One of the great things about holidays with specific foods is that they go on sale as soon as the holiday is over. That’s prime purchasing time for canners. With Halloween over and Thanksgiving rapidly approaching, retailers are desperate to unload their inventory of pumpkins. I even saw a post on line of a grocer that was giving then away to avoid filling their dumpsters.

Canning Pumpkin or Winter Squash
Pumpkins or Squash
Water
I started by placing my pumpkin on its side and then smacking the stem causing it to break off at the base. Using a large knife, and keeping your fingers out of the way, slice the pumpkin in half along the stem.
 Use a spoon and scrape out the seeds and membrane from inside.
 Cut each half in half again.
Pumpkin in a low acid vegetable and can not be water bath processed. It’s not possible. Don’t try it. It has to be processed in a pressure canner. And, you can not purée it like you buy in the store. It has to be cubed. Puréed pumpkin is too dense for the heat of a home canner to penetrate as deep as it needs to. So the bad news is you’ll need to have or buy a pressure canner bathe good news that pressure cookers are awesome and useful in many ways. Since you need a pressure cooker I’m going to include my method of peeling which includes a pressure cooker. There are other ways to do this (peeling, roasting, steaming) but I’m sticking to one method because it was so easy.
Place your grate/rack in the bottom of your pressure cooker. Add water to just barely touch the grate. Start layering your pumpkin quarters in the pot. I was able to fit 4 pie pumpkins (16 quarters) in my Presto 23qt at a time. Put your lid on and lock it. But don’t cap the vent. Turn your heat on high. As soon as steam comes out of the vent put your weight on. Set a timer for 10 minutes. Keep an eye in the pressure, but mine never crossed 12. After ten minutes remove the pot from the heat. (*NEVER DO THIS IF YOU ARE PROCESSING JARS*) Put your canner in the sink and slowly start running water over it. As it starts to cool you can j crease the water. This rapidly cools the pot and makes the pressure drop. Please be familiar with your pressure canner and how it works. Don’t deviate from the manufacturer’s guidelines. After the pressure drop to zero carefully remove the weight. If its done venting entirely, carefully remove the lid. Steam will escape. Be cautious.
Inside you will find perfectly cooked pumpkin.
 I shouldn’t even have to say this, but the pumpkin is hot. Really hot. Really really hot. So use spatulas, tongs, spoons, and or pot holders to remove the segments. When you do, you’ll find that the skin sloughs right off the flesh.
 The flesh should be softened, but firm enough to hold its shape. The first batch I made I let go slightly long because I was nervous. The flesh got a bit over done and was very soft. Again, you don’t want purée, you want cubes. A bit under done is better than a bit over since you’ll be cooking it another 75 minutes shortly.
Using a large knife cut the pumpkin in to approximate 1″ cubes. I used a large knife to avoid having to hold the hot pumpkin with my other hand.
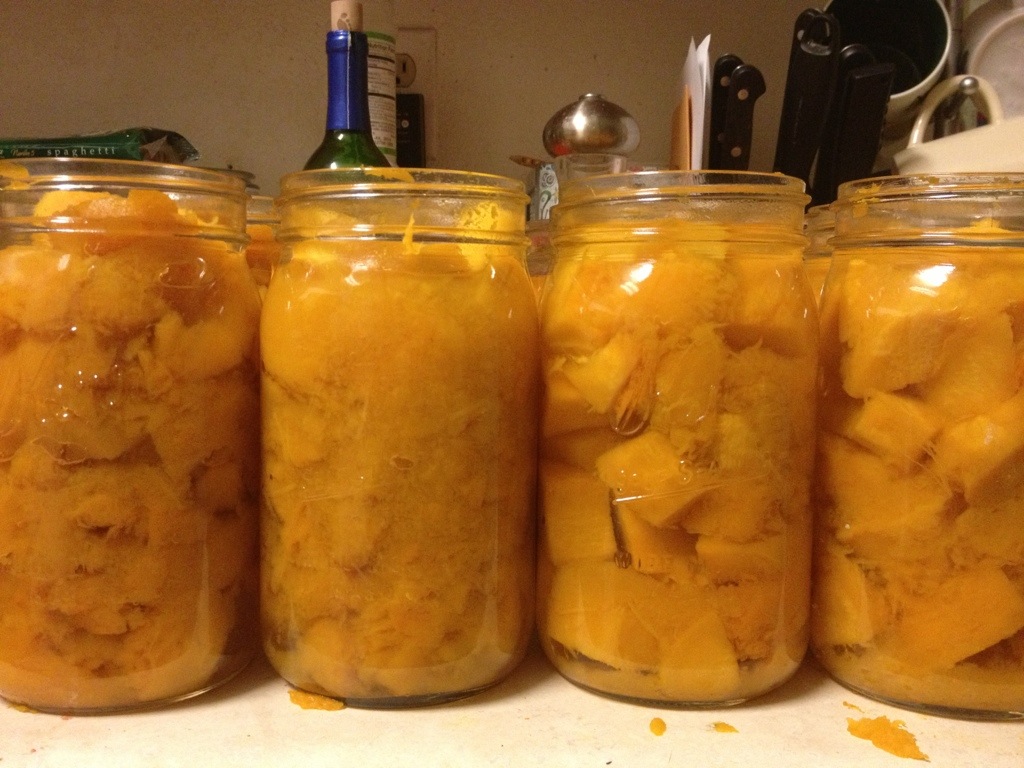
 Use you ladle and funnel and fill your jars to the 1″ headspace. Then top with boiling water. A tea pot is great here, or just a large pot if boiling water.
 You can see which jar had the softer pumpkin and which had the firmer. As long as it doesn’t purée you’re fine. The water will carry the heat between the cubes.
 Clean lids, band, finger tight. Rinse out your pressure canned and add the required amount if water. Usually only a few inches. Add your jars and process according to the guidelines below:
 After the proper time turn off the heat and walk away. Do not move, cool, or attempt to open the canner. Once the pressure drops to zero, remove the weight. Once the inside is ventilated remove the lid. Allow the jars to sit for another 5 minutes or so to acclimate to the cooler temp. This entire process removes the risk of syphoning.
Remove the jars and place on a towel or wood cutting board. I love pressure canned items because they continue to boil well after removal. You can see the bubbles here.
 your finished product will be slightly darker and more on the brown end of the burnt orange spectrum.

 substitute this pumpkin for any fresh or canned pumpkin recipes. I haven’t tried using it in pumpkin bread that calls for greatest fresh pumpkin yet, but I plan to. The first time I used it I found it holds a lot of water. Next time I’ll drain it in a colander before using.
Now you can enjoy pumpkin pie or cookies, bread or purée in March or any other time you feel like it.
Happy canning.

No peeling? Oh wow, if only I’d known about this technique two weeks ago, it would have saved me SO much time. I think I might have to do even MORE pumpkin, just to try this out…
These would make great presents for the Fall and winter!
This is great. A couple of questions, how big of a pumpkin did you use? and can you do this to hubbard, yellow crookneck, and zuchinni squash as well?
Crookneck and Zucchini are summer squash. Per the USDA you should not can them. However, the reason is that results are “inconclusive.” Lots of people do. I’ll leave it at that 😉
These pumpkins were pie pumpkins, slightly smaller than a soccer ball. This process works for any winter squash, like acorn, butternut, etc.
i am so happy to have found your information about canning winter squash. I plan to do a lot of it-my grand daughters love squash soup. I bought a pressure canner which just came today. Do you think you could use this technique for most any winter squash? My local flea market has a farmer who brings the most delicious Buttercup variety. I plan to do some butternut variety too. If I run into any “clearanced” pumpkins, I will do those too. I have a bunch of regular mouth quart jars. Rather than buying any new ones, I am going to use these. I am sure the job won’t be as easy as using wide mouth jars, but as long as I can get them filled, I will use these.
Thank you thank you thank you. I have been looking for an easy way to do this since this is my first time. Now I know I will be able to accomplish the difficult task of peeling my pumpkins!
Glad I could help. Did it work for you?
Hello to all, the contents existing at this web page are truly awesome for people
experience, well, keep up the nice work fellows.
Hello to every , because I am truly eager of reading this weblog’s post
to be updated regularly. It includes nice data.