Plum Chutney

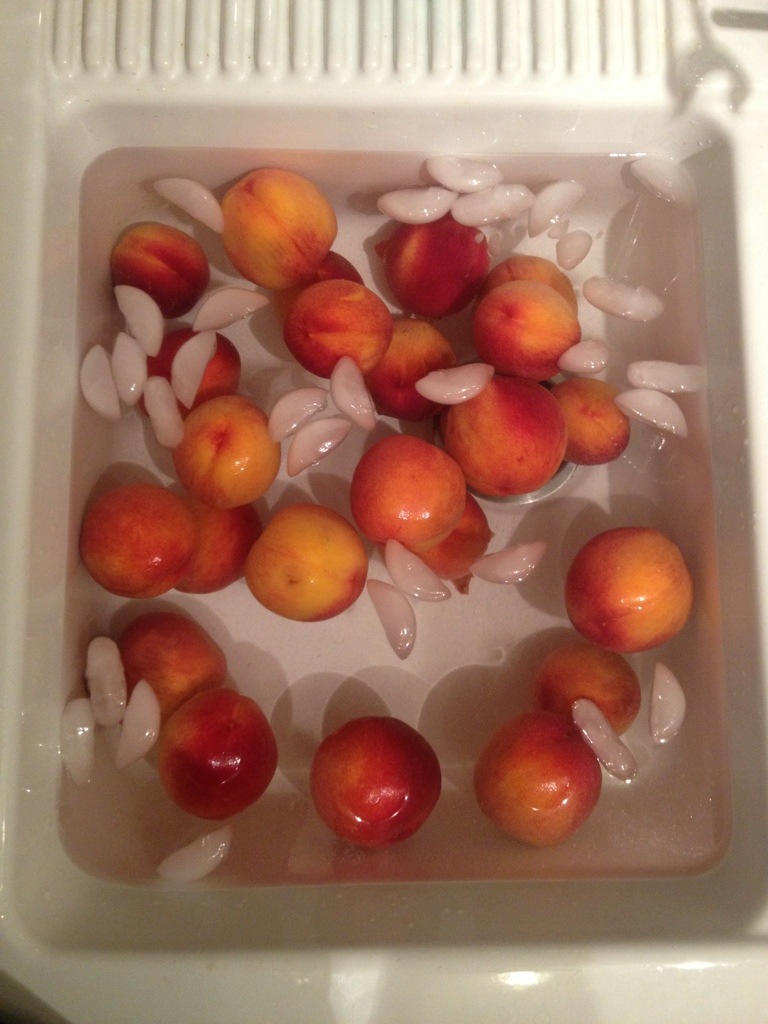
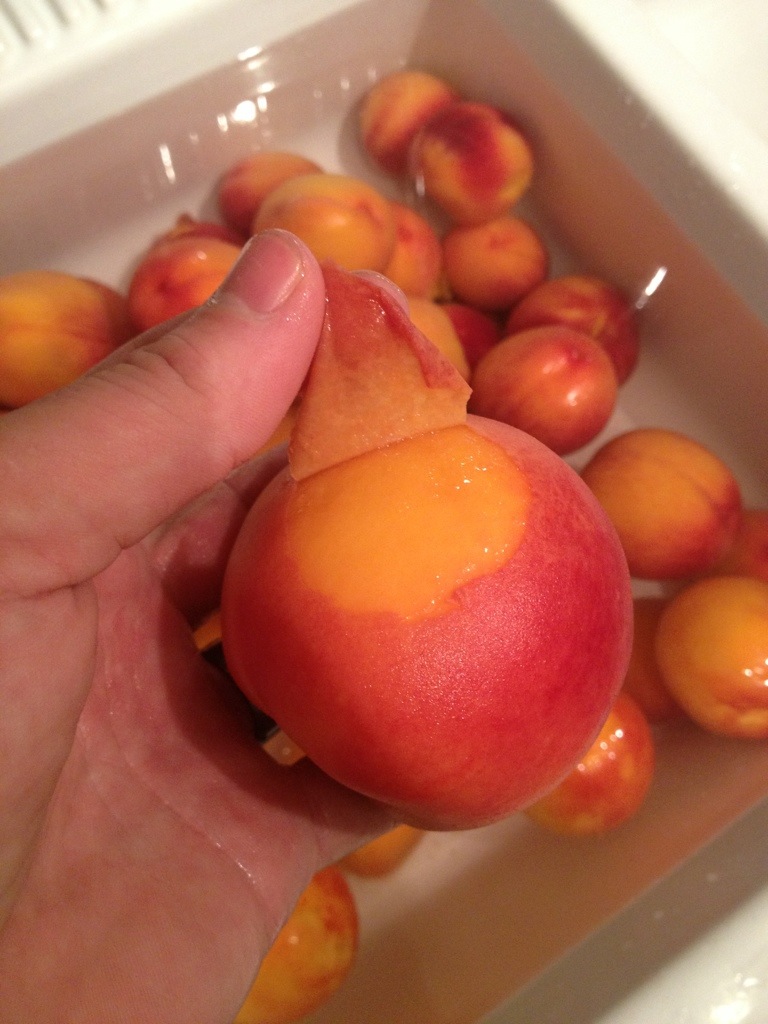
We attended a friend’s ‘picnic’ last weekend in Northern Arizona.  And by picnic I mean 20 hour food fest.  Around a hundred people show up, and everyone brings something to share. I brought my Lemon Basil Pasta Salad, which is always a crowd pleaser.  Someone brought volumes of fresh peaches and plums from their back yard orchard.  At the end of the festivities, there were tons left over, so I grabbed a grocery bag of each.

I decided to try out a Plum Chutney recipe from Put ’em Up! with a few modifications.

Plum Chutney

image

The original recipe called for prunes. I opted for raisins instead.  I also added some dried cranberries. Mainly because I had them and they needed to get used.
2 cups cider vinegar
2 cups sugar
4 pounds plums
2 large sweet onions
1/2 cup raisins
1/2 cup dried cranberries  (optional)
2 T fresh grated ginger
2 T mustard seed
2 t salt
Zest of 1 lemon
2 garlic cloves
1/2 t ground cloves

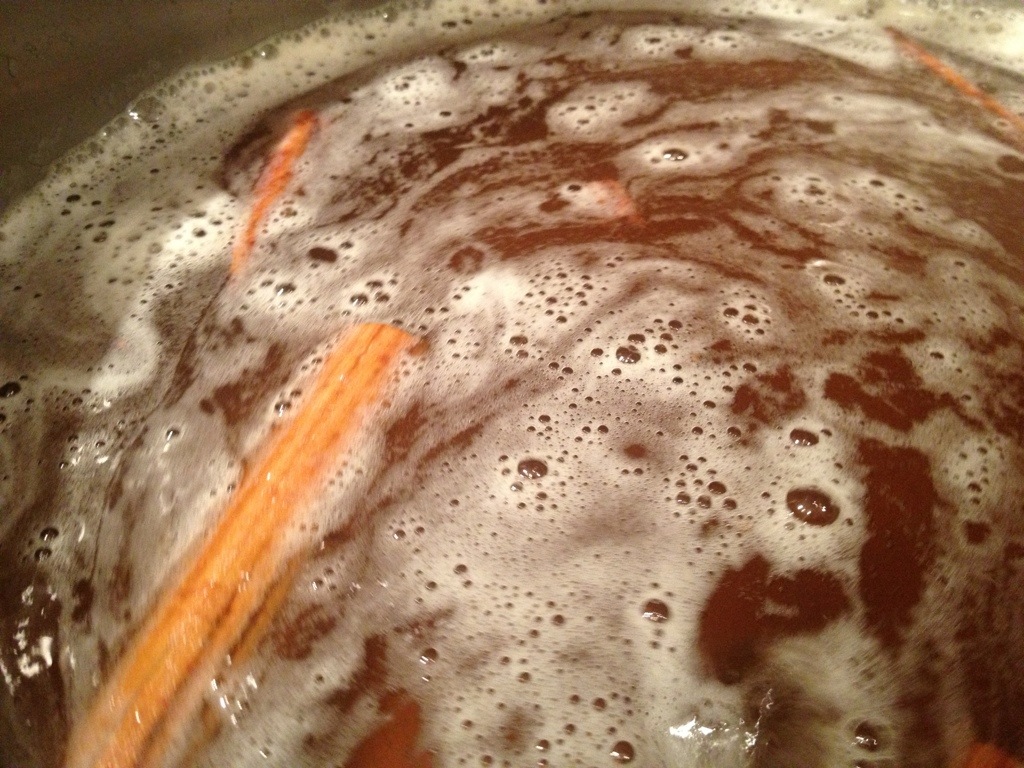
Combine the vinegar and sugar in a non-reactive bowl, and heat to a bowl.

image

Take your plums, and pit and dice them.  Personally, I don’t like cutting the plums in half and then wrestling the pit out with juicy slippery hands holding a knife. So I made more of an assembly line system.

First I cut the plums in half. The half with out the pit got dropped in a bowl. The half with the pit got cut in half again, which made the pit easier to pull out.

image

Then take each half, or quarter and dice it.

image

Peel the ginger root and grate off 2 tablespoons. A small cheese grater works. But a microplane is really the tool of choice here.

image

Cut the rind off your lemon in long strips. Then, using a very sharp knife, hold the blade at a low angle and filet the pith off the back.

image

Stack the pieces of zest, and slice them in to very thin strips.

image

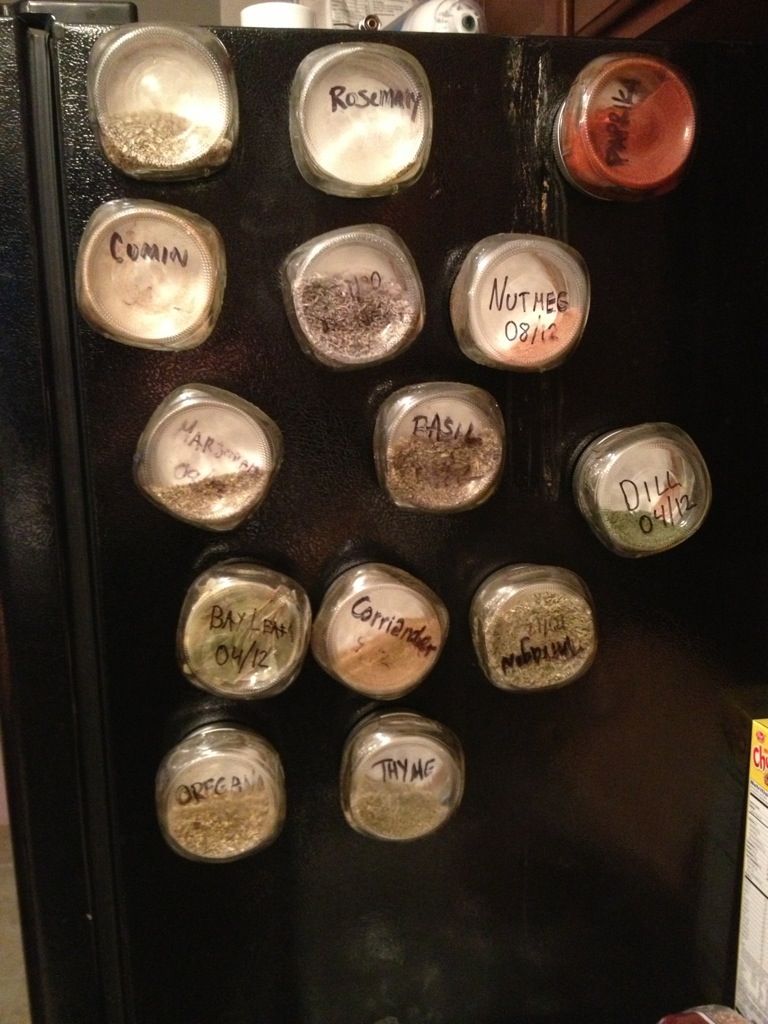
Mince the garlic, chop your onions, and get your spices measured. A note on clove. Clove is one of those spices that quickly becomes overpowering when canning.  Measure accurately and error on the side of too little. I’ve had more than one recipe ruined by too much clove in the jars.

Here’s the mise en place I assembled while the vinegar heated. The spices are in the same container and the garlic is in with the ginger.

image

Add your plums, onion, raisins, cranberries, ginger, mustard seed, salt, zest, garlic, and clove to the pot.  Return the mixture to a boil.  Then reduce the heat and simmer.

image

The original recipe says to simmer for 30 minutes.  I like my chutneys a little thicker and cooked down more. I cooked the Chutney for 20 minutes with a lid on.  Then I continued to simmer for 40 more minutes uncovered to reduce the liquid. 

image

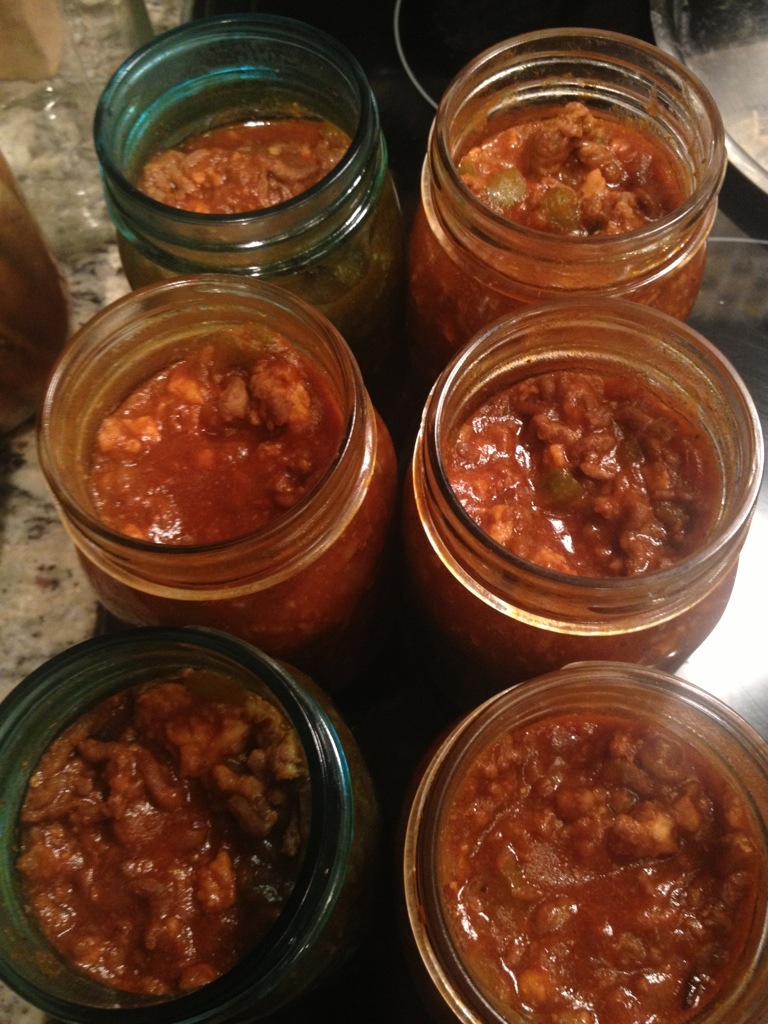
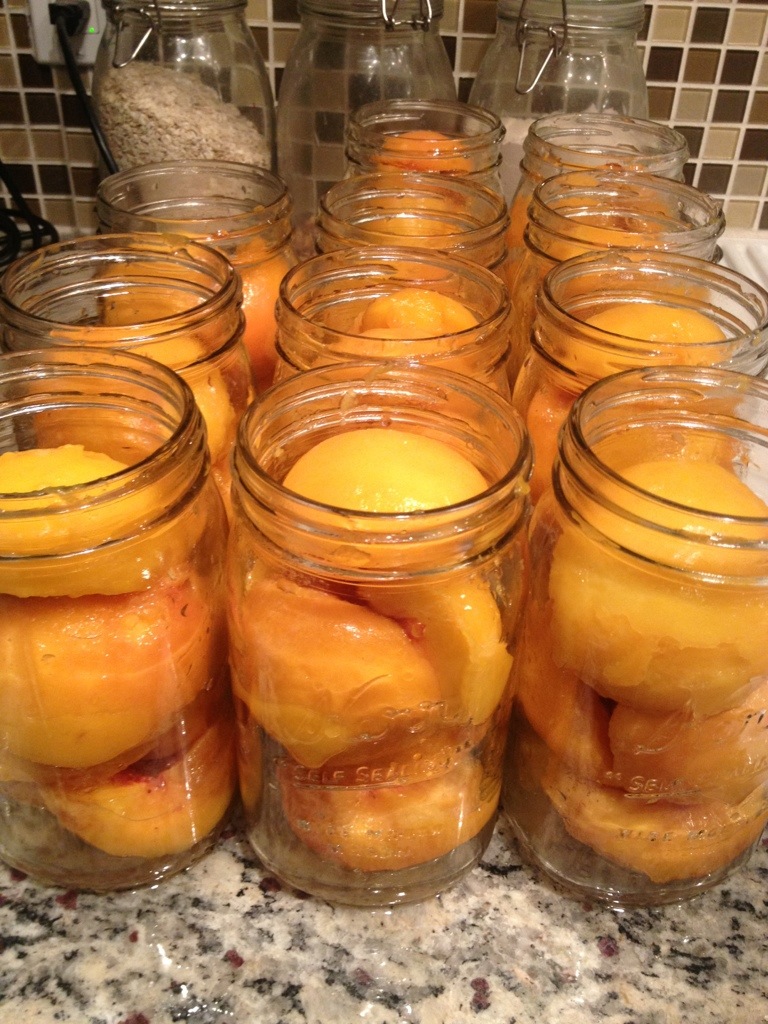
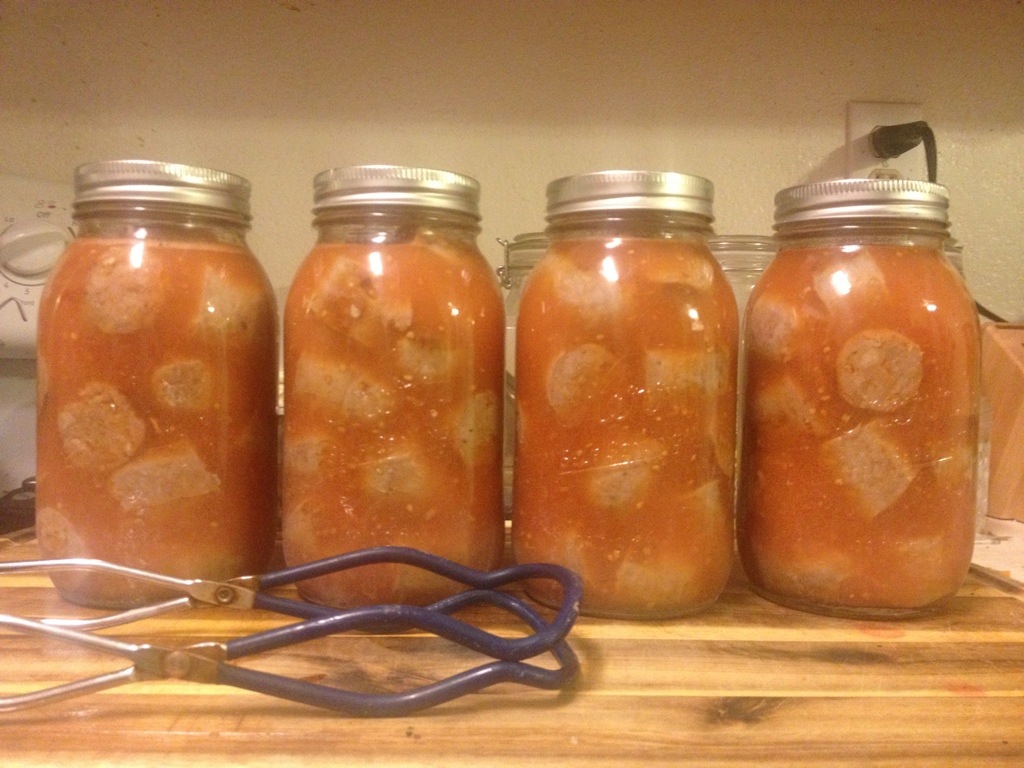
Fill your jars to 1/2″ headspace.

image

Top with a lid and ring, and water bath process for 20 minutes for half pints.

image

This yielded 12 half pints for me, but my onions were pretty big.  I’d expect 8 to 10 half pints on average.

image

I love chutney on pork. Especially a loin roast, sliced in to medallions. Or alongside a roasted turkey breast. But it’s also great with beef cuts, chicken, and duck. Try this recipe out, and let me know how you liked it, if you changed it, or what you had it with.  Happy canning!

1st Time Tiling; Lessons Learned.

My friend Chris came over to show me how to lay tile.  After much deliberation the wife and I decided on a brick pattern with a random offset.  We liked the layout of the double herringbone. But the pattern plus the color variation…well, as the wife said, “It looks like a Calico cat exploded in here.”

To start off we took a handful of tiles and cut them at completely random intervals. Then we set them against the wall. 

image

I really lucked out. 28 tiles fit perfectly from edge to edge. 

Then we went out 3 to 4 tiles, and then down.  Out and down. Out and down.

image

My biggest goal was making sure that I didn’t have two identical tiles next to each other. While there are several similar tiles, I just didn’t want the same ones adjoining. As it came along it was looking pretty good.

image

At one point, order to be more efficient, I worked from the back corner up, while Chris worked from the front corner back.  Unfortunately, in my haste and inexperience, my lines weren’t perfectly square.  What is predictable is preventable. And the preventable happened.  The last space left wasn’t big enough for the piece.

image

At this point I was 9 hours in, ex6hsusted, and frustrated. We ended up cutting a diagonal line from 1/2″ to just under 1″ down the tile.

image

If you know it’s there you see it.  Of you don’t, I’d be surprised if you could pick it out.  Plus, our couch will be over it.  But in the future, I’ll be working from one corner to the other.

At the end of the night, I was feeling pretty good. 

image

The following morning we returned to clean the lines and set the grout. As I walked across the floor I felt a tile move under my foot.  Uh oh.  I tapped it with a screwdriver handle and it was definitely loose. I pulled it up with ease and began scraping up the hardened thinset.  That sucked. I started running the handle of the screwdriver over the tiles and unfortunately we found 4 singles and a group of 7 tiles together.

image

Now, I’m no scientician, but I looked at the thin set underneath. You can clearly see that the thin set only bonded to one tile in one place. My theory is that it was too dry.  It was moist enough to spread and to move under the tile when they were set. But between. The concrete sucking up moisture and the tile sucking up moisture, the thin set didn’t have enough liquid in it to bond to the tile. 

image

Now, I was not about to scrape out 7 tiles worth of that mess. We decided to mix up some very runny thin set and float it on top.  My theory was that that dry thin set is bonded to the concrete. The nrw thin set should bond the tile to the dry stuff, and everything should hold. In addition to that I also put some mud on the bottom of the tile.  Everything was spread super thin so the new tiles would have an elevation difference.

Now, I will say that as much as I like this tile, it is not rectified, and the pieces are not all straight, flat, or the same size. out of 16 cases I found one that rocked because it wasn’t flat and two that had a definite bow or arch (left to right). Plus, when replacing tiles that didn’t set, it was like doing a puzzle to get them to fit again. The pieces were longer or shorter as much as 3 milimeters. Not a huge deal if you’re prepared for it.  But I guess I wasn’t, so that was frustrating.

For the grout we went with non-sanded grout (because we used 1/8th” spacers) in Tobacco Brown. My goal was to have the grout lines disappear into the tile to make it look more like wood. I went back and forth between a light color (Sandstone) and a dark color.  I finally settled on the dark, and hoped for the best.

image

The stuff looked like straight chocolate pudding poop.

If you didn’t know, groutting sucks. Like really really sucks. But eventually we got the room done. It took several hours.

image

After floating the grout you have to clean, and clean, and clean, and clean. A word of caution to those in a committed relationship.  This step can easily cause divorce or murder. Our knees were smoked, legs hurt, arms were exhausted, and we were ready to be done.

image

After wiping, cleaning, and mopping we were finally finished. And man was it worth it!

image

image

image

image

image

And the best part? The tile matches our Shepherd, Leia!

image

So there you have it.  First time laying tile.  Not every tile is perfectly level, one of them had to be shaved down a hair, nearly a dozen needed to be re-set the 2nd day.  But we did it. And for a fraction of the cost.  My instructor got a couple of cases of Shock Top and a few liters of Southern Comfort as payment, which seems like a deal. I gained the confidence to take on more tile projects in the future and a gorgeous new living room floor. 

How was your first time laying tile? Did it work out or did you make mistakes too?

Decisions

So we ripped the carpet, bought the supplies, and readied ourselves.

We ended up painting the living and dining room a nice blue shade by Glidden called Shaded Brook. Though we did buy Behr paint.

image

Even Little Bear got in on the action.

image

The blue next to the submarine gray looks pretty decent. Though we’ll need some yellow decor to brighten up the place.

image

Also, if you don’t dress the part, you aren’t really painting.

image

So we got the paint done.

image

image

It was time to re-tile.  But in what pattern?

Brick with a 33% or random offset?

image

Herringbone Diagonal to the room?

image

Herringbone Square to the room?

image

Double Herringbone Square to the room?

image

Man, these decisions are tough! We laid out tile over and over.  In different corners. In different patterns. It’s such a permanent decision.

Which arrangement do you like best? Comment and tell me your favorite. Tomorrow morning, we make the decision.

Construction time!

This is what happens when you watch too much HGTV. You start to think you can do anything. 

Odessa and I decided that we don’t like the carpet in the living room.  So we did the only logical thing. We ripped it out to commit ourselves to having to tile. 

We kind of decided to do all this last minute. So we forgot to take intentional before pics. Forgive the amount of dogs and kids.  I had to go back to find pix of what the place looked like. 

The living room shortly after moving in.

image

The dining room.

image

Another view.

image

The carpet was chocolate brown, the paint is submarine gray, and the baseboards are the cheapest the previous owner could find.  Those are all about to change.

The new wall color.

image

The new tile is Marazzi Montagna line, Vintage Chic.

image

It’s a wood look tile that has the appearance of being old reclaimed Barnwood with weathering and flecks of old paint. 

So, we ripped the carpet out and cleaned the floor.

image

And I took the baseboards off.

image

The living room now looks like this.

image

All of our furniture is piled in to ‘the room without a purpose.’ Hopefully that room figures out what it is when we’re done.
image

And after a few trips to Home Depot we have everything set and ready to go.

image

If this goes well, the next step is built in shelves in the living room, wainscoting and new lighting in the laundry room, new baseboards and trim throughout, and eventually new cabinets in the kitchen.

So join us for the ride! Laugh at our follies. Give us advice or pointers. Or use us as a bad example. If you work for HGTV, give us a show! We are doing all the work ourselves. Should be a fun time. 

Feel free to comment with your own DIY experiences. Here goes nothing…

Finally, my time to Shine

Everyone loves mason jars. Everyone. And they’re popping up all over the place. Now, seeing as how I’m one of the biggest mason jar fans in the country, people send me stuff about jars when they see it. Something I’ve been sent a lot is “Moonshine” in mason jars. Apple pie, blackberry, cherry, etc. Now we all know that they aren’t actually moonshine, as they are lawfully produced and sold in the US, under the watchful eye of the ATF. But…I bet they are tasty.

So that brings us to this idea. I started looking and asking around for recipe ideas. Most of what I saw said 1 gallon of apple juice, one gallon of cider, various aromatics, and a bottle of Everclear. Now, if you take 256 ounces of non alcohol, and add 25 ounces of alcohol, you end up with a product that is 9.7% alcohol by volume (19 proof). I’m pretty sure they make Porters stronger than that. That wouldn’t do.

See, I’m leaving shortly on a 12 day Mule Deer hunt in a forest that is dropping well below freezing every night. I need something that will keep me warm. Either by consumption or ignition. It’s moonshine for god’s sake. Not a White Zinfandel. It should burn the hair off the chest of those who have hair, and grow hair on the chest of those who have none. So I decided I’d create my own.

20131026-021628.jpgGraham’s Apple Pie Moonshine

1 – 750ml bottle of Everclear 190 proof Grain Alcohol
1 pint Apple Juice
1 pint Apple Cider
1/4 C Brown Sugar
2 Cinnamon Sticks
2 Nutmeg…uh, Nuts?
1/2 Apple (variety your choice)

Toss the brown sugar, cinnamon sticks, and nutmegs (still super confused at to what to call these) in a pot.

20131026-022044.jpg
Measure out two cups (1 pint) of the juice and cider. Who needs measuring cups, right?

20131026-022126.jpg
Add the liquids to the pot and stir to dissolve the sugar. Heat. Bring the mixture to a boil. Reduce the heat, cover, and simmer for 20 minutes.

20131026-022236.jpg
Now, why didn’t we add the Everclear? Two reasons. 1st off it evaporates at like 188 degrees. If you boiled the cider and Everclear for 20 minutes you’d be left with a hard cider, not moonshine. The 2nd is that Everclear is no joke. This stuff is basically pure alcohol at 190 proof.

20131026-022542.jpgIf you have a gas stove and you off vapor enough Everclear you could start a fire. So keep the booze on the counter and the cider in the stove.

After 20 minutes turn off the heat. Using a canning funnel and ladle. (Seriously, you could put the stuff in anything. From a decorative bottle to a Tupperware container. But I love mason jars, so it’s going in a mason jar.) Catch one cinnamon stick and one nutmeg and drop them in one quart sized jar. Grab the others and drop them in the 2nd jar. Then try to get one pint of cider mixture in each jar. Eye balling is ok. Remember to set your mason jars on a towel or wooden cutting board. Cold countertops, especially Granite ones, can cause the jars to shatter once hot liquid is added to the cold jars.

20131026-023122.jpgLet the mixture cool at least 20 more minutes. The longer the better. Then add the bottle of Everclear, divided between the two quarts. Slice your apple in to….slices. (Don’t like the sound of that sentence.) Drop 2-4 slices in each jar. I used Honeycrisp, because they are the undisputed champions of apples. But you could use Gala, Golden Delicious, Granny Smith, whatever.

20131026-023658.jpgSo before you put that lid on, lets talk some science real quick. Let’s just say you decided not to let the cider cool. You just added the Everclear into the hot jar of cider. Then you toss your lid on, secured down with a ring, and walk away. What’s going to happen? As we discussed earlier Everclear evaporates at a relatively low temperature. Which means that alcohol is turning into vapor and that vapor is beginning to take up space. What happens when there is more vapor than space? Big Badda Boom. Now I’m not saying that your jar is going to explode. But I’m also not not saying that. However it’s very likely that the weak aluminum lid comes flying off the top with great force.

So if you don’t have the time to wait for whatever reason do the following. Fill your sink with the hottest water that your faucet will muster. Lower your jars into the sink. Start turning the faucet from hot to warm as you let some water drain out of the sink. Then turn your faucet from warm to cool, and then cool to cold as you continue to let the water slowly drain from the sink. Do this until your jars are cool. The transition has to be slow or your jars will shatter. Ok, back to the fun.

I like to mark my jars so the kids don’t think it’s a treat they can snack on.

20131026-024350.jpg Let’s do the math on this shine real quick. 2 pints of juice and cider is 32 ounces. 750 mL of Everclear are 25 ounces. Added together that’s 57 ounces. If 25 of those ounces are alcohol what proof is this? 43.86% or 88 Proof. Now THAT’s a lot closer to real shine.

This stuff only gets better with time. And no need to worry about processing. No bacteria can grow in this high of an alcohol content. In future batches I’m thinking about withholding 1/2 cup of apple juice and adding 1/2 cup of Fireball Whisky instead for an additional cinnamon kick.

I plan on using this to Irish up my hot apple cider around the campfire, as well as keeping a flask on me for those dusk and dawn hunting hikes up north.

If you have a shine recipe feel free to share or link it in the comments.

Happy canning!

Meals In A Jar; Sloppy Joes

I have a 12 day Mule Deer hunt coming up next week. In preparation, I was trying to come up with self contained meals in mason jars, to save on my finite cooler space.

One of the first things I thought of was Sloppy Joes. But instead of just the sauce, like a can of Manwich, I wanted the meat in the recipe too.

I did some searching around and found a base recipe to work off of. I was originally given the recipe by a member of a canning group I belong to. But I also found the same recipe a couple of places online. So I’m not sure who get’s credit. Either way, I modified it slightly.

Ready To Go Sloppy Joes

2lbs Ground Beef
1 C Chopped Onion
3/4 C Chopped Green Bell Pepper
1 1/2 C Catsup/Ketchup (Use Heinz or Hunt, or make sure your brand has no thickeners added)
2 T Brown Sugar
2 T Apple Cider Vinegar
3 T Heinz Chili Sauce
3 t Worcestershire Sauce
2 t Yellow Mustard
1/4 C Water

Yield 3 Pints

20131025-023258.jpg
For complete transparency, know that I doubled my recipe, and also used 3lbs of beef and 1lb of chicken.

Start by adding your beef, onion, and green pepper to a hot skillet. If you chose to use chicken, add some olive oil to the pan first. If you double your recipe, this is easier to do in two batches

20131025-023620.jpg
Brown the ground beef and cook the onions to translucence. Depending on the fat content of your beef you may need to drain the fat off. Mine was lean enough that it didn’t need it.

20131025-023643.jpg
I prepped by putting my ketchup/catsup (that’s a whole different debate), Worcestershire Sauce, Chili Sauce, and Mustard in one bowl, and my brown sugar, cider and water in another. Stirring to dissolve the sugar.
When the beef and veggies are done, add the remaining ingredients and stir to combine.

20131025-023951.jpg
Bring everything to a boil, reduce to a simmer, cover, and cook for 20 minutes. After 20 minutes I took the lid off and found that it was a bit runnier than I’d like. I kept the lid off and stirred it until it reduced to a consistency I wanted. Fill your clean mason jars to a 1″ headspace.

20131025-024158.jpg
Top with your heated lids and finger tightened rings. Process at 11lbs for 75 minutes for pint, and 90 minutes for quarts. Remember, you can’t fit much more than a half a cup of meat onto one hamburger bun. That’s four servings per pint and eight servings per quart.

20131025-024342.jpg
I haven’t cracked these open yet, as my hunting trip is next week. I’ll definitely come back and update the bottom of this post with a review. But my eight-year-old son and I ate the little bit of leftovers that wouldn’t fill a seventh jar and so far we are both very happy with it. He has requested that I make them from scratch for dinner. Which really isn’t a bad idea since it too less than 30 min to make.

20131025-024459.jpg
The flavor was very comparable to a can of Manwitch sauce. Maybe a touch sweeter. Next time I will add less sugar and try to spice it up just a little bit more, maybe with some hot sauce. But we’ll see what it tastes like out of the jar.

20131025-024603.jpg
If you have ideas for self-contained meals that can be opened from a jar, heated, and served please share or link them in the comments.

Happy canning!

Brandied Peaches and Fireball Whisky Peaches

I was offered to go in halfsies on a case of 40lbs of peaches. I didn’t really have time for 20lbs of peaches. But I’m a sucker for a deal. Plus, I was told these were really good peaches. So I agreed.

When they came in I was in the middle of my work week. During my work week all I do is work. So they had to wait. On Saturday my friend told me he fit them in his fridge since they were getting very ripe. I picked them up Saturday night, and put them in my fridge.

Sunday I got up, pulled them out and stared at them. Stared and stared. I broke out my Ball Blue Book, The Joy of Pickling, and Put ‘Em Up. I read recipes and browsed websites. What should I do with the peaches?

I’d seen other’s talking about brandied peaches before. I checked my liquor cabinet and pantry and found that I had everything I needed. And compared to jams, chutneys, barbecue sauces, etc, brandied peaches seemed a bit more quick and easy to get done.

This recipe is adapted from the book Put ‘Em Up.

Brandied Peaches
10lbs of Peaches
5 c Water
2 c Brandy
1 1/4 c Sugar
1/2 c Honey
2 Cinnamon Sticks
8 Cloves

Get a pot of water to a rolling boil. Fill another pot, large bowl, or sink with ice water. I prefer to vigorously scrub out my sink, and then use that. Add some Fruit Fresh or crushed Vitamin C tablets in to the water to prevent browning.

Put a few peaches at a time in the boiling water. The less ripe your peaches are, the longer they need to blanch. My peaches only took a minute. Don’t overfill your pot either. The peaches will cool the water down, and likely you’ll overcook the ones on the bottom.

20130923-200109.jpg
Pull the peaches out with a slotted spoon or a pair of tongues and move them to the ice water. For a small batch like 10lbs, blanch and cool the whole batch. If you’re processing hundreds of pounds (you should have a helper) work in batches.

20130923-200701.jpg
When you pull the peaches out the skins should slough right off. I find that the skins kinda get hung up on the very bottom point of the peach. I use the palm of my hand to rub the peach and break the skin off. Then I peel it off. Toss the peeled peaches back in the water.

20130923-201305.jpg
In a non-reactive pot combine 5 cups of water, 2 cups of Brandy, 1 1/4 cup sugar, 1/2 cup honey, cinnamon sticks, and 8 cloves. Heat to dissolve the sugar and honey. I was hoping to burn off some of the alcohol so I boiled it for a minute.

20130923-201742.jpg
Take out one peach at a time and cut in half lengthwise. Do this carefully. Once peeled, those little buggers are slippery. I used a cheap serrated steak knife that was sharp enough to cut the peaches, but not sharp enough to go through my hand.

Freestone vs Clingstone

Peaches come in two varieties; Freestone and Clingstone. The difference is whether the flesh of the fruit attaches itself to the pit, or not. Before I started canning I never paid much attention or even cared what variety my peaches were. But let me tell you, trying to cut and pit Clingstone peaches is a huge pain in the butt. You have to cut the pit out, or rip it (and the surrounding flesh) out of the fruit. What you are left with are not the perfect peach slices you expect, but a smattering a peach chunks. Generally I find that farmers markets, produce specialty stores, and produce managers know whether peaches are freestone or not. The easiest was to check is to cut the peach in half and try to take the pit out. Don’t be afraid to ask before committing to buying them.

The peaches I got were some of the best freestones I’ve ever had. I twisted several of them open to have the pit fall out with no effort at all. Put the peach halves back in the water.

Start packing your peach halves in clean jars. Not gonna lie. These guys did not pack well. I fit about 6 halves in each quart. If you chose to go with quarters or eighths you might have better luck. But I wanted the halves.

20130923-205407.jpg
Fill each jar with the brine to 3/4″ headspace. Try to keep the cloves and cinnamon out. Put a lid and ring on each jar and then swirl it around to release the pockets of air between the peaches. Some of my jars went down quite a bit.

20130923-205609.jpg
Top off with syrup to bring it back to the proper headspace.

Fireball Whisky Peaches variation

Now, the book had the proportions listed above. And the brine filled 6 quarts. But I had 20lbs and 11 quarts. Imperial to metric conversion messes with me sometimes. You buy a 750ml bottle of brandy, you feel like that’s quite a bit. You don’t realize it’s only 3 cups until you’re halfway through a double batch of brandied peaches and out of brandy. See where I’m going with this?

So for the second half I walked to my liquor cabinet and stared. What could I use? Brandy, Marsala, Rum, Scotch, Amaretto, Fireball Wisky, Vermo….. Wait a minute. Cinnamon Whisky? With peaches? That sounds….really good!! I grabbed the bottle and returned to the kitchen. For a Fireball variation omit one cup of brandy and add 1 cup of Fireball brand Cinnamon Whisky.

20130923-210513.jpg
Wipe the rims of the jars, put on lids and rings, and water bath process for 30 minutes.

20130923-210637.jpg
I wasn’t given any clear direction on this. But I’m guessing much like a pickle, these bad boys should sit for 21 days before opening. So that’s what I’m going to do.

I’m excited for them to be done though. I have thoughts of Warm Fireball Peaches on Vanilla Ice Cream, Brandied Peaches with a Pork Roast, or maybe a Peach Cobbler or Crumble made of a combination of the two. I’ll update the page when I break the seal on one.

20130923-210954.jpg

20130923-211008.jpg

20130923-211017.jpg
Let me know what your favorite canned peach variation is.

Happy Canning.

Buhsketty Sauce; Or How To Get Your Kids To Eat A Weeks Worth Of Vegetables

Canning stuff is all fine and good. But what are you supposed to do with it? I’m trying to post more recipes that use home canned items to give you a better idea of options that are out there.

When we canned 200lbs of tomatoes last year we considered making pasta sauce. But, not knowing what we’d use or in what quantity, we decided to stick with stewed tomatoes that could be made in to Italian sauce or a variety of other things.

Over the last 9 months I’ve tried a variety if techniques and recipes. This is my favorite recipe for pasta sauce.

Pasta Sauce
2 quarts canned tomatoes
Olive Oil
Onion
Garlic
Vegetables Of Your Choice
Red Wine
Balsamic Vinegar
Oregano
Basil
Thyme

20130910-010415.jpg

I always start this recipe by raiding the fridge and pulling out all the vegetables that have been forgotten over the last two weeks. Bell peppers, sweet peppers, that little 1/4 of a head of cauliflower that’s starting to get rubbery, the one crook neck squash, and that pack of mushrooms you found on clearance. Pretty much anything you find is good. I always have, and always use, carrots. They add the perfect sweetness to the sauce.

This time I happened to find some panchetta that needed using up. You could also add bacon, Italian sausage, or fat back if you have that. If you don’t just add more olive oil to the pan instead.

Start by rendering out the fat of whatever meat you’re using.

20130910-010525.jpg

Chop the onion and garlic, and slice the carrot into thin rounds. Add them to the hot pan and cook until the onions are translucent and the carrots are slightly browned and softened.

20130910-010724.jpg
For this recipe I used pickled garlic that I made previously. Pickled garlic is great. It makes garlic last 6 times as long, preserves all the garlic flavor, but takes that acrid bite out of the cloves.

20130910-010935.jpg
Add the the vegetables in order of hardness. For instance, cauliflower, then zucchini, then peppers so everything cooks to the same consistency.

20130910-011122.jpg
Take your tomatoes and drain the clear liquid off of them. I’ve found that tomatoes really hold the liquid trapped in the jar so I move them around with a fork to release it all. If you canned them in a regular mouth jar screw a blender base on the top. If you use widemouth jars an immersion blender will fit right in the top.

20130910-012743.jpg
Blend until the tomatoes are pureed.

20130910-012944.jpg
Add the tomato sauce to the pan and bring to a boil. This time around I decided to add a jar of hot Italian sausages that I canned a couple of posts ago.

20130910-013223.jpg
Since they are already in tomato sauce I just added them right in.

20130910-013428.jpg
Add a healthy pinch of oregano, basil and thyme; 2 tablespoons to 1/2 cup of any red wine; and 2 tablespoons to 1/4 cup of balsamic vinegar. I like my sauce on the more acidic side, and feel that balsamic adds some good depth to it overall, so I’m more heavy handed with it. Let the sauce simmer and reduce for a while.

While we are waiting let’s talk about spices. Have you seen Ball’s little shorty half pints? I glued some hobby magnets to their lids and use em as spice jars on my fridge.

20130910-014519.jpg

20130910-014613.jpg
Ok, back to the sauce. The basic idea is to sauté the vegetables, puree the tomatoes, added herbs and acidity, and then simmer until it teaches the consistency you like. I prefer mine a little on the thicker side, so I let it reduce for a while.

20130910-014948.jpg

20130910-014959.jpg
I like this recipe because it cleans out my veggie drawer. Ill add portabellos one week and sweet mini peppers the next. Ive also added kale or spinach to the mix. But my favorite part is that my kids gobble it all up. All of it. They love spaghetti. They love the sauce. And they don’t even care what’s in it.

If you have a pasta sauce that uses home canned ingredients, please share it.

Happy canning!

Come meet the girls

This will be a very brief post. But it covers some things. First, we moved!! We finally bought a house. Which means our homesteading dreams are coming true.

We bought a modest house on 9600 sq ft, with a huge front porch in a no HOA neighborhood. The front yard will (hopefully) soon be a garden and or hard.

But currently the most exciting thing is…we got chickens!! I bought a coop and supplies off Craigslist. 4 days later a friend (who also moved) offered me his bigger coop and existing flock, which I gladly took in.

The coop we bought is a 4x6x4.

20130910-001331.jpg

The coop we ended up inheriting is 4x8x8.

20130910-001500.jpg

We adopted two Leghorns and a Rhode Island Red. Then I bought a Black Star and a Columbian Wyandotte.

20130910-001616.jpg
Since the. We have added a 2nd Black Star and 2 Ameraucanas.

All the girls seem to be adapting okay. They are cooped at night but free ranged in the yard during the day.

20130910-001933.jpg
Look for more poultry related posts as our flock grows in weight and in numbers, as eggs get laid, and as I learn what the heck Ive gotten myself in to.

20130910-002240.jpg

Hot Italian Sausage In Tomato Sauce

Update: This recipe won a 1st place Blue Ribbon at the 2013 Arizona State Fair in the Canning Meat category.

Italian Sausage in Tomato Juice

20130716-184452.jpg

I’m trying to delve deeper in to the world of canning. To try more meats. And specifically, to can more things that are closer to ready to eat.

We were at the grocery store looking for pork to smoke (a whole different post) when I saw packages of hot Italian sausages on clearance for half price. In the past I would have frozen them. But I figure, why not put em in a jar?

The National Center For Home Preservation says to brown sausage and then process it in water, stock or tomato juice. My thought process was this: water would be a waste. Why remove all that flavor into water that would likely be drained out anyway. Stock sounded ok. But all I had was previously home canned smoked chicken stock. And that didn’t sound that great. So that left me with tomato juice, which I didn’t have. But what I did have was previously home canned tomatoes.

I figure hot italian sausage is destined to be in pasta sauce at some point in the future. So why not process it in tomatoes now? I grabbed a wide mouth quart of canned tomatoes off the shelf. The immersion blender fits right in the top, and in no time it was a quart of tomato puree. I put that in a pot with a pint of water to make my tomato juice.

I placed the sausages in a pan and browned them on both sides.

20130716-174651.jpg
Once they were brown I cut each sausage in to 5 pieces.

20130716-174805.jpg
Place the pieces in a quart jar. This took a little bit if engineering. But luckily years of playing Tetris paid off. Just make sure you’re filling voids in the jars where you see them. In total I cooked 6 pounds of sausages that ended up filling 4 quarts.

Heat the tomato juice to a boil and cover the sausage pieces with the juice. Leave a 1″ headspace.

20130716-175403.jpg
Use a plastic utensil to remove any air pockets or bubbles. Why plastic, you ask? Because metal can cause micro scratches and fissures in the glass. This can be the catalyst for thermal fractures in the future.

Top with lids and bands and place in a pressure canner at 11lbs for 75 min for pints or 90 min for quarts.

20130716-183309.jpg
Use this chart to adjust for altitude.

20130716-184022.jpg
Always turn off the heat and allow the pressure canner to cool by itself when the time is up.

The finished product looks like this. Not too bad. Sometimes canned meat looks like a lab specimen. This looks more like Spaghettios.

20130716-184327.jpg
I’m huge on making my own pasta sauce right now. Generally it’s 2 quarts of tomatoes, onion, garlic, carrots, zucchini, squash, peppers, wine, balsamic, and spices. In theory a jar of sausages can be added, without taking the time to defrost and brown the sausages, cook them through, and letting them simmer in the sauce. The flavor’s already in there.

Happy canning.


Enter your email address to follow this blog and receive notifications of new posts by email.

Join 368 other subscribers