Archive for the 'Uncategorized' Category

Plum Chutney

We attended a friend’s ‘picnic’ last weekend in Northern Arizona.  And by picnic I mean 20 hour food fest.  Around a hundred people show up, and everyone brings something to share. I brought my Lemon Basil Pasta Salad, which is always a crowd pleaser.  Someone brought volumes of fresh peaches and plums from their back yard orchard.  At the end of the festivities, there were tons left over, so I grabbed a grocery bag of each.

I decided to try out a Plum Chutney recipe from Put ’em Up! with a few modifications.

Plum Chutney

image

The original recipe called for prunes. I opted for raisins instead.  I also added some dried cranberries. Mainly because I had them and they needed to get used.
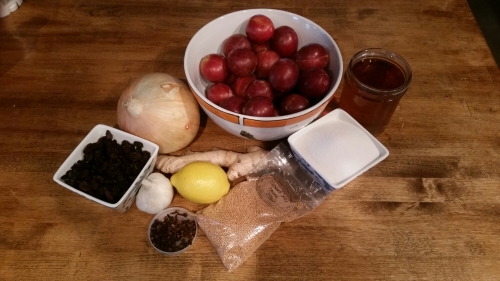
2 cups cider vinegar
2 cups sugar
4 pounds plums
2 large sweet onions
1/2 cup raisins
1/2 cup dried cranberries  (optional)
2 T fresh grated ginger
2 T mustard seed
2 t salt
Zest of 1 lemon
2 garlic cloves
1/2 t ground cloves

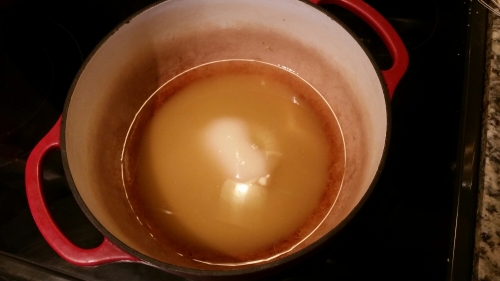
Combine the vinegar and sugar in a non-reactive bowl, and heat to a bowl.

image

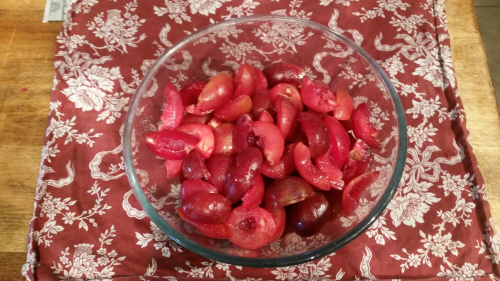
Take your plums, and pit and dice them.  Personally, I don’t like cutting the plums in half and then wrestling the pit out with juicy slippery hands holding a knife. So I made more of an assembly line system.

First I cut the plums in half. The half with out the pit got dropped in a bowl. The half with the pit got cut in half again, which made the pit easier to pull out.

image

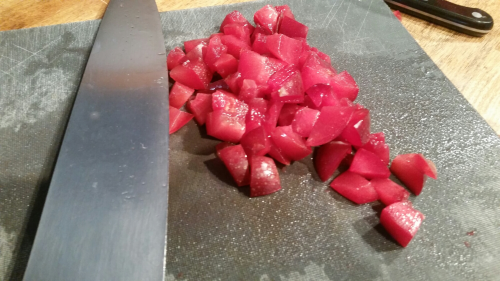
Then take each half, or quarter and dice it.

image

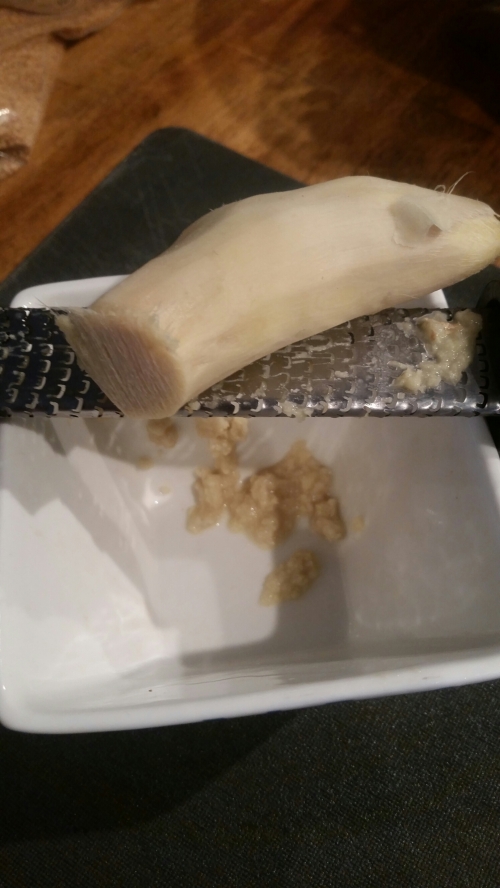
Peel the ginger root and grate off 2 tablespoons. A small cheese grater works. But a microplane is really the tool of choice here.

image

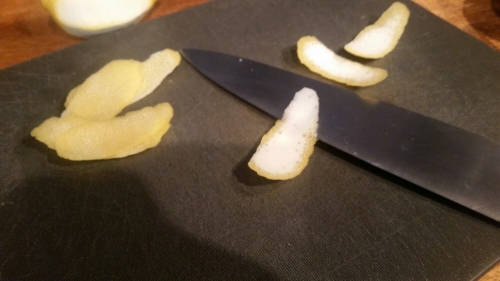
Cut the rind off your lemon in long strips. Then, using a very sharp knife, hold the blade at a low angle and filet the pith off the back.

image

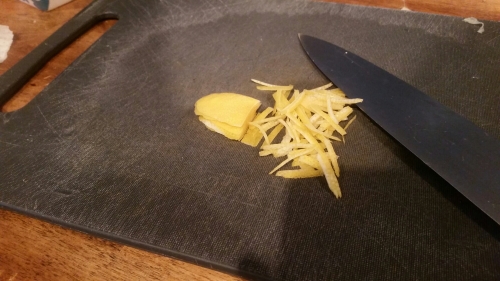
Stack the pieces of zest, and slice them in to very thin strips.

image

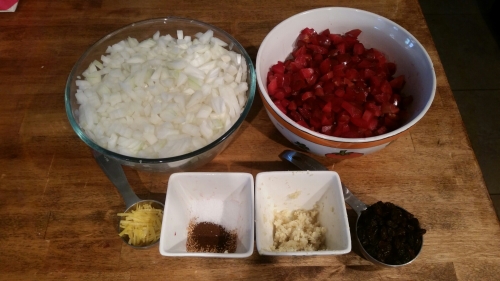
Mince the garlic, chop your onions, and get your spices measured. A note on clove. Clove is one of those spices that quickly becomes overpowering when canning.  Measure accurately and error on the side of too little. I’ve had more than one recipe ruined by too much clove in the jars.

Here’s the mise en place I assembled while the vinegar heated. The spices are in the same container and the garlic is in with the ginger.

image

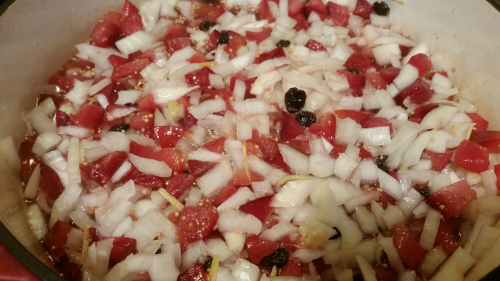
Add your plums, onion, raisins, cranberries, ginger, mustard seed, salt, zest, garlic, and clove to the pot.  Return the mixture to a boil.  Then reduce the heat and simmer.

image

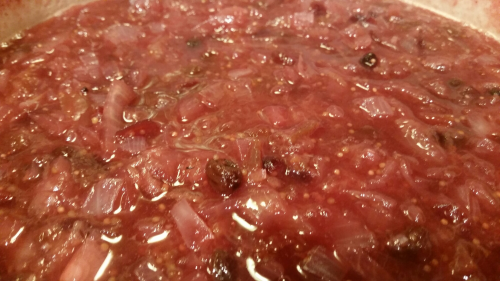
The original recipe says to simmer for 30 minutes.  I like my chutneys a little thicker and cooked down more. I cooked the Chutney for 20 minutes with a lid on.  Then I continued to simmer for 40 more minutes uncovered to reduce the liquid. 

image

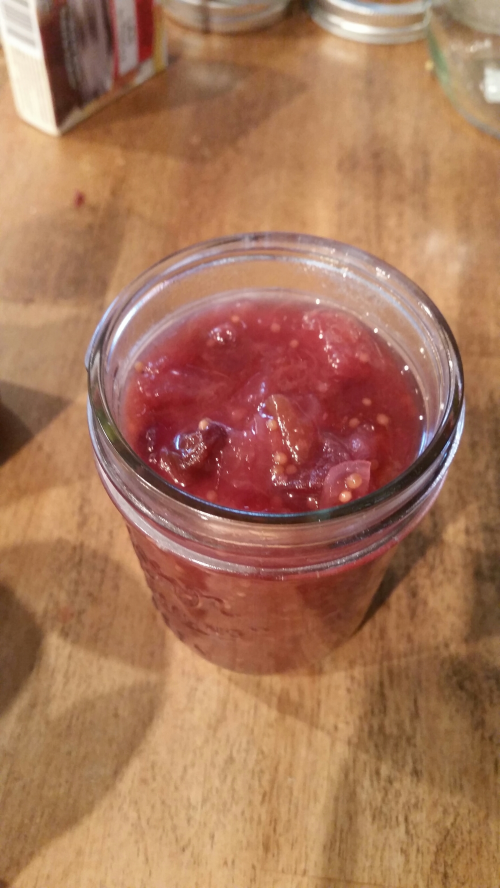
Fill your jars to 1/2″ headspace.

image

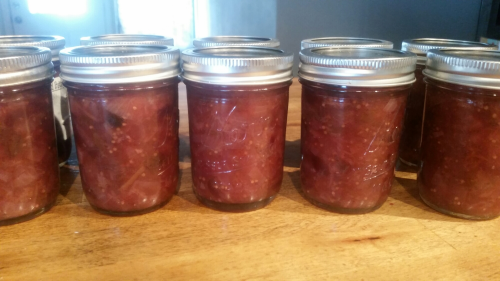
Top with a lid and ring, and water bath process for 20 minutes for half pints.

image

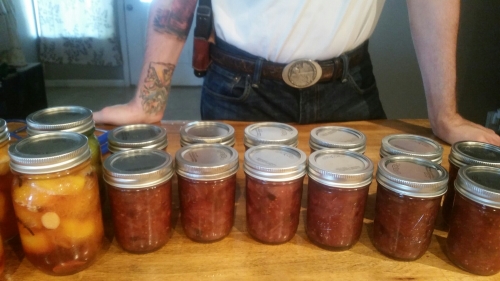
This yielded 12 half pints for me, but my onions were pretty big.  I’d expect 8 to 10 half pints on average.

image

I love chutney on pork. Especially a loin roast, sliced in to medallions. Or alongside a roasted turkey breast. But it’s also great with beef cuts, chicken, and duck. Try this recipe out, and let me know how you liked it, if you changed it, or what you had it with.  Happy canning!

1st Time Tiling; Lessons Learned.

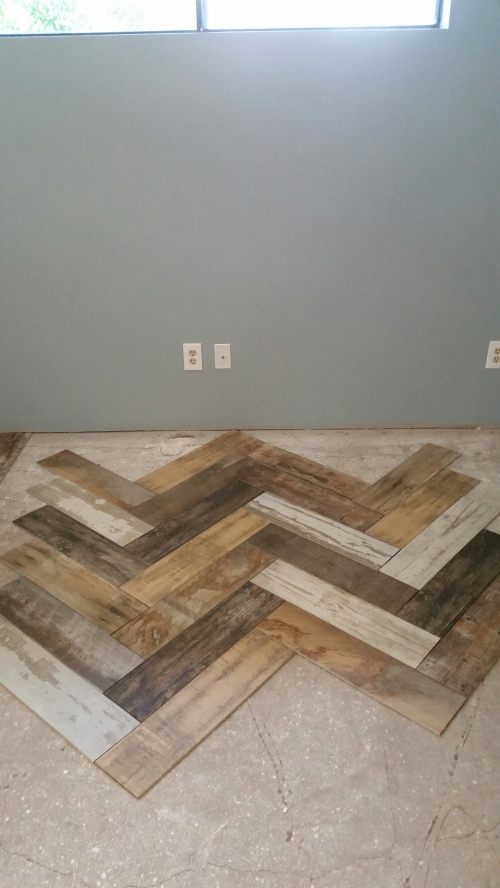
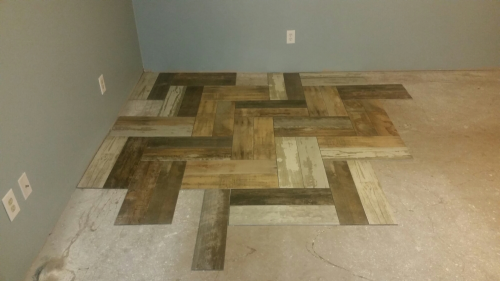
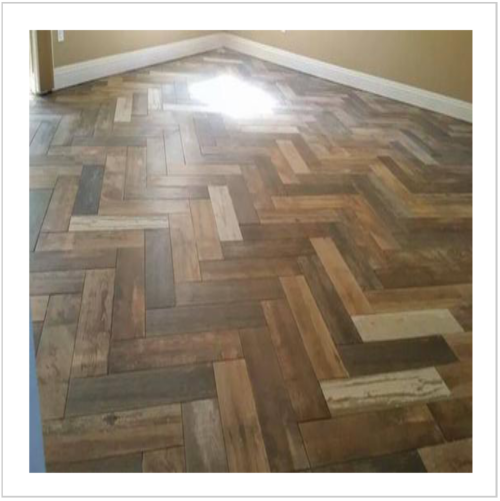
My friend Chris came over to show me how to lay tile.  After much deliberation the wife and I decided on a brick pattern with a random offset.  We liked the layout of the double herringbone. But the pattern plus the color variation…well, as the wife said, “It looks like a Calico cat exploded in here.”

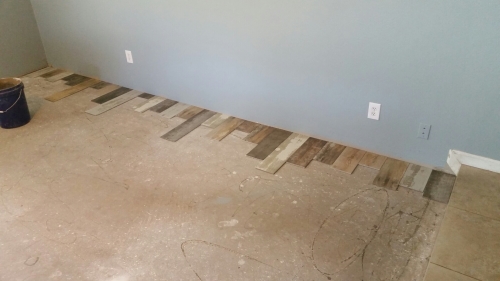
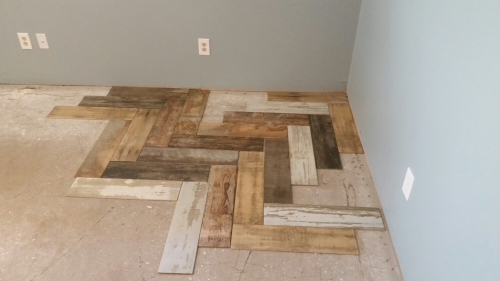
To start off we took a handful of tiles and cut them at completely random intervals. Then we set them against the wall. 

image

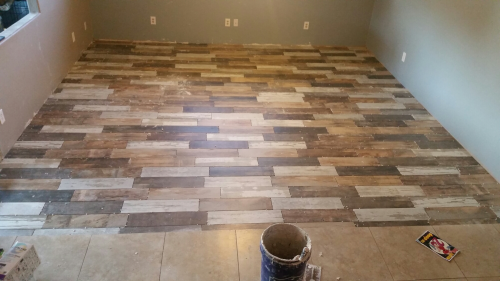
I really lucked out. 28 tiles fit perfectly from edge to edge. 

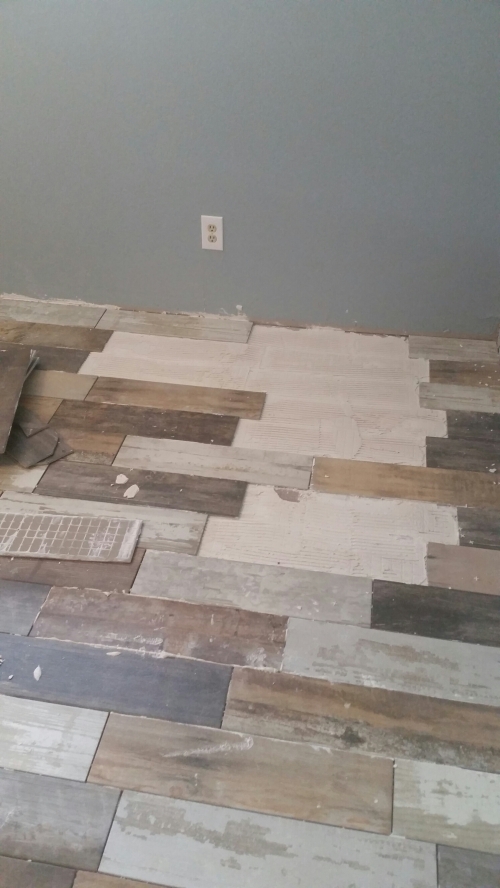
Then we went out 3 to 4 tiles, and then down.  Out and down. Out and down.

image

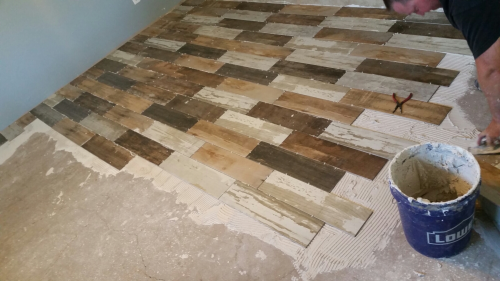
My biggest goal was making sure that I didn’t have two identical tiles next to each other. While there are several similar tiles, I just didn’t want the same ones adjoining. As it came along it was looking pretty good.

image

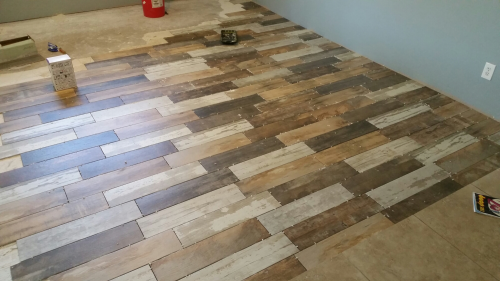
At one point, order to be more efficient, I worked from the back corner up, while Chris worked from the front corner back.  Unfortunately, in my haste and inexperience, my lines weren’t perfectly square.  What is predictable is preventable. And the preventable happened.  The last space left wasn’t big enough for the piece.

image

At this point I was 9 hours in, ex6hsusted, and frustrated. We ended up cutting a diagonal line from 1/2″ to just under 1″ down the tile.

image

If you know it’s there you see it.  Of you don’t, I’d be surprised if you could pick it out.  Plus, our couch will be over it.  But in the future, I’ll be working from one corner to the other.

At the end of the night, I was feeling pretty good. 

image

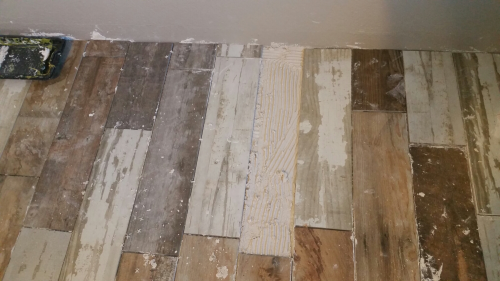
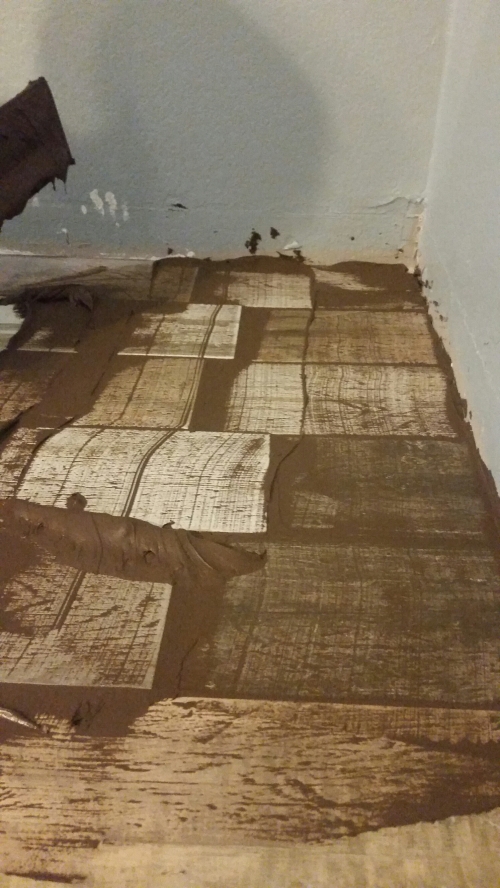
The following morning we returned to clean the lines and set the grout. As I walked across the floor I felt a tile move under my foot.  Uh oh.  I tapped it with a screwdriver handle and it was definitely loose. I pulled it up with ease and began scraping up the hardened thinset.  That sucked. I started running the handle of the screwdriver over the tiles and unfortunately we found 4 singles and a group of 7 tiles together.

image

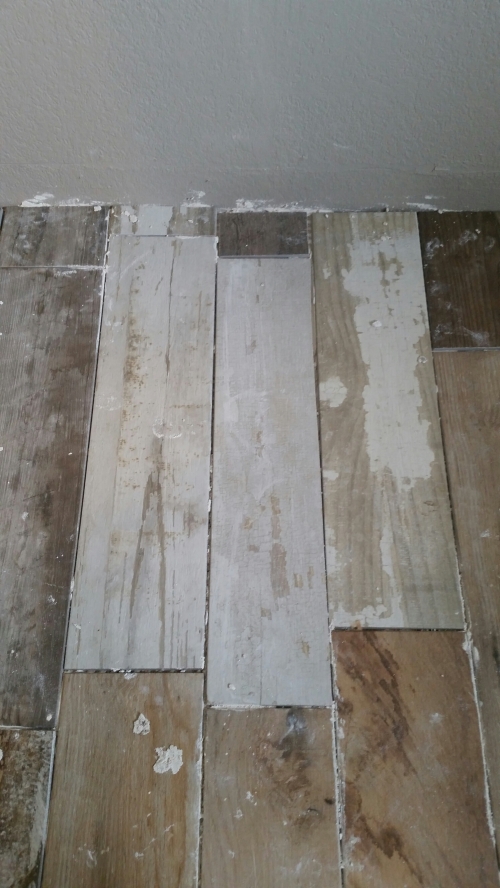
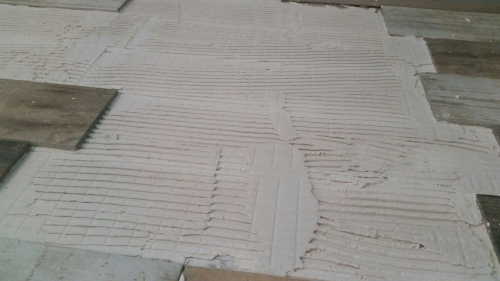
Now, I’m no scientician, but I looked at the thin set underneath. You can clearly see that the thin set only bonded to one tile in one place. My theory is that it was too dry.  It was moist enough to spread and to move under the tile when they were set. But between. The concrete sucking up moisture and the tile sucking up moisture, the thin set didn’t have enough liquid in it to bond to the tile. 

image

Now, I was not about to scrape out 7 tiles worth of that mess. We decided to mix up some very runny thin set and float it on top.  My theory was that that dry thin set is bonded to the concrete. The nrw thin set should bond the tile to the dry stuff, and everything should hold. In addition to that I also put some mud on the bottom of the tile.  Everything was spread super thin so the new tiles would have an elevation difference.

Now, I will say that as much as I like this tile, it is not rectified, and the pieces are not all straight, flat, or the same size. out of 16 cases I found one that rocked because it wasn’t flat and two that had a definite bow or arch (left to right). Plus, when replacing tiles that didn’t set, it was like doing a puzzle to get them to fit again. The pieces were longer or shorter as much as 3 milimeters. Not a huge deal if you’re prepared for it.  But I guess I wasn’t, so that was frustrating.

For the grout we went with non-sanded grout (because we used 1/8th” spacers) in Tobacco Brown. My goal was to have the grout lines disappear into the tile to make it look more like wood. I went back and forth between a light color (Sandstone) and a dark color.  I finally settled on the dark, and hoped for the best.

image

The stuff looked like straight chocolate pudding poop.

If you didn’t know, groutting sucks. Like really really sucks. But eventually we got the room done. It took several hours.

image

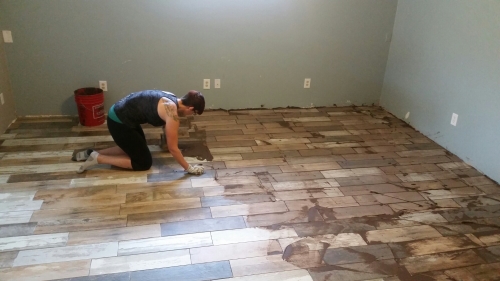
After floating the grout you have to clean, and clean, and clean, and clean. A word of caution to those in a committed relationship.  This step can easily cause divorce or murder. Our knees were smoked, legs hurt, arms were exhausted, and we were ready to be done.

image

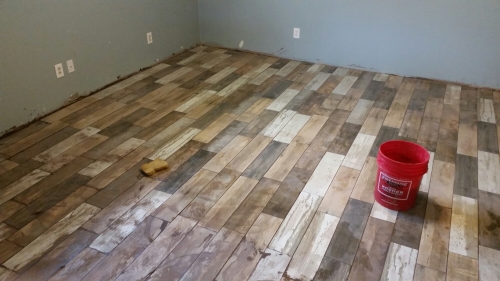
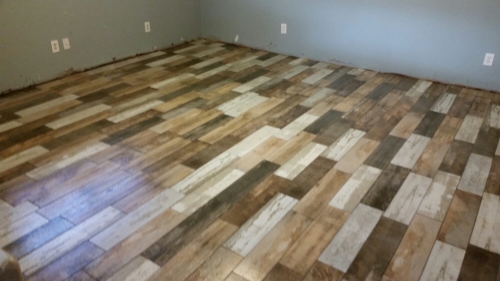
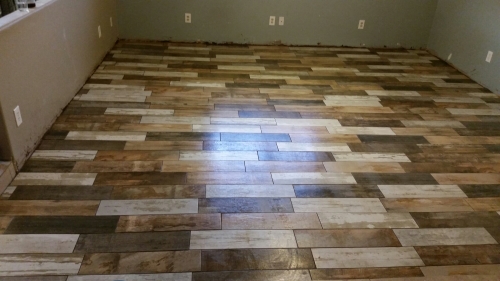
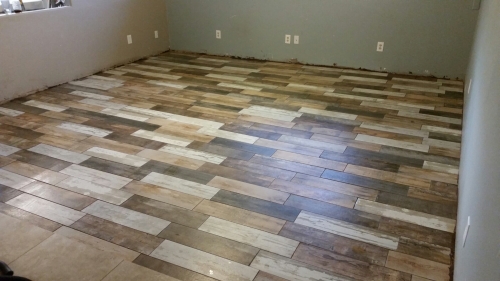
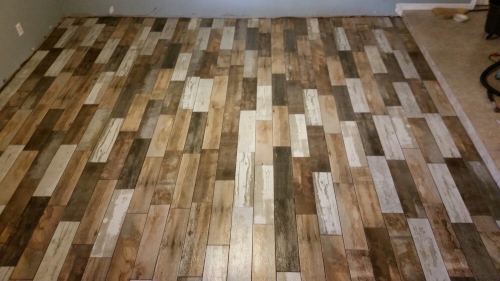
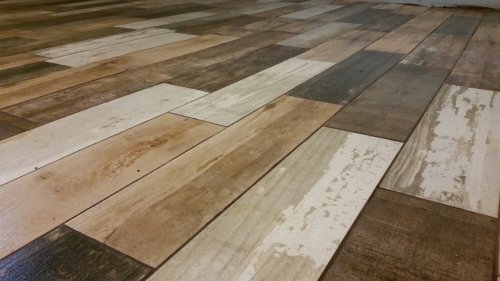
After wiping, cleaning, and mopping we were finally finished. And man was it worth it!

image

image

image

image

image

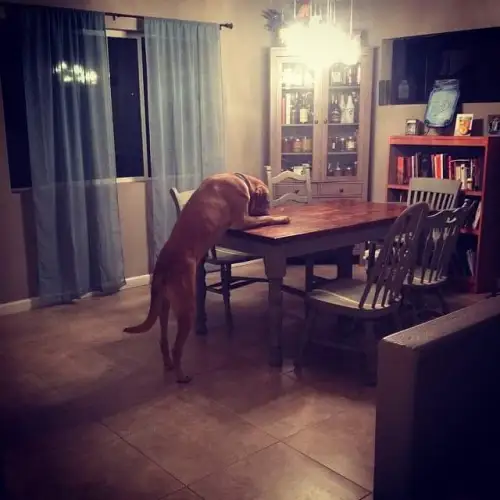
And the best part? The tile matches our Shepherd, Leia!

image

So there you have it.  First time laying tile.  Not every tile is perfectly level, one of them had to be shaved down a hair, nearly a dozen needed to be re-set the 2nd day.  But we did it. And for a fraction of the cost.  My instructor got a couple of cases of Shock Top and a few liters of Southern Comfort as payment, which seems like a deal. I gained the confidence to take on more tile projects in the future and a gorgeous new living room floor. 

How was your first time laying tile? Did it work out or did you make mistakes too?

Decisions

So we ripped the carpet, bought the supplies, and readied ourselves.

We ended up painting the living and dining room a nice blue shade by Glidden called Shaded Brook. Though we did buy Behr paint.

image

Even Little Bear got in on the action.

image

The blue next to the submarine gray looks pretty decent. Though we’ll need some yellow decor to brighten up the place.

image

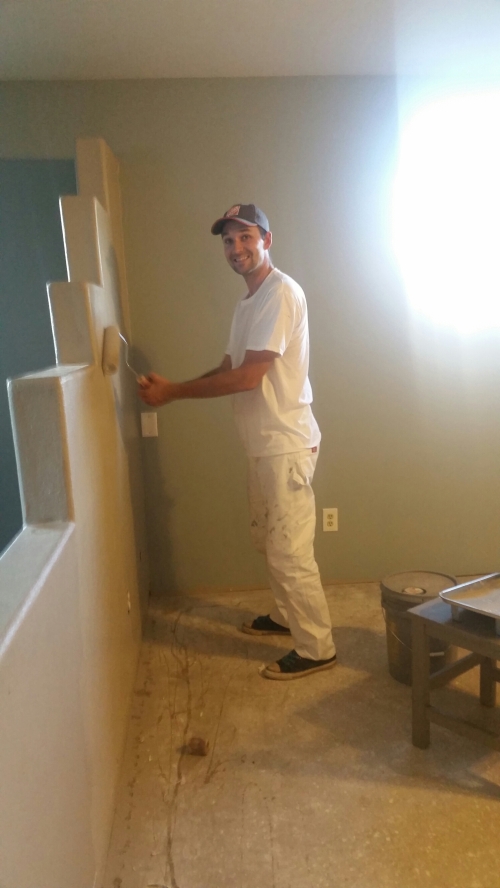
Also, if you don’t dress the part, you aren’t really painting.

image

So we got the paint done.

image

image

It was time to re-tile.  But in what pattern?

Brick with a 33% or random offset?

image

Herringbone Diagonal to the room?

image

Herringbone Square to the room?

image

Double Herringbone Square to the room?

image

Man, these decisions are tough! We laid out tile over and over.  In different corners. In different patterns. It’s such a permanent decision.

Which arrangement do you like best? Comment and tell me your favorite. Tomorrow morning, we make the decision.

Construction time!

This is what happens when you watch too much HGTV. You start to think you can do anything. 

Odessa and I decided that we don’t like the carpet in the living room.  So we did the only logical thing. We ripped it out to commit ourselves to having to tile. 

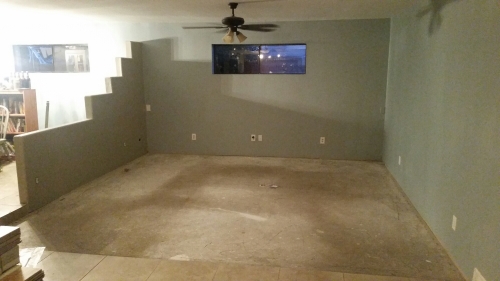
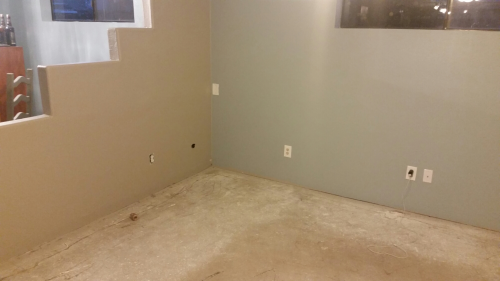
We kind of decided to do all this last minute. So we forgot to take intentional before pics. Forgive the amount of dogs and kids.  I had to go back to find pix of what the place looked like. 

The living room shortly after moving in.

image

The dining room.

image

Another view.

image

The carpet was chocolate brown, the paint is submarine gray, and the baseboards are the cheapest the previous owner could find.  Those are all about to change.

The new wall color.

image

The new tile is Marazzi Montagna line, Vintage Chic.

image

It’s a wood look tile that has the appearance of being old reclaimed Barnwood with weathering and flecks of old paint. 

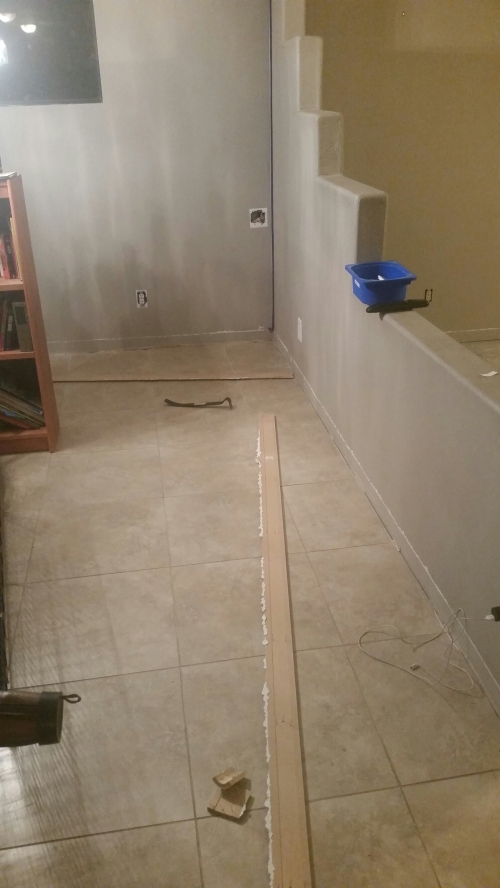
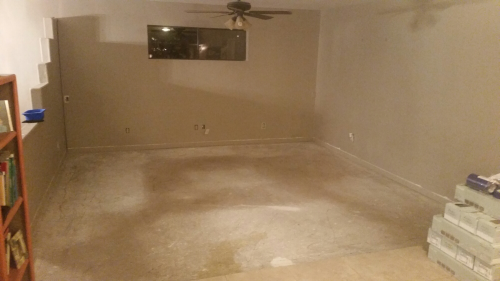
So, we ripped the carpet out and cleaned the floor.

image

And I took the baseboards off.

image

The living room now looks like this.

image

All of our furniture is piled in to ‘the room without a purpose.’ Hopefully that room figures out what it is when we’re done.
image

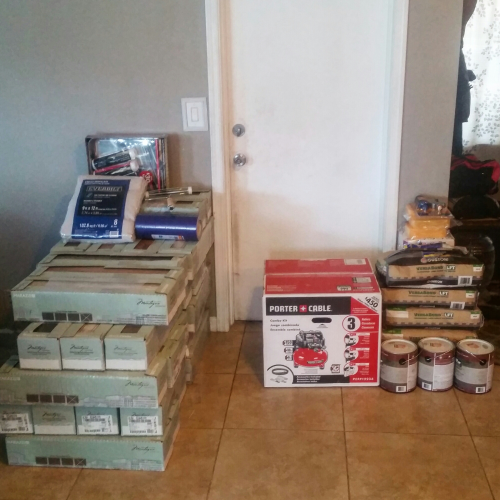
And after a few trips to Home Depot we have everything set and ready to go.

image

If this goes well, the next step is built in shelves in the living room, wainscoting and new lighting in the laundry room, new baseboards and trim throughout, and eventually new cabinets in the kitchen.

So join us for the ride! Laugh at our follies. Give us advice or pointers. Or use us as a bad example. If you work for HGTV, give us a show! We are doing all the work ourselves. Should be a fun time. 

Feel free to comment with your own DIY experiences. Here goes nothing…

How the Local Government Forced Me To Be An Artist

So I wanted to share a bit of the process that I went through to come up with my designs.

I love Mason jars with every fiber of my being. I was really trying to sell my canned jams, jellies, pickles etc. However after about two months of investigating I found out that the local government was interested in charging me approximately $900-$1200 in application fees, inspection fees, that fee and this fee. Then I would need to rent commercial kitchen space by the hour, and not only do all my prep work and processing there, but purchase separate equipment (knife, cutting board, canner, etc) to keep there….which requires storage fees. This would run upwards of $300 a month. And I haven’t even purchased jars, fruit, sugar, and pectin yet. As a side business it was not feasible financially. The alternative? Give my recipes to a processor and pay them to make my stuff. Uh, no. Making it is 2/3 of the fun.

Needless to say I was pretty disappointed. A bunch of nanny government rules and fees preventing me from doing something so simple. Unfortunately the cottage food law here only covers cakes, cookies, and breads and doesn’t allow for jams and pickles like Texas’ does.

But I’m an idea man. And I’ve never let a little thing like bureaucracy stop me. So I decided I’d try my hand at selling mason jar related things. My community has several farmers markets and a monthly art walk downtown. My thought was maybe I can get a table and sell mason jar soap dispensers and “sippy cups.” But that wasnt really enough, and certainly wouldn’t suffice for an art walk.

I’ve never fancied myself a very artistic person, and generally anything that I draw turns out looking like an eight-year-old did it. So I thought maybe I could buy really cool mason jar art in Etsy (there’s a ton of amazing water colors!) and resell it. But the art walk folks don’t just want art whole sellers, they want artists. And, a lot of the printed stuff is of the 4 public domain jar designs floating around. Boring. So I had to think some more.

Now, I remembered carving in linoleum blocks way back in junior high school, and enjoying that very much. I thought if revisit that. I grabbed a lino block kit from Hobby Lobby and brought it home. After my family went to bed (I work shift work, they don’t) I grabbed a beer, a mason jar, my block and a pencil. I sat at the table and willed the jar on to the block. I’d sketch and erase, sketch and erase, over and over. Until finally I came up with this:

20130109-203700.jpg

20130109-203912.jpg
Hmm, not horrible, I guess. So I grabbed the carving knife, and another beer, and 3 hours later I wound up with this:

20130109-204029.jpgWhich printed this:

20130109-204101.jpgNot too shabby. I posted pics on Facebook and Instagram and got some decent feedback. So I thought I’d try some more.

The 2nd night I sketched out jars had stuff in them. I clicked around online for inspiration since shading and reflection are important, and yet confusing when you’re cutting in negative. I wound up with this (pencil in the left, Sharpie on the right):

20130109-204337.jpgThis took longer to carve out, since there was more detail. But eventually I got this:

20130109-204450.jpgWhich printed:

20130109-204522.jpg I like this one because no one, not even I, know what’s in the jar. I’ve heard people say “I love the olives.” Or “those cherries look good” Who knows? Maybe they’re just marbles.

But together the two stamps gave me hope that maybe I’m not destined for failure.

20130109-204719.jpg
Now, my goal was to make one a night for as long as I could. The third night I grabbed more beer, more music, and I sat down to another blank canvas. This time I wanted a larger quart jar, as realistic as I could get it. So I sketched, and erased, and sketched some more. I wound up here:

20130109-205020.jpgI’m pretty proud of that one. For a guy that can’t draw, paint, or take good photographs I was feeling pretty good. Due to the number if letters and fine detail this took me two days to draw and cut. But eventually the block and stamp were done.

20130109-205512.jpg

20130109-205531.jpg

While I spent my night whittling away on blocks, I spent my day’s learning how to screenprint. I read a bunch of blogs online, talked to some friends with experience, and even borrowed a simple set up from a friend of mine. I also started setting up an Etsy store. I basically got everything on the website established except for items to sell, and did not make the store go live yet.

Over the next two days I printed my stamps on paper, scanned the image, printed it on a transparency, added one of my favorite canning phrases, and burned my own screens. Then I started printing.

I made towels:

20130109-213940.jpg

20130109-214016.jpg
Bags and backpacks:

20130109-214108.jpg

20130109-214125.jpg
And some shirts:

20130109-214218.jpg

20130109-214243.jpg
I took some of my towels and bags down to a local antique store where I took pictures of them with a more appropriate setting. And with that I “opened my store.”

It’s the American dream, right? I think the best part for me is that I’m not dependent on the income. In fact, I’m likely to spend any money I make on more jars, more fruit, more sugar and pectin, and more things to screen print. That’s an important part for me. This has to stay fun. I don’t want to get to the point where I feel like this is something I have to do but rather something I want to do. So, we’ll see how it goes. I’ve had decent success so far and have filled a handful of orders.

Last night I took a break from screenprinting everything and picked up another block and pencil. I’ve already done three different types of jars and I wanted to mix it up. So I decided to add some still life around the jar. After a couple hours of sketching and cutting, I came up with this:

20130109-214715.jpg
I haven’t burned this image into a screen yet, and haven’t decided whether or not I will. Although a couple of my friends say that they really enjoy this one. I think cutting the woodblocks is at least half of the entertainment for me. Really it comes down to having 2 to 3 hours at night where I can just relax and wind down, knock back a couple beers, listen to some light music, and cut chunks out of blocks. And right now, that works for me.

20130109-214856.jpg
If you’re interested in anything here, the link to my shop is etsy.com/shop/MasonJarsMixingBowls

If you have any ideas for wood block cuts I’d love to hear them. And if you have anything to share, positive or negative, about the ones I’ve already done I’d love to hear that too.

Happy canning.
I’ve entered the screenprinting business. Here’s a link to my Mason Jar related Etsy Store MasonJarsMixingBowls

I’ve entered the screenprinting business. Here’s a link to my Mason Jar related Etsy Store MasonJarsMixingBowls

I promise my followers that I’m not going to spam you guys with a bunch of Etsy links from here on out.  But I’m kind of excited.  I decided to sketch some mason jar designs on linoleum blocks, carve them out, make stamps, turn those stamps in to silk screens, and then print some towels, shirts, bags, and things.  So, if you’re in to canning, pickling, mason jars, and cooking (which you are if you’re reading my blog) why not swing by to see if you see something you like.  Everything is crafted with the same amount of care that I put in to my canning.   I’m mason jar obsessed and this is just another part of the adventure.

Roast Chicken with Root Vegetables

As the wife left for the gym she told me to make dinner, using the whole chicken that was in the fridge. As I pulled the chicken from the refrigerator I opened up the vegetable drawer to figure out what else we might have with it. I found a parsnip, three beets, a bag of carrots, some fennel and a bag of potatoes. Seemed like it was going to be chicken and root vegetables for dinner. I decided to throw together a recipe based loosely on portions of the recipe that I use for my Thanksgiving turkey, recipes that I had previously used for roast chicken, as well as some recipes that my wife uses for side dishes. It was very successful so I thought I would share it.

Roast Chicken With Root Vegetables
1 Whole Chicken
1 Parsnip
3 Beets
5 Carrots
1 Head Fennel
5-10 small potatoes
Rosemary
Garlic
Thyme
Olive Oil
Salt And Pepper

I go from the chicken to seasonings to vegetables and back throughout this recipe. I also washed my hands about 12 times. Remember not to cross contaminate.

Oven to 475.

Rinse the chicken, remove the neck and gibblets, and pat dry with a paper towel.

Salt and pepper the cavity. Crush 4 cloves of garlic with the edge of your knife. Throw the garlic in the cavity along with 2-3 sprigs of thyme and rosemary. I found myself short of fresh thyme, so I used dried but in the future I’d use fresh.

Drizzle olive oil on the bird and rub to coat. Like a little chicken back rub. Season the exterior liberally with kosher salt and black pepper. And I do mean liberally. My bird looked as sparkly as a Liberace costume when I was done.

20120828-211804.jpg

Now we’re going to get all trussed up with no where to go. Have you ever trussed a chicken? It’s not difficult if you can tie shoes.

Put the chicken breast side up, legs pointed toward you. Grab a length of butcher’s twine. I usually go for about 2-3 feet so I don’t end up short. Hold the ends up to find the halfway point. Put the center of the twine under what I would call the shoulders of the bird and run it up on top of the wings.

20120828-212448.jpg
Bring the twine over the legs against the rib cage. Under the end of the rib cage cross the twine and cinch it up. (taking this picture was not easy)

20120828-212642.jpg
Move the legs in tight, cross the twine again, and wrap it around the legs just behind the knuckles. I pull the twine tight, cross it, and wrap the legs again. Tie a bow, tuck the wing tips under the body, and you’re done.

20120828-213041.jpg

Set the chicken aside and get ready to prep vegetables. I do it in this order because it gives the chicken more time to get to room temperature, which provides for more even cooking.

20120828-213310.jpg
I peeled the parsnip and beets, but everything else was just washed. Chopping vegetables is easy. My end goal was just to have approximately 1″ pieces. Put all the vegetables in a baking dish. Drizzle with oil, salt, and pepper and then toss by hand.
The beet stains on the parsnips reminded me a bit of bananas in strawberry syrup.

20120828-213756.jpg
Place the chicken right on top of the vegetables.

20120828-214257.jpg

20120828-214729.jpg
Throw it in the oven and set a timer for 25 minutes. This makes the skin fabulously crispy. Then drop the heat to 400 and set the time for another 45 minutes. The deepest part of the thigh should be 160 degrees.

20120828-214918.jpg

20120828-214926.jpg

Cut and remove the twine before serving.

Just a note. The beets either steamed or leeched into the bird, causing the fluid in the cavity to look exactly like blood. It freaked me out. The chicken appeared done, the temp was right, and the fluids coming from the joints were clear. It took me a minute to figure out what had happened.

The end result was chicken skin so deliciously salty and crispy that I would have eaten it like a bag of chips given the opportunity, meat that was moist and flavorful, and a variety of vegetables that were cooked perfectly and paired great with the chicken. I served it with Odessa’s Cranberry Sauce that you can find in its own post from last year. And the whole meal was fantastic.

20120828-215556.jpg

I wanted to put a joke about a fun guy in the title.

Once again I was lured in by the siren song of cheap prices. While picking up some strawberries for strawberry black pepper jam (recipe to follow in another post) I found mushrooms for $.10 a package. The 8 ounce packages that I think are usually around $1.99 each were on clearance for $.10 apiece. I looked the packages over, and while they definitely had some brown spots on them I did not see any mold or anything that looked so horrific that they were unusable. Unable to contain my excitement I quickly grabbed two flats and stacked 30 packages on them.

20120828-185628.jpg

Arriving at home the first thing I did was to fill my sink with water and a little bit of ice to cool it down. I cut the packages open and dropped the mushrooms into the sink. Then I used my hands to bump them up and down in the water. That got most of the dirt off of them. I used the sprayer function on my faucet nozzle to rinse them off.

20120828-223351.jpg

Then I took the mushrooms out one at a time. I cut off the bottom quarter inch of the stem as well as any brown spots that did not look good. All in all I think I only threw out 15 mushrooms. Most of them were good to go. Some of them had soft slimy spots that I sliced off. It turns out that 15 pounds of mushrooms will fill two 16 quart stock pots.

20120828-223607.jpg

At this point my wife made the mistake of walking into the kitchen. I quickly put her to task on this next part. We took each mushroom and sliced it. The smaller mushrooms with only 3 to 4 slices each. The larger would be 6 or more. I tried not to make the slices too thin knowing very well that they would cook down quite a bit.

20120828-223812.jpg

The mushrooms need to cook in water. I filled the pot with mushrooms and then added water. The problem is the mushrooms float and it was hard to keep them below the surface. I heated the water to boil, then reduce the heat and cook them for five minutes. After five minutes the color had darkened and they had turned slightly translucent.

20120828-190331.jpg

I filled the jars with the mushrooms. This is the part that blew my mind. Such great volume of sliced mushrooms reduced down and down and down in size. By the time I was done I only filled nine pint jars. Is next part was a little tricky if you have sensitive fingers. I swear mine don’t feel heat anymore. I drained the liquid that they had been cooking in out of the jars. Then I added fresh clean boiled water up to the 1 inch headspace. I placed a ring and lid on each and was prepared to process them.

This is when the closest thing to catastrophe struck my kitchen. The weighted regulator for my pressure cooker was missing. I searched high and low in every spot that I would put it, everyplace my wife would put it, and any place I thought my kids might have hidden it. But it was to no avail. About 30 minutes later I conceded that I would not be processing the mushrooms tonight. I placed the jars in the fridge so that they wouldn’t be a complete waste and went to bed. The next day I ran to a hardware store bright and early and bought a new regulator.

Reprocessing food is not the end of the world it’s just labor-intensive. First off all the lids on the jars were trash now as the sealing compound had already softened on the hot jars yesterday. The contents of the jars was emptied back into a pot and slowly brought up to boil. I let it simmer for a couple minutes to make sure that everything was heated through. And then I refilled clean jars. If you ever processed something and the lids don’t seal right, this is the correct method for reprocessing the food. Same thing happens if you have an emergency come up and you can’t get things into a processor before you have to walk away from them. Throw them in the refrigerator to store them safely and then repeat them the next opportunity that you get.

20120828-190910.jpg

The jars replaced in a pressure canner and heated at 11 pounds for 45 minutes. If you aren’t familiar with the process, you put 2 to 4 inches of water in the canner, put the jars inside, and put the lid on. Turn the heat on with the weighted regulator off. When steam starts purging through the regulator vent set the timer for 10 minutes. That little event should look like an old-fashioned locomotive pouring steam out. This ensures that all the cold air is purged out of the pressure cooker and the entire content is filled with water and steam. After 10 minutes put your weighted regulator on and watch the pressure rise. When it gets to the desired pounds reduce your heat to find that magic spot that keeps it at the number that you need. For me an exact medium keeps it at 11 pounds. That is the time that you start your processing timer. At sea level for mushrooms in pints it was 45 minutes. After 45 minutes turn the heat off on the burner and do nothing else. Moving the canner could cause the temperature to drop to rapidly and a rapid drop in temperature will cause your jars to purge. That will result in a pressure cooker full of glass jars and horrible mushroom soup.

After the pressure drops to zero remove the regulator to make sure no steam remains inside and slowly and carefully remove the lid. Allow the jars to remain in the processor just a little bit longer so they continue to cool slowly. If you have the time and don’t need the processor for anything else just leave them out overnight and return to them the next day when they are cool. Be aware that pressure process jars stay hot for an extremely long time. Jar lifters will still be needed to move them.

20120828-191646.jpg

Allow the jars to sit undisturbed for 24 hours so the lids sealed correctly. You now have shelfstable mushrooms for the next two years. As I said my 15 pounds of mushrooms turned into less than 9 pint jars by the time everything was said and done. That’s approximately 2 pounds of mushrooms per jar. I ended up with one failure due to a lid not sealing correctly but those aren’t bad dogs for all of the processing that I do. If you have one jar that doesn’t seal and you do not want to reprocess it just put it in the refrigerator and use it within next week or two.

These cooked mushrooms would make a great addition to any marinara or other pasta sauce, as well as for use in casseroles or chicken dishes.

I decided to make the family chicken Marsala that night because that recipe is always much easier than I remember.

20120828-191622.jpg

This was one of the more labor intensive and frustrating projects that I’ve done since getting into canning. I still insisted at $.20 a pound it was probably worth it long-term. However I would make sure to grant myself the time to get this done.

Speed Jamming

So after realizing what an amazing deal the pineapples were and how easy they were to can, I returned to Superstition Ranch Market to pick up some more for $.69. I called ahead to make sure they were on sale. By the time I got there they had 14 left. That’s it. I grabbed 10 of them and threw them in a box. They were very soft, for a pineapple, and a little wet on the outside. But I knew I was using them tonight. I also grabbed another flat of strawberries for $.33 a pound, knowing that this might be the last time I do strawberries this year. Walking through, I saw blackberries at $.50 per 6oz, which isn’t the greatest deal I’ve seen, but is still an excellent price. I grabbed another flat.

20120826-004110.jpg

I’m finally getting the hang of formulating a game plan before I start. I came home and decided what jam I was making tonight, as well as what I was going to can. First thing I did was get all of my jars ready. The jars were opened, lids and rings stacked separately, and jars aligned to the left hand side of my stove.

20120826-004316.jpg

Then I prepped all my fruit. I cut the tops and bottoms off the pineapple, peeled it, removed the core, and chopped them into chunks. I simmered the pineapple in the simple syrup as I prepped the berries. I cut the hulls off of the strawberries and threw them in a bowl.

20120826-004447.jpg

That’s when I realized I was out of pectin. I put the quarts of pineapple in the processor, set the timer, and ran to the grocery store. When I came back the pineapple was removed and I set in on the jam.

I ran the strawberries through a food processor. Recently I have found this is faster than smooshing them down with a potato masher. I run about a quart and a half of strawberries each batch. I pulsed the food processor in quarter to half second bursts. You do not want to liquefy the strawberries, just break them down in size. If you need to, err on the size of too big rather than too small. As the strawberries will break down further as they cook.

20120826-005009.jpg

I also use the potato masher on the fruit from approximately 1 1/2 to 2 pineapples to make the “crushed pineapple” for the jam.

First up, Strawberry Pineapple Jam.
2 C Pineapple
2 C Strawberries
1 Package Pectin
4 C Sugar

I’m not going to give instructions on every recipe that I post on here for jam. Jam is jam. The ingredient list is what changes, the process stays consistent from time to time. If this is your first time making jam and you need to find out how, browse back until you find my strawberry lemon jam recipe which gives you explicit step-by-step directions.

20120826-005216.jpg

I managed to score a sous chef tonight. While I was working on my first batch of strawberry pineapple jam, my son was busy mushing up blackberries with the kitchen aid food mill. This is hands down his favorite job to do in the kitchen. I swear he gets more joy about shoving little blackberries to their death and he does doing anything else. And I really appreciated having the extra set of hands tonight.

20120826-005349.jpg

So this is the part with my time-saving process. I have all my fruit ready to go, pectin and sugar sitting on the countertop, jars are open and ready to go, waterbath processor boiling at a full, and another pot ready to be filled with fruit.

I start with the first batch. Fruit and pectin in, bring it to a boil, add the sugar, bring it to a boil, and fill the jars. The dirty pot, ladle, funnel, and whisk immediately go into the sink and get filled with the hottest water my sink can muster. As that is happening I return to the full jars, put a lid and ring on each, and place them in the water bath. Now I have just 10 minutes to get my next batch done.

I wash the pot and accessories and return it to the stove that is still hot. I measure out four more cups of fruit, and four more cups of sugar. Fruit and pectin go in the pot and are heated to a boil, then the sugar is added and it is brought to a boil again. This is right about the 6 to 7 minute mark. After boiling for a full minute I remove it from the heat and start filling the jars. Usually the timer on the first batch goes off as I’m filling the first couple jars of the second batch. I take a timeout from filling the jars and remove the first batch from the water, placing them to the right of my stove on a dishtowel. As soon as the jars of the second batch are full the pot and accessories go back in the sink full of hot water, rings and lids are placed on the second batch and they are placed in the water bath processor. And then I move onto my third batch.

I don’t have the timing down perfect yet. It seems that about the fourth batch I’m running just a little bit late. Right after I pour the sugar in my fruit, the batch in the water is ready to be removed. I find myself stirring hot jam with my left hand while removing jars from the water bath with my right. It’s precarious, and I’ll admit I have my fair share of scars on my wrists, but I wear them with pride.

20120826-010021.jpg

If I prep my fruit for each batch of jam as I go along it is taking me approximately 25 to 35 minutes per batch. That is still a pretty good time. If I take 20 to 30 minutes to prep all of my fruit ahead of time I can now do one batch every 10 minutes…I guess 11 to be perfectly honest about it. That to me is a satisfying time.

As I finished up the strawberry pineapple jam, my son was done with the blackberries. The third batch turned into blackberry jam.

Blackberry Jam
5 C Blackberries (through a foodmill, not whole)
1 Package Pectin
7 C Sugar

On the fourth batch I found myself short of strawberries, short of pineapple, and short of blackberries. This is where I love making jam. Because so many fruits just naturally go together. The last batch was a near even mixture of strawberries and blackberries.

Strawberry Blackberry Jam
3 C Blackberries
2 C Strawberries
1 Package Pectin
6 C Sugar

The last of the pineapple was wrapped up to be put in yogurt the rest of the week.

Just over three hours later I have 6 quarts and 3 pints of canned pineapple, 18 half pints of strawberry pineapple jam, ten half pints of blackberry jam, 2 pints and 6 half pints of strawberry blackberry jam. Adding this together with Tuesday’s production I managed to make 90 half pints of jam and 3 gallons of canned pineapple in about 7 hours. I’m pretty happy with that.

20120826-010930.jpg

20120826-011025.jpg

20120826-011100.jpg

I definitely think that prepping your fruit ahead of time is the way to go. Make sure that you have enough jars and pectin to supply what you want to make, and get everything laid out on the countertop. If you are organized and dedicated you can really go through six batches of jam in an hour. If each batch yields 8 to 12 jars, that’s can you keep you well-suited for a while.

Now I need to find time to get to those 8 pounds of pears that are mocking me from the refrigerator….

Easy As Pineapple

This week I canned my first batch of pineapple. It was pretty much the easiest thing ever. But I thought I would make a post in case you are like me, and love step-by-step directions with pictures attached.

I found myself at Superstition Ranch Market again this week and they had pineapples on sale for $.69 apiece. I picked up four of them.

20120822-130024.jpg

Start by cutting off the top and the bottom of the pineapple and then slicing the peel off from top to bottom.

20120822-130132.jpg

Cut the pineapple into quarters.

20120822-130226.jpg

Now it’s a breeze to slice the tough core out of the pineapple. Simply cut along the top of each quarter removing the hard woody material that made up the core.

20120822-130326.jpg
I sliced each quarter in half lengthwise and then chopped the pieces into almost cubes about 2 to 3 cm in width.

Pineapple has to be preserved in fruit juice or syrup. I did not have any pineapple juice or grape juice on hand, and I did not want to go through the process of trying to juice the small amount of core and peel that I had sliced off. Since the pineapple was already very sweet I decided to go with a very light syrup. 2 cups of sugar for 7 cups of water.

Combine the sugar and water in a large pan and apply heat.

20120822-130549.jpg

As the syrup heats up the sugar will disappear and the liquid will turn clear. Heat until boiling, then add your pineapple. Pineapple is better preserved using a hot pack method over a cold pack method. The fruit is also less likely to float in the syrup if you hot pack it.

20120822-130735.jpg

Allow the fruit to simmer in the syrup for approximately 10 minutes. You’ll notice the pineapple appears slightly more translucent and floats in the pot.

20120822-130830.jpg

After that it’s business as usual. Place your fruit into clean jars, packing the fruit down slightly. If you need to add some of the syrup from the pot to leave one 1/2 half inch headspace. Put on your lids and bands and process in a water bath canner for 10 minutes for pints and 20 minutes for courts.

Four pineapples filled 6 pints and one quart, or 1 gallon of process pineapple. Visually it is very consistent with store-bought pineapple. It does not seem to have broken down any more than the fruit that you purchase and I can.

20120822-131106.jpg

I have not priced out canned pineapple recently but at $.69 each, already having the jars at home, adding the trivial cost for sugar, this seems very cost-effective. Basically a gallon of pineapple for just over three dollars. I don’t think that can be beat at the grocery store. The more I think about it the more I’m considering heading back to buy ten more.

On a side note, this is the first post that I’m making with the WordPress iPhone app. I’d appreciate any feedback anyone has on whether the format is different, or if I’ve overlooked anything due to my speech to text posting.

Happy Canning.


Enter your email address to follow this blog and receive notifications of new posts by email.
Join 368 other subscribers