Posts Tagged 'canning'

Meals In A Jar; Sloppy Joes

I have a 12 day Mule Deer hunt coming up next week. In preparation, I was trying to come up with self contained meals in mason jars, to save on my finite cooler space.

One of the first things I thought of was Sloppy Joes. But instead of just the sauce, like a can of Manwich, I wanted the meat in the recipe too.

I did some searching around and found a base recipe to work off of. I was originally given the recipe by a member of a canning group I belong to. But I also found the same recipe a couple of places online. So I’m not sure who get’s credit. Either way, I modified it slightly.

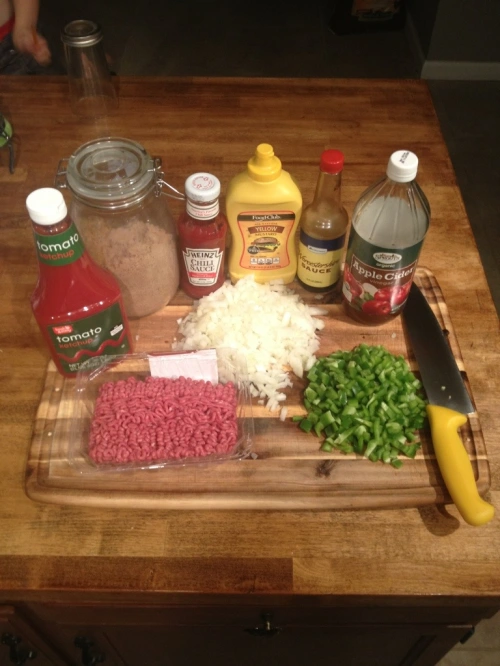
Ready To Go Sloppy Joes

2lbs Ground Beef
1 C Chopped Onion
3/4 C Chopped Green Bell Pepper
1 1/2 C Catsup/Ketchup (Use Heinz or Hunt, or make sure your brand has no thickeners added)
2 T Brown Sugar
2 T Apple Cider Vinegar
3 T Heinz Chili Sauce
3 t Worcestershire Sauce
2 t Yellow Mustard
1/4 C Water

Yield 3 Pints

20131025-023258.jpg
For complete transparency, know that I doubled my recipe, and also used 3lbs of beef and 1lb of chicken.

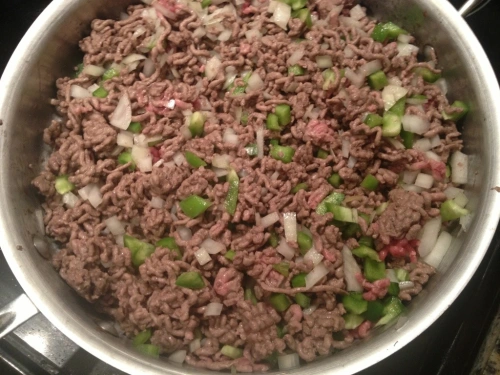
Start by adding your beef, onion, and green pepper to a hot skillet. If you chose to use chicken, add some olive oil to the pan first. If you double your recipe, this is easier to do in two batches

20131025-023620.jpg
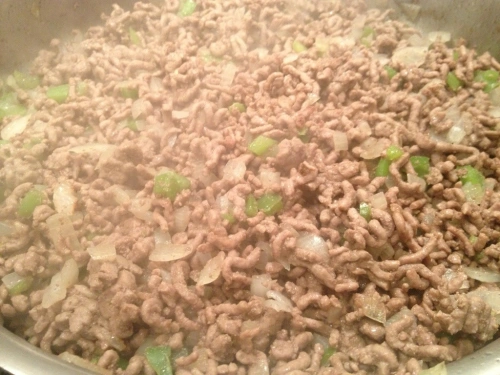
Brown the ground beef and cook the onions to translucence. Depending on the fat content of your beef you may need to drain the fat off. Mine was lean enough that it didn’t need it.

20131025-023643.jpg
I prepped by putting my ketchup/catsup (that’s a whole different debate), Worcestershire Sauce, Chili Sauce, and Mustard in one bowl, and my brown sugar, cider and water in another. Stirring to dissolve the sugar.
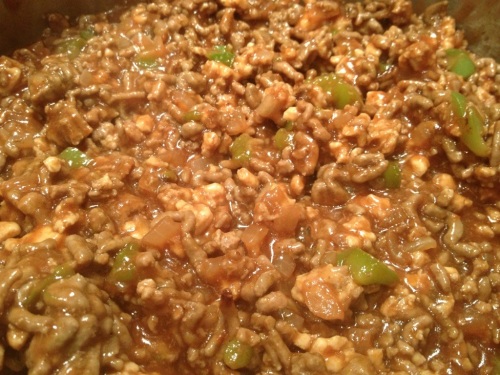
When the beef and veggies are done, add the remaining ingredients and stir to combine.

20131025-023951.jpg
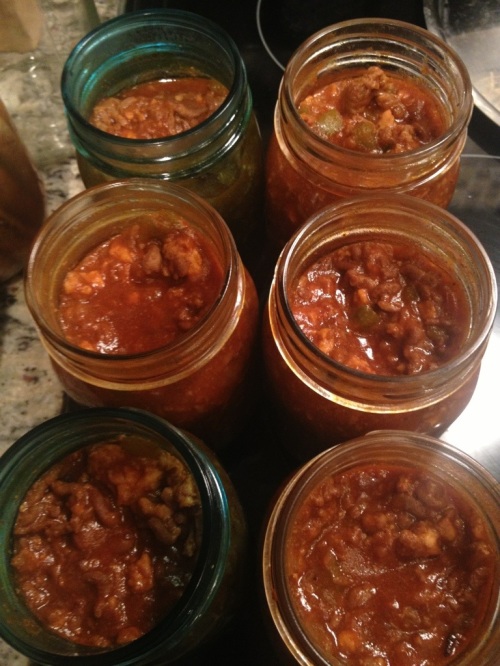
Bring everything to a boil, reduce to a simmer, cover, and cook for 20 minutes. After 20 minutes I took the lid off and found that it was a bit runnier than I’d like. I kept the lid off and stirred it until it reduced to a consistency I wanted. Fill your clean mason jars to a 1″ headspace.

20131025-024158.jpg
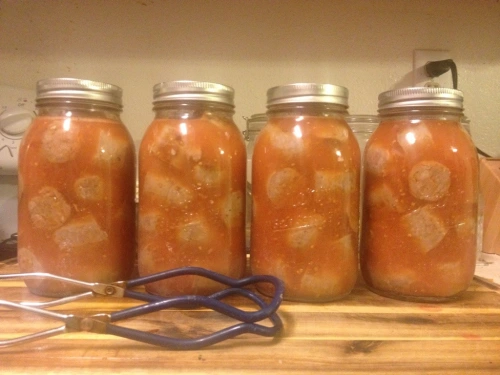
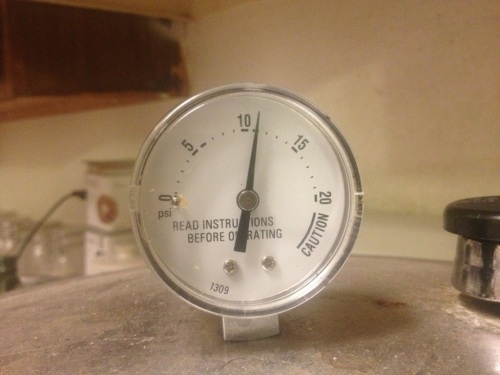
Top with your heated lids and finger tightened rings. Process at 11lbs for 75 minutes for pint, and 90 minutes for quarts. Remember, you can’t fit much more than a half a cup of meat onto one hamburger bun. That’s four servings per pint and eight servings per quart.

20131025-024342.jpg
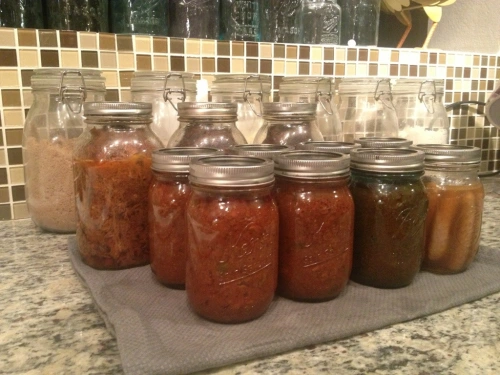
I haven’t cracked these open yet, as my hunting trip is next week. I’ll definitely come back and update the bottom of this post with a review. But my eight-year-old son and I ate the little bit of leftovers that wouldn’t fill a seventh jar and so far we are both very happy with it. He has requested that I make them from scratch for dinner. Which really isn’t a bad idea since it too less than 30 min to make.

20131025-024459.jpg
The flavor was very comparable to a can of Manwitch sauce. Maybe a touch sweeter. Next time I will add less sugar and try to spice it up just a little bit more, maybe with some hot sauce. But we’ll see what it tastes like out of the jar.

20131025-024603.jpg
If you have ideas for self-contained meals that can be opened from a jar, heated, and served please share or link them in the comments.

Happy canning!

Brandied Peaches and Fireball Whisky Peaches

I was offered to go in halfsies on a case of 40lbs of peaches. I didn’t really have time for 20lbs of peaches. But I’m a sucker for a deal. Plus, I was told these were really good peaches. So I agreed.

When they came in I was in the middle of my work week. During my work week all I do is work. So they had to wait. On Saturday my friend told me he fit them in his fridge since they were getting very ripe. I picked them up Saturday night, and put them in my fridge.

Sunday I got up, pulled them out and stared at them. Stared and stared. I broke out my Ball Blue Book, The Joy of Pickling, and Put ‘Em Up. I read recipes and browsed websites. What should I do with the peaches?

I’d seen other’s talking about brandied peaches before. I checked my liquor cabinet and pantry and found that I had everything I needed. And compared to jams, chutneys, barbecue sauces, etc, brandied peaches seemed a bit more quick and easy to get done.

This recipe is adapted from the book Put ‘Em Up.

Brandied Peaches
10lbs of Peaches
5 c Water
2 c Brandy
1 1/4 c Sugar
1/2 c Honey
2 Cinnamon Sticks
8 Cloves

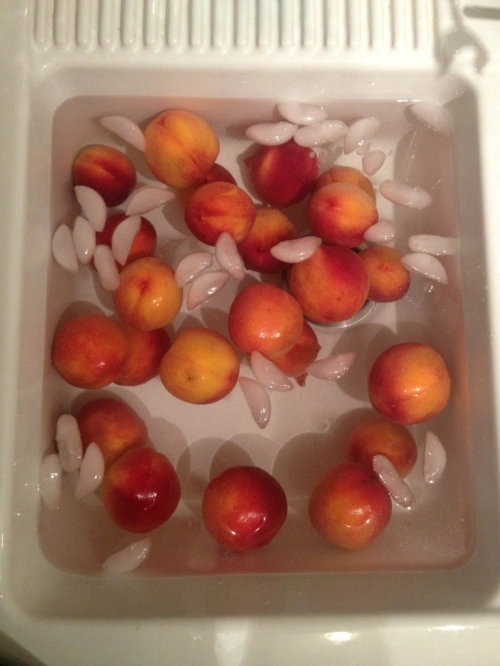
Get a pot of water to a rolling boil. Fill another pot, large bowl, or sink with ice water. I prefer to vigorously scrub out my sink, and then use that. Add some Fruit Fresh or crushed Vitamin C tablets in to the water to prevent browning.

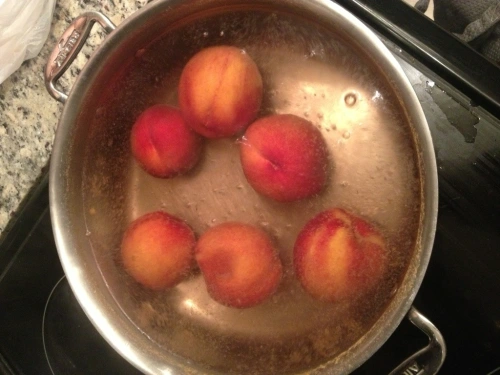
Put a few peaches at a time in the boiling water. The less ripe your peaches are, the longer they need to blanch. My peaches only took a minute. Don’t overfill your pot either. The peaches will cool the water down, and likely you’ll overcook the ones on the bottom.

20130923-200109.jpg
Pull the peaches out with a slotted spoon or a pair of tongues and move them to the ice water. For a small batch like 10lbs, blanch and cool the whole batch. If you’re processing hundreds of pounds (you should have a helper) work in batches.

20130923-200701.jpg
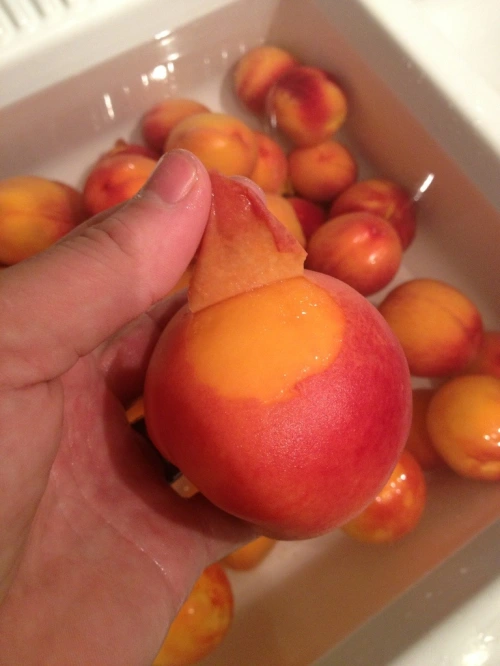
When you pull the peaches out the skins should slough right off. I find that the skins kinda get hung up on the very bottom point of the peach. I use the palm of my hand to rub the peach and break the skin off. Then I peel it off. Toss the peeled peaches back in the water.

20130923-201305.jpg
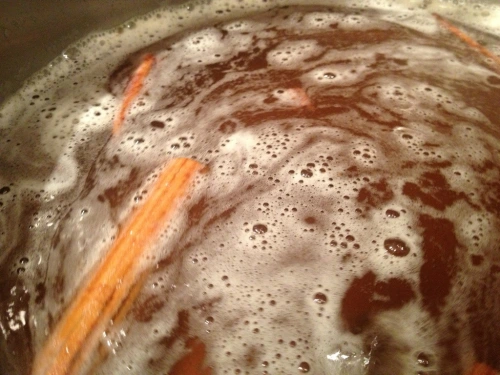
In a non-reactive pot combine 5 cups of water, 2 cups of Brandy, 1 1/4 cup sugar, 1/2 cup honey, cinnamon sticks, and 8 cloves. Heat to dissolve the sugar and honey. I was hoping to burn off some of the alcohol so I boiled it for a minute.

20130923-201742.jpg
Take out one peach at a time and cut in half lengthwise. Do this carefully. Once peeled, those little buggers are slippery. I used a cheap serrated steak knife that was sharp enough to cut the peaches, but not sharp enough to go through my hand.

Freestone vs Clingstone

Peaches come in two varieties; Freestone and Clingstone. The difference is whether the flesh of the fruit attaches itself to the pit, or not. Before I started canning I never paid much attention or even cared what variety my peaches were. But let me tell you, trying to cut and pit Clingstone peaches is a huge pain in the butt. You have to cut the pit out, or rip it (and the surrounding flesh) out of the fruit. What you are left with are not the perfect peach slices you expect, but a smattering a peach chunks. Generally I find that farmers markets, produce specialty stores, and produce managers know whether peaches are freestone or not. The easiest was to check is to cut the peach in half and try to take the pit out. Don’t be afraid to ask before committing to buying them.

The peaches I got were some of the best freestones I’ve ever had. I twisted several of them open to have the pit fall out with no effort at all. Put the peach halves back in the water.

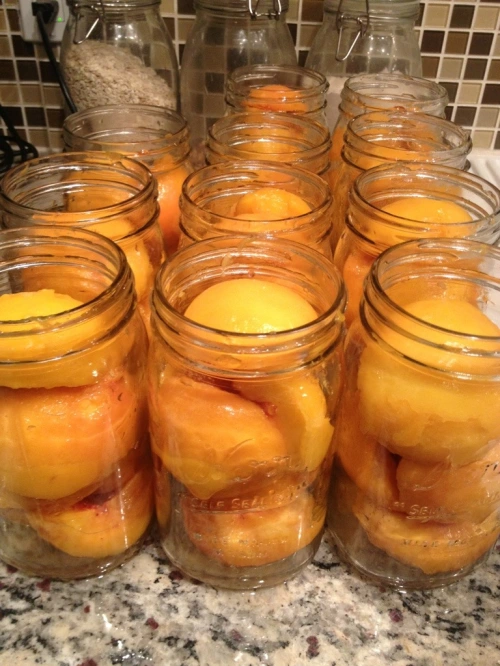
Start packing your peach halves in clean jars. Not gonna lie. These guys did not pack well. I fit about 6 halves in each quart. If you chose to go with quarters or eighths you might have better luck. But I wanted the halves.

20130923-205407.jpg
Fill each jar with the brine to 3/4″ headspace. Try to keep the cloves and cinnamon out. Put a lid and ring on each jar and then swirl it around to release the pockets of air between the peaches. Some of my jars went down quite a bit.

20130923-205609.jpg
Top off with syrup to bring it back to the proper headspace.

Fireball Whisky Peaches variation

Now, the book had the proportions listed above. And the brine filled 6 quarts. But I had 20lbs and 11 quarts. Imperial to metric conversion messes with me sometimes. You buy a 750ml bottle of brandy, you feel like that’s quite a bit. You don’t realize it’s only 3 cups until you’re halfway through a double batch of brandied peaches and out of brandy. See where I’m going with this?

So for the second half I walked to my liquor cabinet and stared. What could I use? Brandy, Marsala, Rum, Scotch, Amaretto, Fireball Wisky, Vermo….. Wait a minute. Cinnamon Whisky? With peaches? That sounds….really good!! I grabbed the bottle and returned to the kitchen. For a Fireball variation omit one cup of brandy and add 1 cup of Fireball brand Cinnamon Whisky.

20130923-210513.jpg
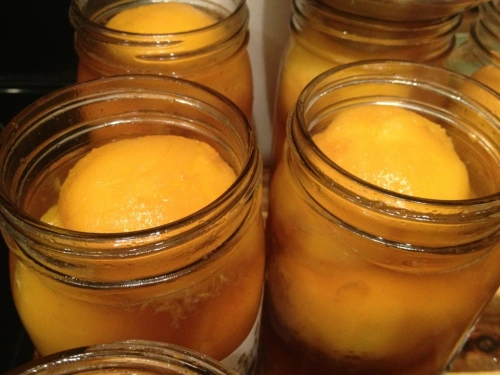
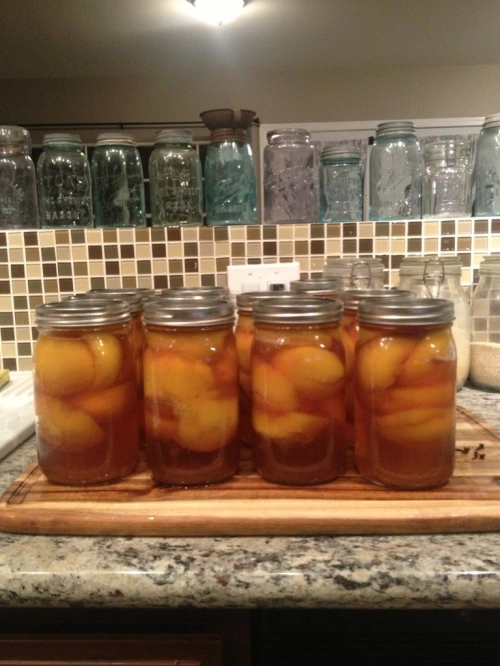
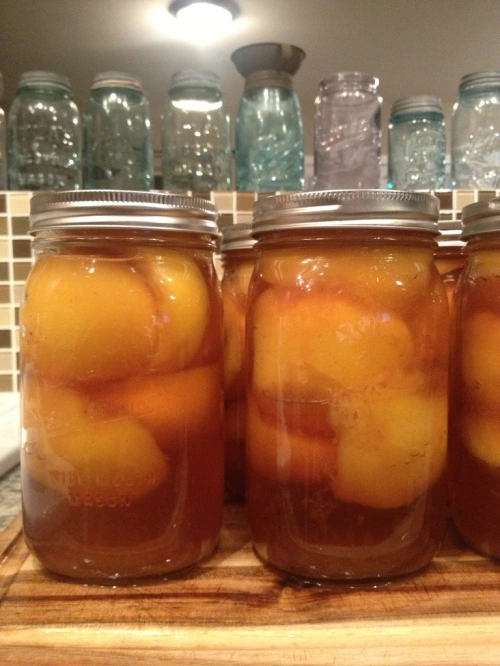
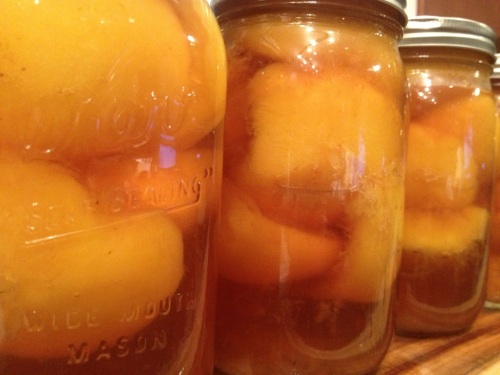
Wipe the rims of the jars, put on lids and rings, and water bath process for 30 minutes.

20130923-210637.jpg
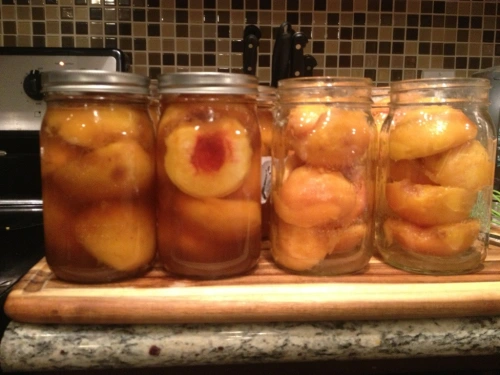
I wasn’t given any clear direction on this. But I’m guessing much like a pickle, these bad boys should sit for 21 days before opening. So that’s what I’m going to do.

I’m excited for them to be done though. I have thoughts of Warm Fireball Peaches on Vanilla Ice Cream, Brandied Peaches with a Pork Roast, or maybe a Peach Cobbler or Crumble made of a combination of the two. I’ll update the page when I break the seal on one.

20130923-210954.jpg

20130923-211008.jpg

20130923-211017.jpg
Let me know what your favorite canned peach variation is.

Happy Canning.

Buhsketty Sauce; Or How To Get Your Kids To Eat A Weeks Worth Of Vegetables

Canning stuff is all fine and good. But what are you supposed to do with it? I’m trying to post more recipes that use home canned items to give you a better idea of options that are out there.

When we canned 200lbs of tomatoes last year we considered making pasta sauce. But, not knowing what we’d use or in what quantity, we decided to stick with stewed tomatoes that could be made in to Italian sauce or a variety of other things.

Over the last 9 months I’ve tried a variety if techniques and recipes. This is my favorite recipe for pasta sauce.

Pasta Sauce
2 quarts canned tomatoes
Olive Oil
Onion
Garlic
Vegetables Of Your Choice
Red Wine
Balsamic Vinegar
Oregano
Basil
Thyme

20130910-010415.jpg

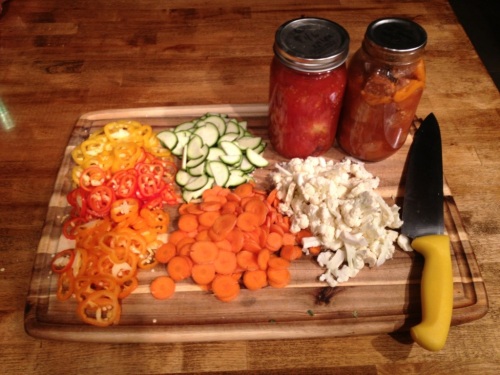
I always start this recipe by raiding the fridge and pulling out all the vegetables that have been forgotten over the last two weeks. Bell peppers, sweet peppers, that little 1/4 of a head of cauliflower that’s starting to get rubbery, the one crook neck squash, and that pack of mushrooms you found on clearance. Pretty much anything you find is good. I always have, and always use, carrots. They add the perfect sweetness to the sauce.

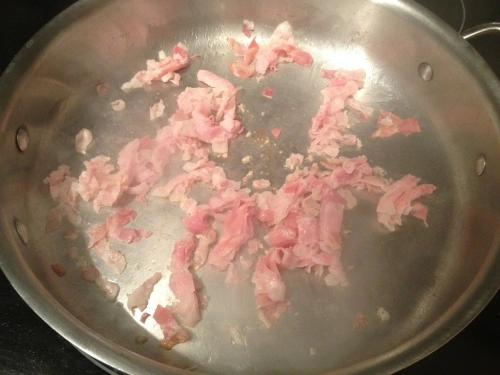
This time I happened to find some panchetta that needed using up. You could also add bacon, Italian sausage, or fat back if you have that. If you don’t just add more olive oil to the pan instead.

Start by rendering out the fat of whatever meat you’re using.

20130910-010525.jpg

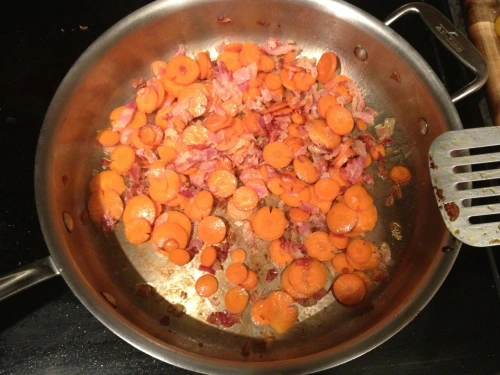
Chop the onion and garlic, and slice the carrot into thin rounds. Add them to the hot pan and cook until the onions are translucent and the carrots are slightly browned and softened.

20130910-010724.jpg
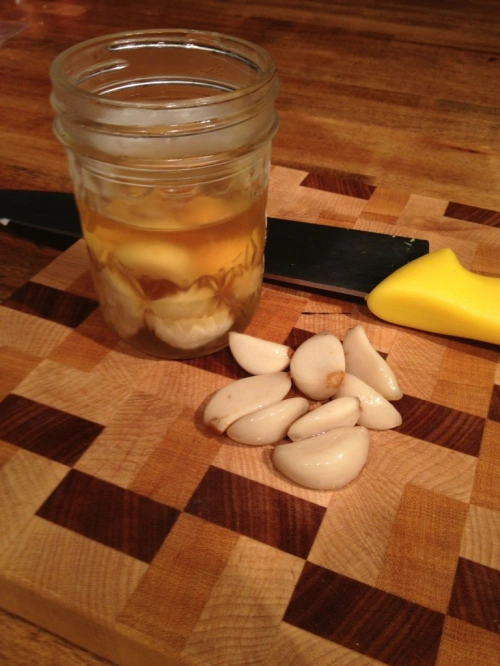
For this recipe I used pickled garlic that I made previously. Pickled garlic is great. It makes garlic last 6 times as long, preserves all the garlic flavor, but takes that acrid bite out of the cloves.

20130910-010935.jpg
Add the the vegetables in order of hardness. For instance, cauliflower, then zucchini, then peppers so everything cooks to the same consistency.

20130910-011122.jpg
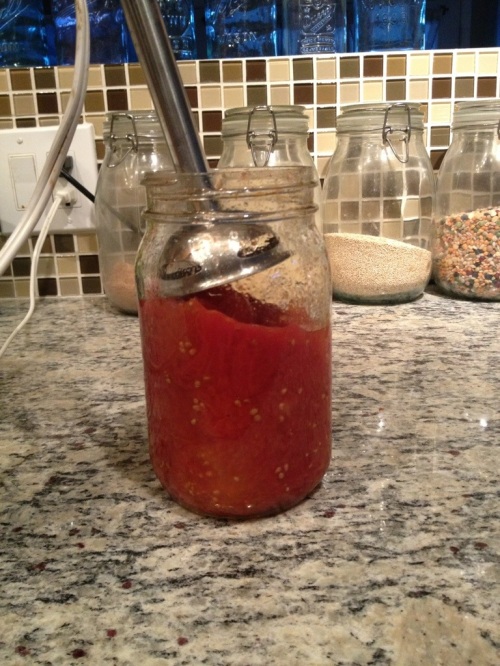
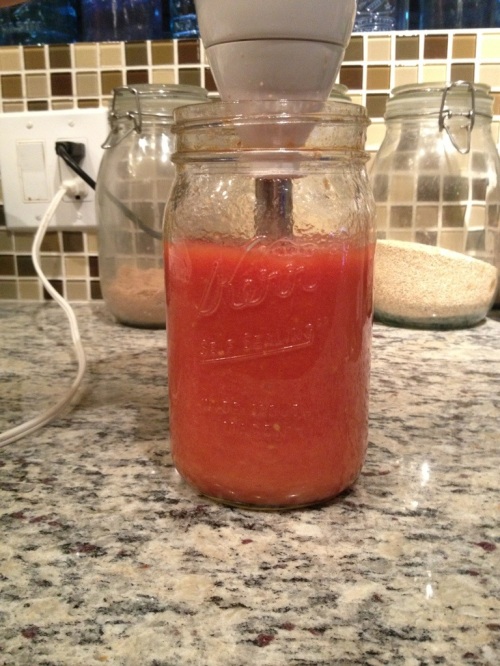
Take your tomatoes and drain the clear liquid off of them. I’ve found that tomatoes really hold the liquid trapped in the jar so I move them around with a fork to release it all. If you canned them in a regular mouth jar screw a blender base on the top. If you use widemouth jars an immersion blender will fit right in the top.

20130910-012743.jpg
Blend until the tomatoes are pureed.

20130910-012944.jpg
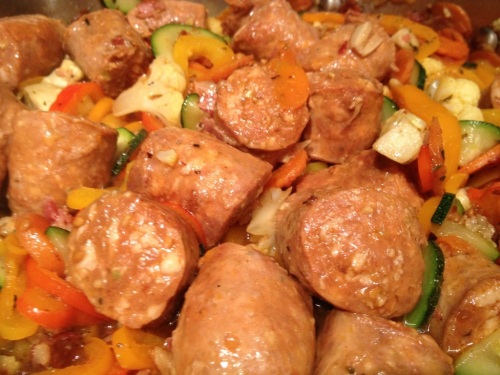
Add the tomato sauce to the pan and bring to a boil. This time around I decided to add a jar of hot Italian sausages that I canned a couple of posts ago.

20130910-013223.jpg
Since they are already in tomato sauce I just added them right in.

20130910-013428.jpg
Add a healthy pinch of oregano, basil and thyme; 2 tablespoons to 1/2 cup of any red wine; and 2 tablespoons to 1/4 cup of balsamic vinegar. I like my sauce on the more acidic side, and feel that balsamic adds some good depth to it overall, so I’m more heavy handed with it. Let the sauce simmer and reduce for a while.

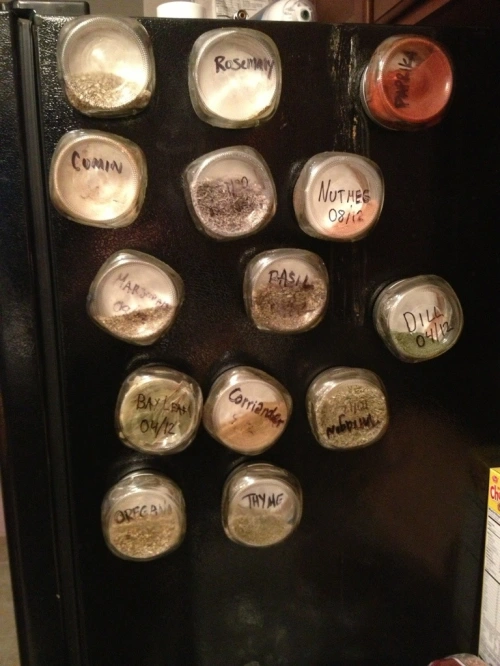
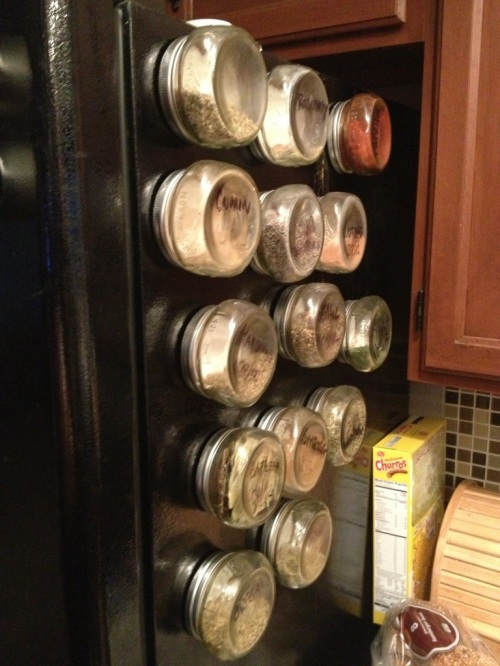
While we are waiting let’s talk about spices. Have you seen Ball’s little shorty half pints? I glued some hobby magnets to their lids and use em as spice jars on my fridge.

20130910-014519.jpg

20130910-014613.jpg
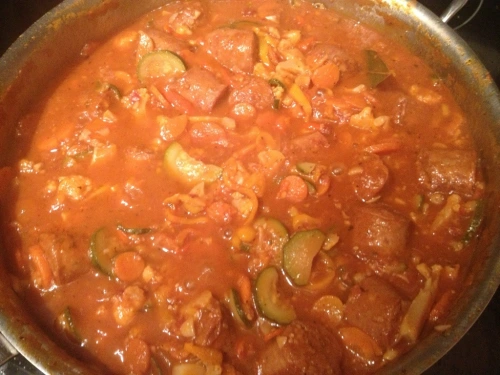
Ok, back to the sauce. The basic idea is to sautƩ the vegetables, puree the tomatoes, added herbs and acidity, and then simmer until it teaches the consistency you like. I prefer mine a little on the thicker side, so I let it reduce for a while.

20130910-014948.jpg

20130910-014959.jpg
I like this recipe because it cleans out my veggie drawer. Ill add portabellos one week and sweet mini peppers the next. Ive also added kale or spinach to the mix. But my favorite part is that my kids gobble it all up. All of it. They love spaghetti. They love the sauce. And they don’t even care what’s in it.

If you have a pasta sauce that uses home canned ingredients, please share it.

Happy canning!

Hot Italian Sausage In Tomato Sauce

Update: This recipe won a 1st place Blue Ribbon at the 2013 Arizona State Fair in the Canning Meat category.

Italian Sausage in Tomato Juice

20130716-184452.jpg

I’m trying to delve deeper in to the world of canning. To try more meats. And specifically, to can more things that are closer to ready to eat.

We were at the grocery store looking for pork to smoke (a whole different post) when I saw packages of hot Italian sausages on clearance for half price. In the past I would have frozen them. But I figure, why not put em in a jar?

The National Center For Home Preservation says to brown sausage and then process it in water, stock or tomato juice. My thought process was this: water would be a waste. Why remove all that flavor into water that would likely be drained out anyway. Stock sounded ok. But all I had was previously home canned smoked chicken stock. And that didn’t sound that great. So that left me with tomato juice, which I didn’t have. But what I did have was previously home canned tomatoes.

I figure hot italian sausage is destined to be in pasta sauce at some point in the future. So why not process it in tomatoes now? I grabbed a wide mouth quart of canned tomatoes off the shelf. The immersion blender fits right in the top, and in no time it was a quart of tomato puree. I put that in a pot with a pint of water to make my tomato juice.

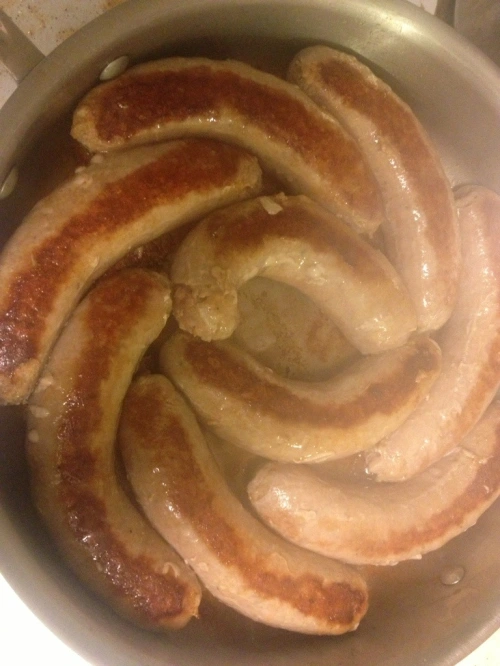
I placed the sausages in a pan and browned them on both sides.

20130716-174651.jpg
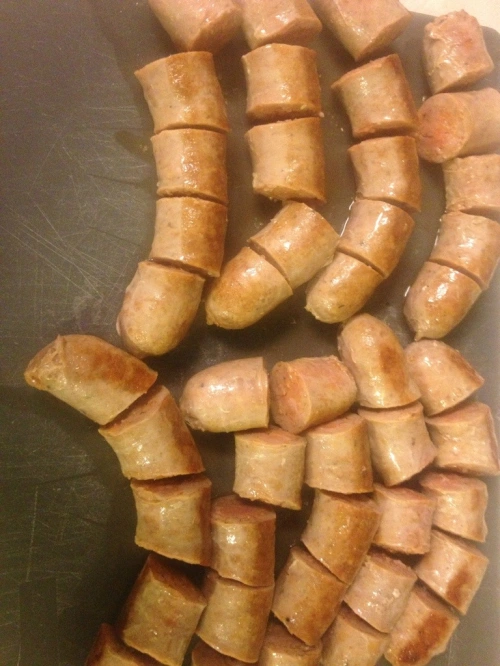
Once they were brown I cut each sausage in to 5 pieces.

20130716-174805.jpg
Place the pieces in a quart jar. This took a little bit if engineering. But luckily years of playing Tetris paid off. Just make sure you’re filling voids in the jars where you see them. In total I cooked 6 pounds of sausages that ended up filling 4 quarts.

Heat the tomato juice to a boil and cover the sausage pieces with the juice. Leave a 1″ headspace.

20130716-175403.jpg
Use a plastic utensil to remove any air pockets or bubbles. Why plastic, you ask? Because metal can cause micro scratches and fissures in the glass. This can be the catalyst for thermal fractures in the future.

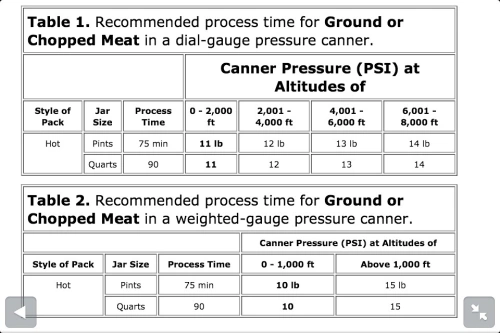
Top with lids and bands and place in a pressure canner at 11lbs for 75 min for pints or 90 min for quarts.

20130716-183309.jpg
Use this chart to adjust for altitude.

20130716-184022.jpg
Always turn off the heat and allow the pressure canner to cool by itself when the time is up.

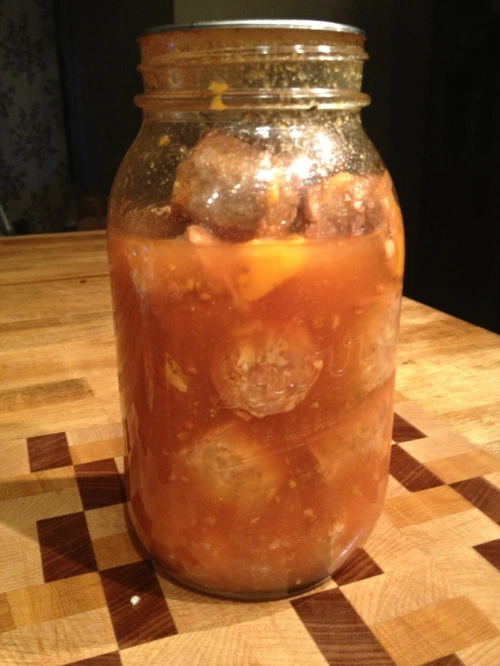
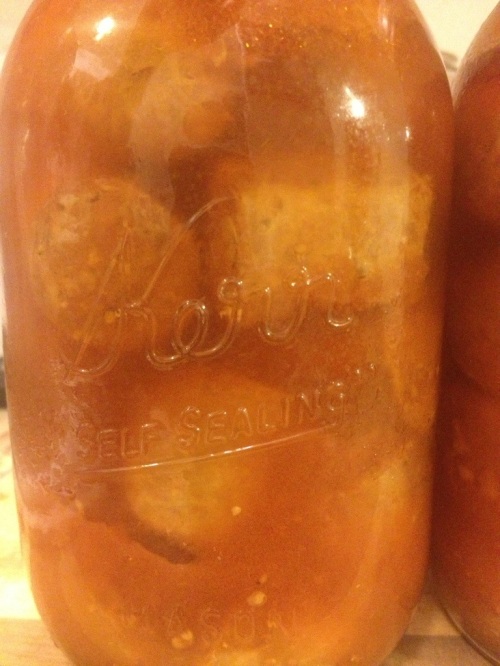
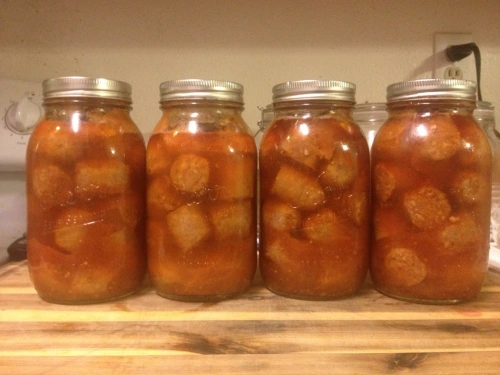
The finished product looks like this. Not too bad. Sometimes canned meat looks like a lab specimen. This looks more like Spaghettios.

20130716-184327.jpg
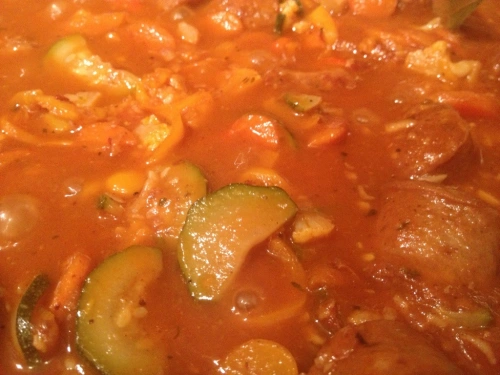
I’m huge on making my own pasta sauce right now. Generally it’s 2 quarts of tomatoes, onion, garlic, carrots, zucchini, squash, peppers, wine, balsamic, and spices. In theory a jar of sausages can be added, without taking the time to defrost and brown the sausages, cook them through, and letting them simmer in the sauce. The flavor’s already in there.

Happy canning.

I pickled a peck of picked peppers.

Ok, so that title is a bit misleading. I actually pickled 3 pounds of store bought peppers. But this was a total win of a recipe. I’ll be keeping these on hand forever.

I wanted to make pickled peppers for a while. Only problem was, for what? My younger kids don’t like too much spice, and I’m not real keen on strong heat. I didn’t want to make jars and jars of stuff just to sit around.

What I wanted was something closer to “Hots.” A blend of sweet and spicy peppers packed in oil that is popular on sandwiches on the east coast.

I found yellow chile peppers at the grocery store. Didn’t know much about them, but they looked good. And I thought they’d look good in a jar. So I grabbed a couple pounds and brought them home.

On the way home I stopped by Cost Plus and found their Weck Jars on sale. So of course I grabbed 3 of them as well. I know the price is high. But I love them. Weck jars have a presence to them. They just look so amazing with food in them. The added benefit of food only touching glass is a bonus.

Pickled Pepper Brine
5 C White Vinegar
1 C Water
4 t Pickling Salt
2 T Sugar

Start by rinsing and hand washing all your peppers. Pretty easy step.

20130610-233106.jpg
Cut the top off each pepper and then slice lengthwise.

20130610-233213.jpg
Pack the pepper halves in to jars. I pushed them down to compress them, but not enough to break them. My childhood Tetris experience definitely helped me out.

Combine the brine ingredients and bring to a boil. Pour the hot brine over the peppers leaving 1/2″ headspace.

20130610-233729.jpg
Add your lids and rings, or in case of Weck jars, rubber bands and lids.

Process for 10 minutes in a water bath.

20130610-234205.jpg
Skip ahead 3 weeks. I always let my pickled foods sit for 21 days before opening. It can be murder seeing them every day. But it’s totally worth it.

The end result were peppers that have a mild heat like green chiles, the tang of vinegar, and the subtle sweetness that you get with sweet peppers. It’s like a blend of sweet and hot peppers, but only one pepper. I couldn’t be happier.

Tonight I chopped a couple up and used added them to a bowl of mild chili. But I can totally see these sliced on a sandwich, mixed in with ground beef as a burger or meatloaf, or on a pizza. As soon as stock runs low I’ll be making more.

20130610-235139.jpg

20130610-235241.jpg

20130610-235840.jpg

Shank You Very Much

Braising. It’s one of my favorite ways of preparing meats. Braising uses moist heat and time and takes tougher, less expensive cuts that have huge flavor, and break them down into tender delicious dishes.

Im going to over two recipes today. Moroccan Lamb Shanks With White Bean Ragu which contains a variety of spices and seasonings and Beef Shanks In Red Wine that has less ingredients, but a full rich flavor.

The 1st recipe is not real picture intensive because I was too busy cooking. šŸ™‚

Moroccan Lamb Shanks with White Bean Ragu, Chick Pea Mash, and Roasted Cauliflower

4 Lamb shanks
1 T Cumin
1 t Turmeric
2 t Coriander
1/2 t Cayenne Pepper
1/2 t Paprika
1 t Fennel Seed
2 t Kosher Salt
1/2 t Black Pepper
2 t Mint
1 T Chopped Ginger
1 Onion
4 T Olive Oil
1 qt Canned Tomatoes
1 qt Stock
2 C White Wine
1/4 Preserved Lemon
1 Pint White Beans
Handful Of Spinach

2 can garbanzo beans/chick peas
1/4 C chopped Cilantro
1 C stock (chicken or veg)

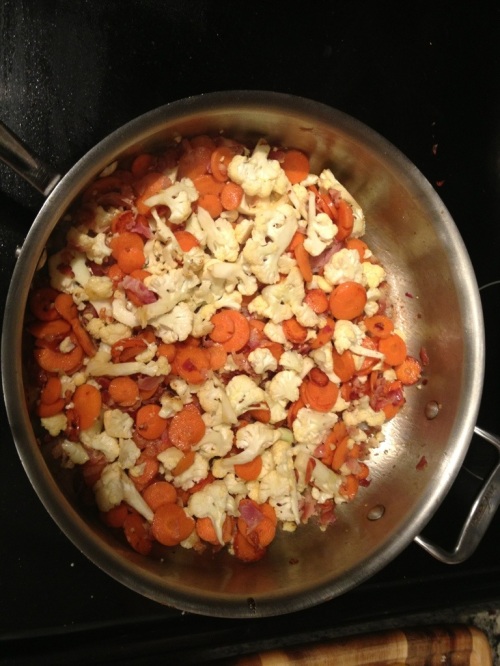
1 head cauliflower
2 T olive oil
1 t Salt
2 t Pepper

Oven at 425.

Heat half the oil on a skillet. Sear the lamb shanks on all sides until brown. In a dutch oven heat the other half of the oil and brown the onion. As the onion is cooking add the cumin, turmeric, coriander, cayenne pepper, paprika, and fennel seed. Add the white wine and deglaze the pan.

Once the shanks are seared add them to the dutch oven. Add salt and pepper. Stir in the canned tomatoes, stock, beans, ginger, and mint.

Take the preserved lemons and cut the flesh out. Filet the pith off of the zest. Rinse the zest well under cold water. Slice the zest crosswise into the thinest strips you can muster. Add the strips to the pot. Bring the contents to a boil.

Cover the dutch oven and place in the oven for approximately 2-3 hours. Add the handful of spinach 20 minutes before serving and stir it in the pot. The meat on the shank should be very tender and fall easily off the bone.

Core the cauliflower. Break off the florets from the base. Cut larger florets in to smaller pieces by cutting up the stems and separating by hand. Place the cauliflower in a pan or cookie sheet. Drizzle with oil and sprinkle with salt and pepper. Then toss to coat. Roast the cauliflower for 25-30 minutes.

Combine the chick peas and stock in a pot. Heat. Roughly mash the peas with a fork or potato masher. Heat through. Add the cilantro and stir to combine.

Serve the cauliflower and chick pea mash next to the shank. Top the shank with the bean and spinach ragu.

These shanks are so flavorful as you taste the lamb with bursts of coriander and lemon, heat from the cumin and paprika, and the depth of the turmeric and ginger. It seems like a lot. But the white beans and chick peas help mellow it out.

20130530-013346.jpg

Hope you enjoy.

For a dish with less spice, but just as much depth, try my 2nd dish.

Beef Shanks In Red Wine On Polenta

4 Beef shanks
1 Onion
2 Stalks celery
1 Large carrot
1 Bottle of red wine (merlot or cabernet)
4 Garlic cloves
1 Bunch fresh thyme
4 T Olive oil
2 t Salt
1 qt Beef stock

1 C Corn meal
4 C+ Vegetable Stock
3 T butter

Oven at 400.

20130530-013539.jpg
Heat the oil in a dutch oven. One at a time, sear the shanks on all sides. Remove the shanks as they are seared and store on a plate.

20130530-014149.jpg
Chop the onion and cut the carrot and celery into 1/2″ pieces. Add them to the pot and cook until the onions start to turn translucent.

20130530-014038.jpg
Add the red wine, beef stock, and thyme.

20130530-014423.jpg
Bring the contents to a boil and cook to reduce some of the liquid. This concentrates the flavor.

20130530-014637.jpg
Cover and place the pot in the oven for 3-3 1/2 hours. The meat with retract from the bone and the connective tissue and meat will be very tender.

20130530-014954.jpg
Heat the vegetable stock to a boil. Slowly pour in the corn meal while stirring vigorously. Reduce to a simmer. This is where polenta gets tricky. You want it to be thick, but not lumpy. If it get’s too thin, cook it longer. If it gets lumpy, slowly add mor stock. Continue to cook for 30 minutes, stirring frequently.

These were so tender that as I tried to remove them from the pan the bones slipped from the meat. I pocked the marrow back into the bone and tossed the bones aside.

Spoon the polenta on a plate. Place a shank on top and the add the cooked vegetables.

20130530-015944.jpg

How the Local Government Forced Me To Be An Artist

So I wanted to share a bit of the process that I went through to come up with my designs.

I love Mason jars with every fiber of my being. I was really trying to sell my canned jams, jellies, pickles etc. However after about two months of investigating I found out that the local government was interested in charging me approximately $900-$1200 in application fees, inspection fees, that fee and this fee. Then I would need to rent commercial kitchen space by the hour, and not only do all my prep work and processing there, but purchase separate equipment (knife, cutting board, canner, etc) to keep there….which requires storage fees. This would run upwards of $300 a month. And I haven’t even purchased jars, fruit, sugar, and pectin yet. As a side business it was not feasible financially. The alternative? Give my recipes to a processor and pay them to make my stuff. Uh, no. Making it is 2/3 of the fun.

Needless to say I was pretty disappointed. A bunch of nanny government rules and fees preventing me from doing something so simple. Unfortunately the cottage food law here only covers cakes, cookies, and breads and doesn’t allow for jams and pickles like Texas’ does.

But I’m an idea man. And I’ve never let a little thing like bureaucracy stop me. So I decided I’d try my hand at selling mason jar related things. My community has several farmers markets and a monthly art walk downtown. My thought was maybe I can get a table and sell mason jar soap dispensers and “sippy cups.” But that wasnt really enough, and certainly wouldn’t suffice for an art walk.

I’ve never fancied myself a very artistic person, and generally anything that I draw turns out looking like an eight-year-old did it. So I thought maybe I could buy really cool mason jar art in Etsy (there’s a ton of amazing water colors!) and resell it. But the art walk folks don’t just want art whole sellers, they want artists. And, a lot of the printed stuff is of the 4 public domain jar designs floating around. Boring. So I had to think some more.

Now, I remembered carving in linoleum blocks way back in junior high school, and enjoying that very much. I thought if revisit that. I grabbed a lino block kit from Hobby Lobby and brought it home. After my family went to bed (I work shift work, they don’t) I grabbed a beer, a mason jar, my block and a pencil. I sat at the table and willed the jar on to the block. I’d sketch and erase, sketch and erase, over and over. Until finally I came up with this:

20130109-203700.jpg

20130109-203912.jpg
Hmm, not horrible, I guess. So I grabbed the carving knife, and another beer, and 3 hours later I wound up with this:

20130109-204029.jpgWhich printed this:

20130109-204101.jpgNot too shabby. I posted pics on Facebook and Instagram and got some decent feedback. So I thought I’d try some more.

The 2nd night I sketched out jars had stuff in them. I clicked around online for inspiration since shading and reflection are important, and yet confusing when you’re cutting in negative. I wound up with this (pencil in the left, Sharpie on the right):

20130109-204337.jpgThis took longer to carve out, since there was more detail. But eventually I got this:

20130109-204450.jpgWhich printed:

20130109-204522.jpg I like this one because no one, not even I, know what’s in the jar. I’ve heard people say “I love the olives.” Or “those cherries look good” Who knows? Maybe they’re just marbles.

But together the two stamps gave me hope that maybe I’m not destined for failure.

20130109-204719.jpg
Now, my goal was to make one a night for as long as I could. The third night I grabbed more beer, more music, and I sat down to another blank canvas. This time I wanted a larger quart jar, as realistic as I could get it. So I sketched, and erased, and sketched some more. I wound up here:

20130109-205020.jpgI’m pretty proud of that one. For a guy that can’t draw, paint, or take good photographs I was feeling pretty good. Due to the number if letters and fine detail this took me two days to draw and cut. But eventually the block and stamp were done.

20130109-205512.jpg

20130109-205531.jpg

While I spent my night whittling away on blocks, I spent my day’s learning how to screenprint. I read a bunch of blogs online, talked to some friends with experience, and even borrowed a simple set up from a friend of mine. I also started setting up an Etsy store. I basically got everything on the website established except for items to sell, and did not make the store go live yet.

Over the next two days I printed my stamps on paper, scanned the image, printed it on a transparency, added one of my favorite canning phrases, and burned my own screens. Then I started printing.

I made towels:

20130109-213940.jpg

20130109-214016.jpg
Bags and backpacks:

20130109-214108.jpg

20130109-214125.jpg
And some shirts:

20130109-214218.jpg

20130109-214243.jpg
I took some of my towels and bags down to a local antique store where I took pictures of them with a more appropriate setting. And with that I “opened my store.”

It’s the American dream, right? I think the best part for me is that I’m not dependent on the income. In fact, I’m likely to spend any money I make on more jars, more fruit, more sugar and pectin, and more things to screen print. That’s an important part for me. This has to stay fun. I don’t want to get to the point where I feel like this is something I have to do but rather something I want to do. So, we’ll see how it goes. I’ve had decent success so far and have filled a handful of orders.

Last night I took a break from screenprinting everything and picked up another block and pencil. I’ve already done three different types of jars and I wanted to mix it up. So I decided to add some still life around the jar. After a couple hours of sketching and cutting, I came up with this:

20130109-214715.jpg
I haven’t burned this image into a screen yet, and haven’t decided whether or not I will. Although a couple of my friends say that they really enjoy this one. I think cutting the woodblocks is at least half of the entertainment for me. Really it comes down to having 2 to 3 hours at night where I can just relax and wind down, knock back a couple beers, listen to some light music, and cut chunks out of blocks. And right now, that works for me.

20130109-214856.jpg
If you’re interested in anything here, the link to my shop is etsy.com/shop/MasonJarsMixingBowls

If you have any ideas for wood block cuts I’d love to hear them. And if you have anything to share, positive or negative, about the ones I’ve already done I’d love to hear that too.

Happy canning.
I’ve entered the screenprinting business. Here’s a link to my Mason Jar related Etsy Store MasonJarsMixingBowls

I’ve entered the screenprinting business. Here’s a link to my Mason Jar related Etsy Store MasonJarsMixingBowls

I promise my followers that Iā€™m not going to spam you guys with a bunch of Etsy links from here on out.Ā  But Iā€™m kind of excited.Ā  I decided to sketch some mason jar designs on linoleum blocks, carve them out, make stamps, turn those stamps in to silk screens, and then print some towels, shirts, bags, and things.Ā  So, if you’re in to canning, pickling, mason jars, and cooking (which you are if you’re reading my blog) why not swing by to see if you see something you like.Ā  Everything is crafted with the same amount of care that I put in to my canning. Ā  I’m mason jar obsessed and this is just another part of the adventure.

Cowboy Candy; Or How To Make Weapons Grade Pepper Spray At Home

When your passion is putting food in jars people tend to find out. Most of my friends know that I spend many weekends canning in the kitchen. They also know that I hate seeing food wasted and generally will try to find some way to preserve anything anyone drops off on my doorstep. This has its advantages and disadvantages. One of the nicer points is that generally I get volumes of free produce. The drawback however is dealing with my wife when she comes home to find approximately 300 pounds of lemons on the countertop.

This weekend I returned from a short trip back east to a message from a friend who told me that he had lemons and jalapenos waiting for me. Lemons are easy. Limoncello and preserved lemons, as well as candy lemons are an annual thing for me. But jalapeƱos I haven’t done yet. So I started thinking of creative ways that I could use my hot little friends.

After the success of Dilly Beans I decided its time for me to go back to canning roots and try some of the tried and true local gems that people have been making for ages. Forget innovation. Forget variation. Some things are good for a reason.

So here we go. Another recipe I’ve heard about for a while but had never tried is Cowboy Candy. Cowboy Candy is candied jalapeƱo peppers. Just like with the beans, people rave about these things. They talk about the stuff like it’s crack. Like once you start you’re gonna be fiending in your bedroom crying for another jar. Every recipe I’ve come across comes with the same warning. “Make more than you expect. You’ll go through faster than you think. Your friends will take your entire inventory.” If everyone is this wild about them they must be onto something.

They’re supposed to be amazing on burgers, with cheese and/or crackers, on top of meat as a glaze, as a condiment or straight out of the jar with a fork.

20121212-021224.jpgThe following recipe is found all over the Internet. I don’t even know who to give credit to at this point. Maybe it’s public domain by now? I found it the recipe I followed on a Facebook canning group. But you can find it, word for word, on several sites.

Cowboy Candy
3lbs JalapeƱos
2 C Apple Cider Vinegar
6 Cups Sugar
1/2 t Turmeric
1/2 t Celery Seed
3 t Minced Garlic
1 t Cayenne Pepper

The peppers that my friend brought over were red and bit small. So I decided to pick up some larger green ones from the grocery store. Together I felt they made a nice mix, added some variety, and looked appropriate for the holiday season. I used 2 pounds of green and 1 pound of red peppers.

20121212-021606.jpg I’ve made many recipes with many hot peppers in them before and generally don’t wear gloves. However this time you’re going to be slicing at least 3 pounds of jalapeno peppers over the course of probably 20 minutes. It is well worth your time to wear a pair of latex or rubber gloves during this process. You will appreciate this when you need to rub your eye, scratch your nose, or God forbid, use the restroom.

Start by slicing off the very top of the pepper to remove the stem. Then slice the pepper into little 1/4 inch rounds.

20121212-022003.jpg

20121212-022325.jpgWhen you are finished set the peppers aside. In a large pot combine the apple cider vinegar, sugar, and spices. This is the one point where I deviated from the recipe. I read online that many people found this recipe to be very sweet and they reduced the sugar. I reduced the sugar by one cup. However, I doubled the recipe for the brine.

20121212-022404.jpg Bring the brine to a boil, reduce the heat, and simmer for five minutes. Then add the pepper slices and simmer for four minutes. You don’t want to be standing right over the pot while the stuff is boiling. The combination of vinegar and peppers coming up into your eyes and lungs is quite overwhelming. I had the fan on over the stove throughout. Use a slotted spoon to remove the peppers and place them into clean jars. Leave 1/4 inch headspace.

20121212-022628.jpgReturn the remaining brine to the heat. Boil it hard for six minutes. Then use a ladle to pour the brine over your peppers in the jars, again leaving headspace. Use a clean paper towel and a dab of white vinegar to clean the rims of the jars.
Process half pints for 10 minutes and pints for 15.

20121212-023745.jpg
It was suggested that the leftover brine makes an excellent marinade, addition to sauces, or a condiment in and of itself. I went ahead and jarred up what I had left and processed it alongside the peppers.

As with everything pickled these bad boys need to sit for a little while. The suggested time is three weeks. We’ll see how long these last in my pantry before the wife finds them.

I also plan on adding these to my repertoire of easy to make Christmas gifts. Although slicing the jalapenos took a little bit of time the actual process for cooking and preparing the cowboy candy was very easy.

20121212-023826.jpg

20121212-023835.jpg

Do you have a favorite family recipe for pickled or candied produce?

Happy canning.

Of Cranberries and Apples

I waited and waited for cranberries to drop below $1 a bag. And my favorite low cost produce store sold out without ever reaching that price. So I finally folded and bought 15 bags at $1.50 a piece. I think this is the cheapest I’ll find them.

I had an initial game plan. Half would be Odessa’s, to make Odessa’s Cranberry Sauce. The other half was to be mine to make a sort of apple cranberry chutney I’ve been wanting to try.

Unfortunately (fortunately?) the Internet is an amazing pool of awesome information and ideas, and I stumbled across something I couldn’t resist. Pickled Cranberries.

And with those ideas stirring in my head I went in to the kitchen. 9 bags of cranberries for Odessa, two to pickle, and four for chutney. Or so I thought.

I should mention that this post won’t be very picture heavy, cause I was cooking my ass off tonight. Felt like everything on every burner needed my constant attention. And I was interrupted by two mishaps. One by my kid, and one my own doing.

Odessa started with her recipe first. It’s still my favorite cranberry sauce. And I could have two jars a month and be happy.

Cranberry Apple Chutney

24oz cranberries
20 apples, cored and rough chopped
9 cups sugar
4 lemons, zested and juiced
4 cups water.

This is a recipe that I found through Instagram, and then modified. The original recipe, as it was provided to me called for 8 cups of apples, 4 cups of cranberries, 6 cups of sugar, and one lemon. I based my math off of the amount of cranberries that I had left. But that was nearly 16 cups and I didn’t have it in me to add 24 cups of sugar to something.

I chose to go with Granny Smith and Fuji apples to stick with the red and green holiday theme.

20121128-014819.jpgFor what it’s worth, Fuji apples do not hold up to cooking, a little key point that I forgot. Opt for Lady Pink, Braeburn, Honey Crisp or other firm apple instead, if given the choice.

I used my handy dandy apple corer/slicer and cut the apples into 6 slices. Then I rough chopped the slices into pieces.

20121128-014748.jpgPut the water in a large pot, heat, and add the cranberries. I gave the berries about a five minute head start over the apples. As the cranberries start popping add your apples to the pot. Once the cranberries and apples start to cook and release more liquid add your sugar as well and stir thoroughly mix. Cook for approximately 10 to 15 minutes until the cranberries and apples begin to cook down. Then add your lemon zest and juice.

20121128-015454.jpg I tasted the chutney after originally having only added 6 cups of sugar. That still seemed a bit too tart. I added another 3 cups of sugar, bringing the total to nine, simmered, and taste it again. That seemed like a good amount.

Continue to cook for approximately 10 to 15 minutes until the mixture thickens.

20121128-015541.jpg Pour your cranberry chutney into clean mason jars, apply your lid and ring.

20121128-015644.jpg Process in a water bath canner for 10 minutes for pints.

20121128-015953.jpg

20121128-020016.jpg This ended up making 14 pints.

As I was looking around the web for cranberry recipes I came across an idea for pickled cranberries. Pickling is my most recent obsession. The author suggested adding a spoonful of pickled cranberries to club soda and gin, or tossing them in olive oil and topping a goat cheese and arugula salad with them. This sounded way too delicious to pass up.

Pickled Cranberries
24oz Cranberries
3 cups apple cider vinegar
3 cups sugar
2 cinnamon sticks
1 teaspoon allspice berries
1/2 teaspoon whole cloves
1/2 teaspoon black peppercorns
1/4 teaspoon juniper berries (I didn’t have these, and didn’t want to run out to the store. I’ll add them next time)

Place the allspice, clove, peppercorns, and juniper berries in cheesecloth and tie off.

Combine the vinegar, sugar, cinnamon sticks, and spice bundle in a pot and heat to a boil. Add the cranberries and cook for 5-10 minutes until the cranberries have popped. Bring the mixture back to a full boil.

Remove the spice bundle and cinnamon sticks and set aside. Ladle the cranberries into jars, and then add brine to the 1/2″ headspace. Cut the cinnamon sticks in half and add a piece to each jar.

Lids, rings, and 10 minutes in a water bath. As these are pickles, let them sit for a while before opening and enjoying.

20121128-021008.jpg

20121128-021048.jpg
**Update**
The wife cracked a jar of the pickled cranberries today and made herself a cocktail of tonic water, gin, and some cranberries. Not long thereafter she texted “OMG these things are awesome.” I asked her to take a picture, and classy it up a bit so I could post it here. Ladies and gentlemen, my wife’s classy picture of her cocktail:

20121128-204027.jpg

20121128-210029.jpg

Cranberry Pickled Apple Slices
It was at this point that I thought I was done. But I noticed that I had this gorgeous red tinted, cranberry scented brine left in the pot. I couldn’t bring myself to toss it out. I decided to be adventurous. I took two Fuji apples a d two Granny Smith apples and cored and sliced them. I returned the spice bundle to the brine and added the apple slices. My intent was just to cook them to the point of being soft. However at this very moment my three-year-old walked into the kitchen and told me that he had broken some glass. When I went to investigate I found that he had made his way into my canning pantry and was playing “how high can I build a tower of jelly jars.” Turns out the answer is seven. The tower had fallen and a jar if Strawberry Citrus Jam met its demise. In the time it took me to deal with and clean that, my apple over cooked. But, oh well, not the end of the world.

The apples were added to jars and covered with brine. Then processed for 10 minutes. I’ll probably warm them and use them to top vanilla ice cream. Or serve them as a side to pork chops.

20121128-021629.jpg

20121128-021651.jpg
So there’s 4 things you can do with cranberries and apples. I’m definitely considering those pickled cranberries as Christmas gift idea #2. Show up to a holiday party with a couple jars of those bad boys, some vodka, gin, and mixers? You’ll be the hot of the party.

As I said earlier, I’m on a huge pickling kick right now. If you have a great recipe, or know of a must have pickling book, please share.

Happy canning.

Enter your email address to follow this blog and receive notifications of new posts by email.
Join 368 other subscribers