Posts Tagged 'homesteading'

Meals In A Jar; Sloppy Joes

I have a 12 day Mule Deer hunt coming up next week. In preparation, I was trying to come up with self contained meals in mason jars, to save on my finite cooler space.

One of the first things I thought of was Sloppy Joes. But instead of just the sauce, like a can of Manwich, I wanted the meat in the recipe too.

I did some searching around and found a base recipe to work off of. I was originally given the recipe by a member of a canning group I belong to. But I also found the same recipe a couple of places online. So I’m not sure who get’s credit. Either way, I modified it slightly.

Ready To Go Sloppy Joes

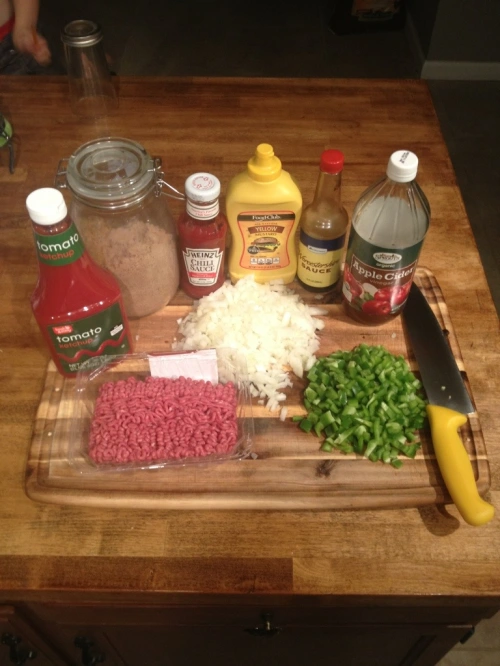
2lbs Ground Beef
1 C Chopped Onion
3/4 C Chopped Green Bell Pepper
1 1/2 C Catsup/Ketchup (Use Heinz or Hunt, or make sure your brand has no thickeners added)
2 T Brown Sugar
2 T Apple Cider Vinegar
3 T Heinz Chili Sauce
3 t Worcestershire Sauce
2 t Yellow Mustard
1/4 C Water

Yield 3 Pints

20131025-023258.jpg
For complete transparency, know that I doubled my recipe, and also used 3lbs of beef and 1lb of chicken.

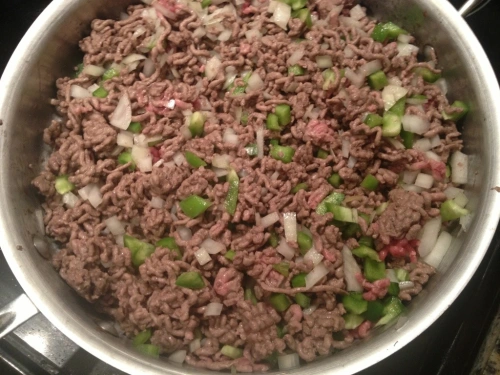
Start by adding your beef, onion, and green pepper to a hot skillet. If you chose to use chicken, add some olive oil to the pan first. If you double your recipe, this is easier to do in two batches

20131025-023620.jpg
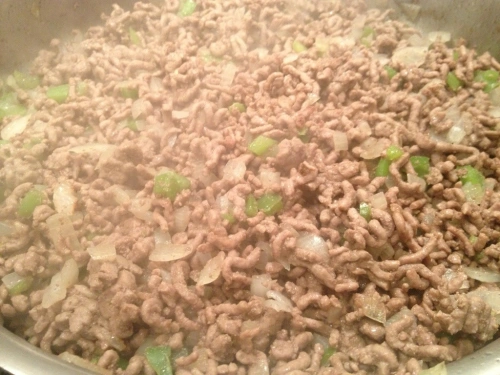
Brown the ground beef and cook the onions to translucence. Depending on the fat content of your beef you may need to drain the fat off. Mine was lean enough that it didn’t need it.

20131025-023643.jpg
I prepped by putting my ketchup/catsup (that’s a whole different debate), Worcestershire Sauce, Chili Sauce, and Mustard in one bowl, and my brown sugar, cider and water in another. Stirring to dissolve the sugar.
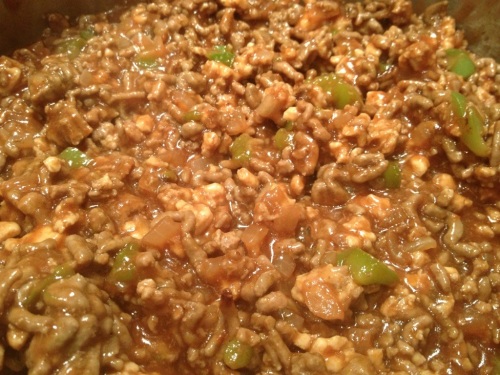
When the beef and veggies are done, add the remaining ingredients and stir to combine.

20131025-023951.jpg
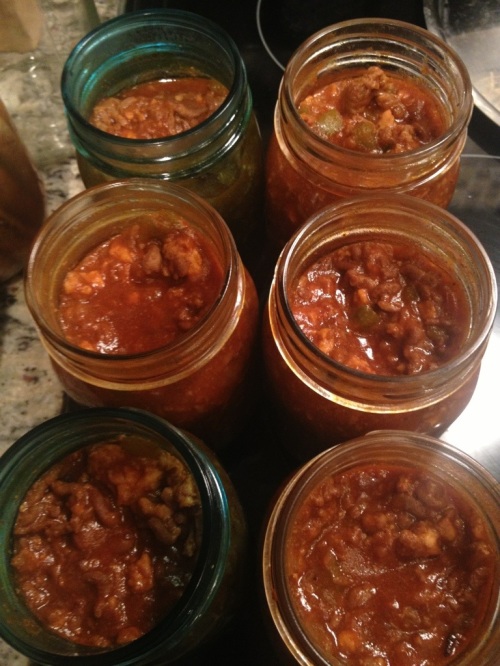
Bring everything to a boil, reduce to a simmer, cover, and cook for 20 minutes. After 20 minutes I took the lid off and found that it was a bit runnier than I’d like. I kept the lid off and stirred it until it reduced to a consistency I wanted. Fill your clean mason jars to a 1″ headspace.

20131025-024158.jpg
Top with your heated lids and finger tightened rings. Process at 11lbs for 75 minutes for pint, and 90 minutes for quarts. Remember, you can’t fit much more than a half a cup of meat onto one hamburger bun. That’s four servings per pint and eight servings per quart.

20131025-024342.jpg
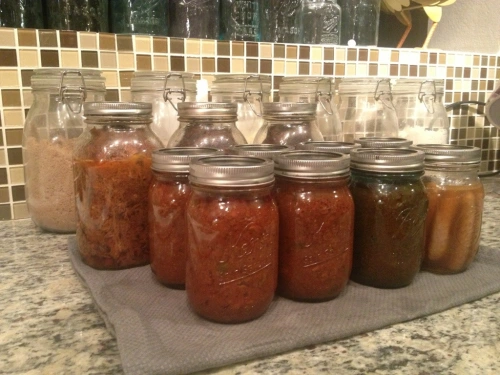
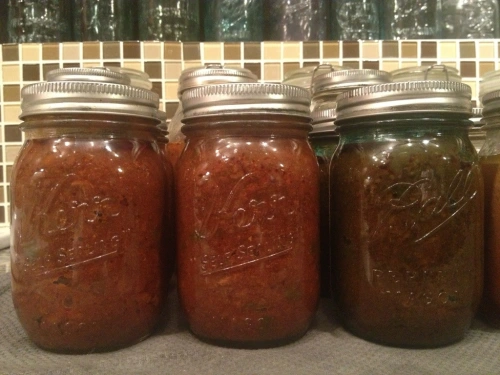
I haven’t cracked these open yet, as my hunting trip is next week. I’ll definitely come back and update the bottom of this post with a review. But my eight-year-old son and I ate the little bit of leftovers that wouldn’t fill a seventh jar and so far we are both very happy with it. He has requested that I make them from scratch for dinner. Which really isn’t a bad idea since it too less than 30 min to make.

20131025-024459.jpg
The flavor was very comparable to a can of Manwitch sauce. Maybe a touch sweeter. Next time I will add less sugar and try to spice it up just a little bit more, maybe with some hot sauce. But we’ll see what it tastes like out of the jar.

20131025-024603.jpg
If you have ideas for self-contained meals that can be opened from a jar, heated, and served please share or link them in the comments.

Happy canning!

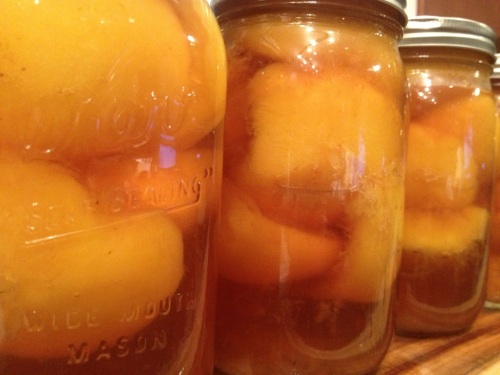
Brandied Peaches and Fireball Whisky Peaches

I was offered to go in halfsies on a case of 40lbs of peaches. I didn’t really have time for 20lbs of peaches. But I’m a sucker for a deal. Plus, I was told these were really good peaches. So I agreed.

When they came in I was in the middle of my work week. During my work week all I do is work. So they had to wait. On Saturday my friend told me he fit them in his fridge since they were getting very ripe. I picked them up Saturday night, and put them in my fridge.

Sunday I got up, pulled them out and stared at them. Stared and stared. I broke out my Ball Blue Book, The Joy of Pickling, and Put ‘Em Up. I read recipes and browsed websites. What should I do with the peaches?

I’d seen other’s talking about brandied peaches before. I checked my liquor cabinet and pantry and found that I had everything I needed. And compared to jams, chutneys, barbecue sauces, etc, brandied peaches seemed a bit more quick and easy to get done.

This recipe is adapted from the book Put ‘Em Up.

Brandied Peaches
10lbs of Peaches
5 c Water
2 c Brandy
1 1/4 c Sugar
1/2 c Honey
2 Cinnamon Sticks
8 Cloves

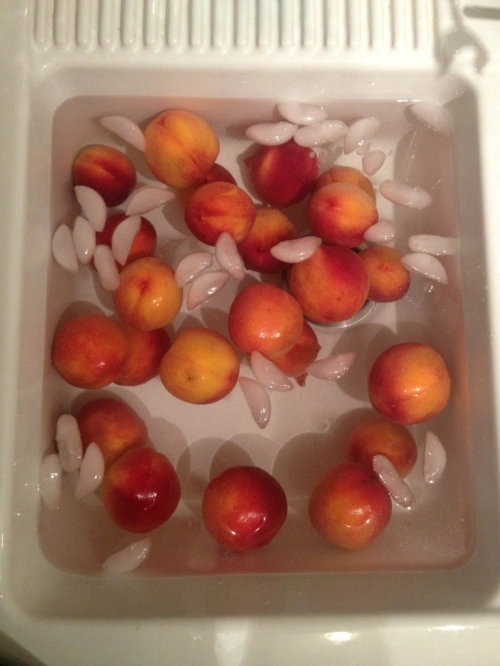
Get a pot of water to a rolling boil. Fill another pot, large bowl, or sink with ice water. I prefer to vigorously scrub out my sink, and then use that. Add some Fruit Fresh or crushed Vitamin C tablets in to the water to prevent browning.

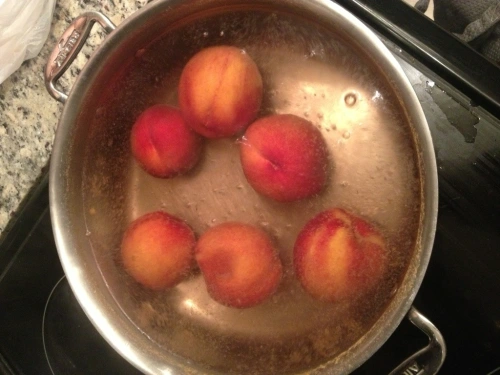
Put a few peaches at a time in the boiling water. The less ripe your peaches are, the longer they need to blanch. My peaches only took a minute. Don’t overfill your pot either. The peaches will cool the water down, and likely you’ll overcook the ones on the bottom.

20130923-200109.jpg
Pull the peaches out with a slotted spoon or a pair of tongues and move them to the ice water. For a small batch like 10lbs, blanch and cool the whole batch. If you’re processing hundreds of pounds (you should have a helper) work in batches.

20130923-200701.jpg
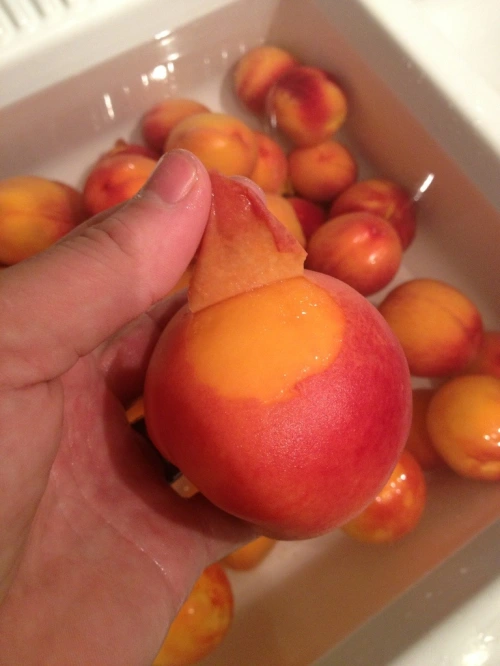
When you pull the peaches out the skins should slough right off. I find that the skins kinda get hung up on the very bottom point of the peach. I use the palm of my hand to rub the peach and break the skin off. Then I peel it off. Toss the peeled peaches back in the water.

20130923-201305.jpg
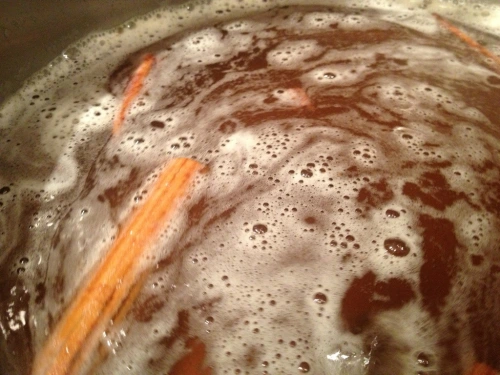
In a non-reactive pot combine 5 cups of water, 2 cups of Brandy, 1 1/4 cup sugar, 1/2 cup honey, cinnamon sticks, and 8 cloves. Heat to dissolve the sugar and honey. I was hoping to burn off some of the alcohol so I boiled it for a minute.

20130923-201742.jpg
Take out one peach at a time and cut in half lengthwise. Do this carefully. Once peeled, those little buggers are slippery. I used a cheap serrated steak knife that was sharp enough to cut the peaches, but not sharp enough to go through my hand.

Freestone vs Clingstone

Peaches come in two varieties; Freestone and Clingstone. The difference is whether the flesh of the fruit attaches itself to the pit, or not. Before I started canning I never paid much attention or even cared what variety my peaches were. But let me tell you, trying to cut and pit Clingstone peaches is a huge pain in the butt. You have to cut the pit out, or rip it (and the surrounding flesh) out of the fruit. What you are left with are not the perfect peach slices you expect, but a smattering a peach chunks. Generally I find that farmers markets, produce specialty stores, and produce managers know whether peaches are freestone or not. The easiest was to check is to cut the peach in half and try to take the pit out. Don’t be afraid to ask before committing to buying them.

The peaches I got were some of the best freestones I’ve ever had. I twisted several of them open to have the pit fall out with no effort at all. Put the peach halves back in the water.

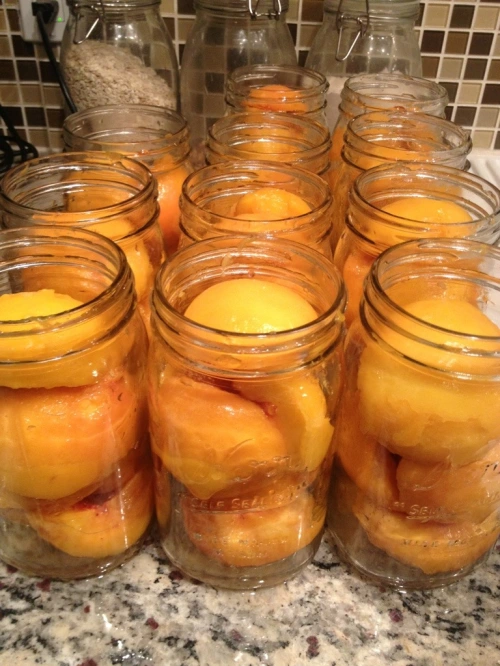
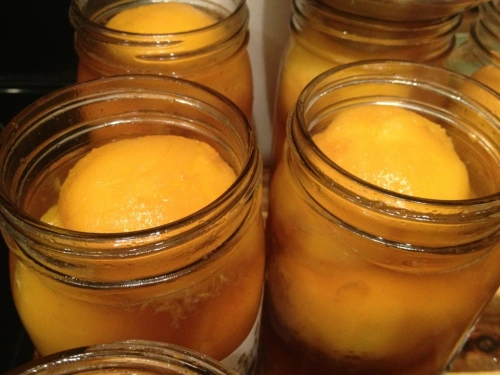
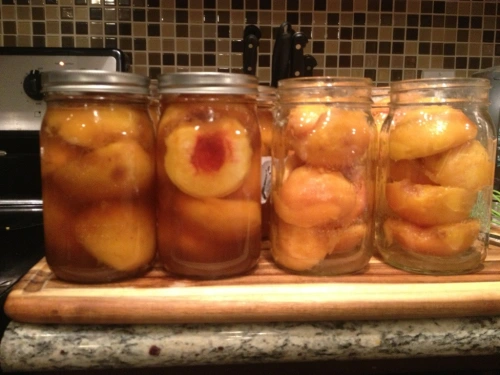
Start packing your peach halves in clean jars. Not gonna lie. These guys did not pack well. I fit about 6 halves in each quart. If you chose to go with quarters or eighths you might have better luck. But I wanted the halves.

20130923-205407.jpg
Fill each jar with the brine to 3/4″ headspace. Try to keep the cloves and cinnamon out. Put a lid and ring on each jar and then swirl it around to release the pockets of air between the peaches. Some of my jars went down quite a bit.

20130923-205609.jpg
Top off with syrup to bring it back to the proper headspace.

Fireball Whisky Peaches variation

Now, the book had the proportions listed above. And the brine filled 6 quarts. But I had 20lbs and 11 quarts. Imperial to metric conversion messes with me sometimes. You buy a 750ml bottle of brandy, you feel like that’s quite a bit. You don’t realize it’s only 3 cups until you’re halfway through a double batch of brandied peaches and out of brandy. See where I’m going with this?

So for the second half I walked to my liquor cabinet and stared. What could I use? Brandy, Marsala, Rum, Scotch, Amaretto, Fireball Wisky, Vermo….. Wait a minute. Cinnamon Whisky? With peaches? That sounds….really good!! I grabbed the bottle and returned to the kitchen. For a Fireball variation omit one cup of brandy and add 1 cup of Fireball brand Cinnamon Whisky.

20130923-210513.jpg
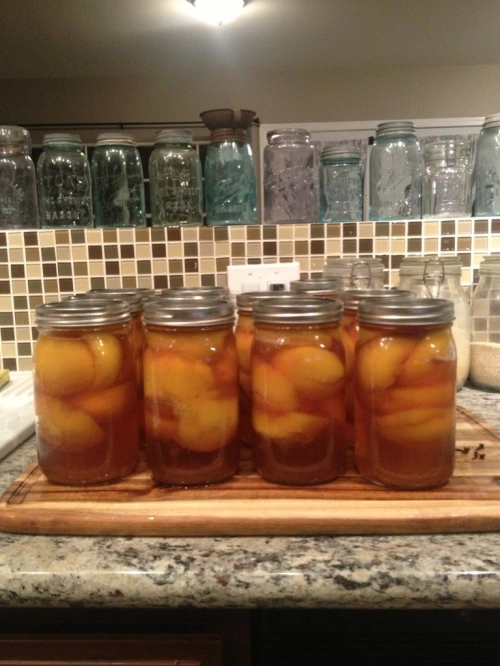
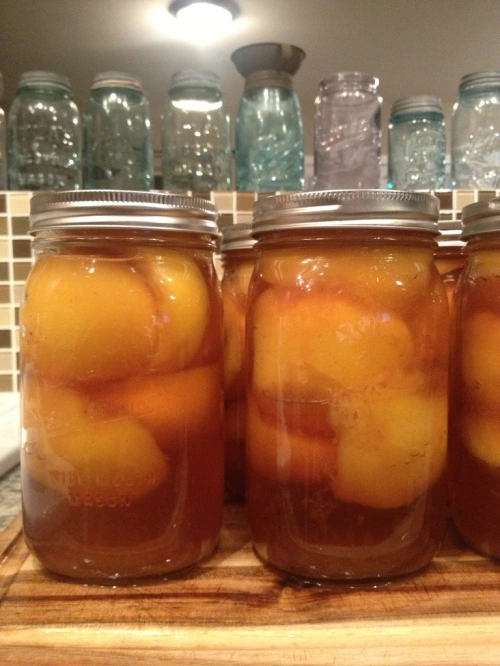
Wipe the rims of the jars, put on lids and rings, and water bath process for 30 minutes.

20130923-210637.jpg
I wasn’t given any clear direction on this. But I’m guessing much like a pickle, these bad boys should sit for 21 days before opening. So that’s what I’m going to do.

I’m excited for them to be done though. I have thoughts of Warm Fireball Peaches on Vanilla Ice Cream, Brandied Peaches with a Pork Roast, or maybe a Peach Cobbler or Crumble made of a combination of the two. I’ll update the page when I break the seal on one.

20130923-210954.jpg

20130923-211008.jpg

20130923-211017.jpg
Let me know what your favorite canned peach variation is.

Happy Canning.

Come meet the girls

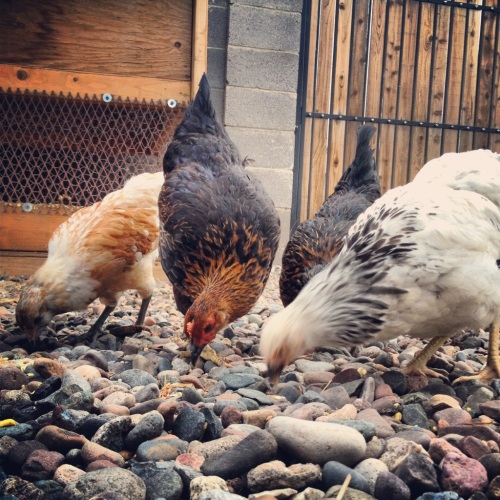
This will be a very brief post. But it covers some things. First, we moved!! We finally bought a house. Which means our homesteading dreams are coming true.

We bought a modest house on 9600 sq ft, with a huge front porch in a no HOA neighborhood. The front yard will (hopefully) soon be a garden and or hard.

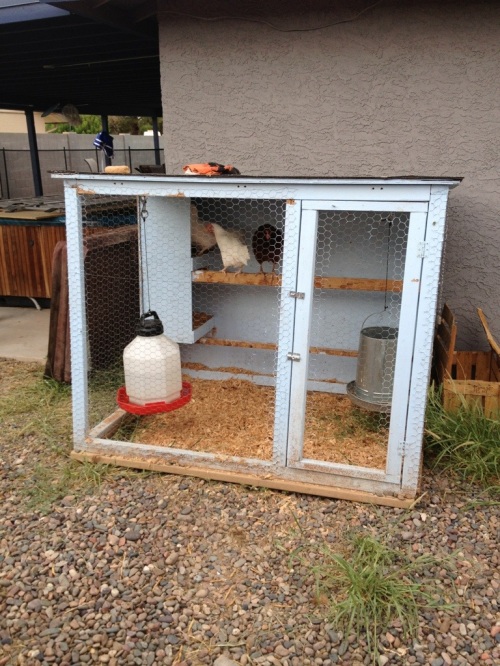
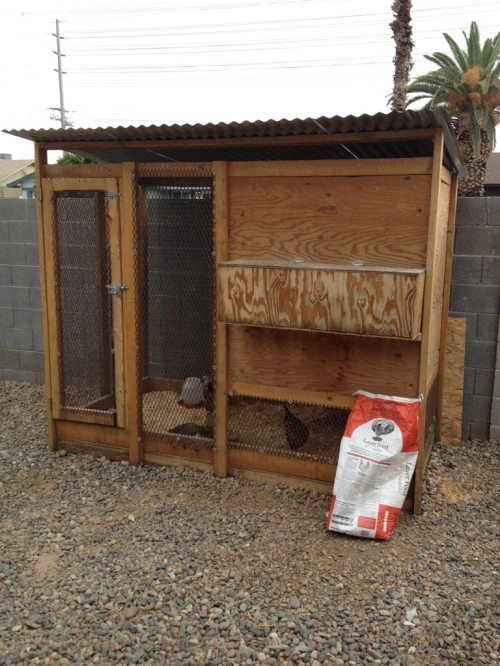
But currently the most exciting thing is…we got chickens!! I bought a coop and supplies off Craigslist. 4 days later a friend (who also moved) offered me his bigger coop and existing flock, which I gladly took in.

The coop we bought is a 4x6x4.

20130910-001331.jpg

The coop we ended up inheriting is 4x8x8.

20130910-001500.jpg

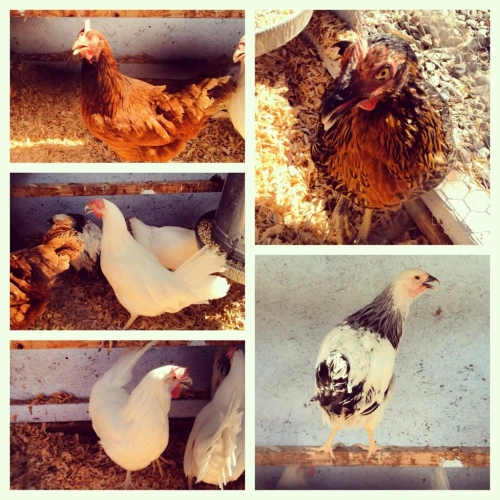
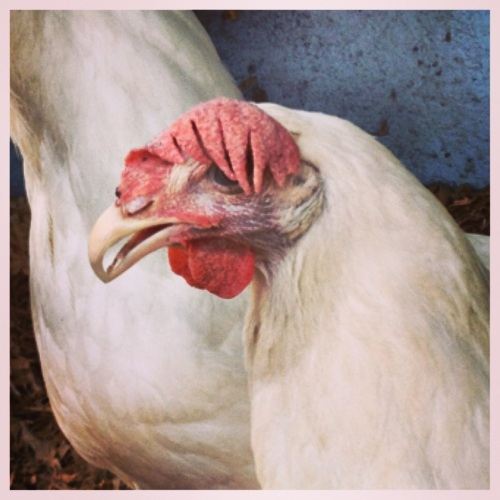
We adopted two Leghorns and a Rhode Island Red. Then I bought a Black Star and a Columbian Wyandotte.

20130910-001616.jpg
Since the. We have added a 2nd Black Star and 2 Ameraucanas.

All the girls seem to be adapting okay. They are cooped at night but free ranged in the yard during the day.

20130910-001933.jpg
Look for more poultry related posts as our flock grows in weight and in numbers, as eggs get laid, and as I learn what the heck Ive gotten myself in to.

20130910-002240.jpg

Tomatillo Salsa Verde

I’m going start focusing on holiday gift ideas. Hopefully one post a week until the New Year. I already covered two ideas, Guinness Stout Beer Jelly and Curry Pickled Cauliflower, last year. That beer jelly is a huge hit with everyone that tries it. So if you need a quick and easy gift idea, start there.

But in the mean time I plan on trying some other easy gift ideas for you to use. This week will be Tomatillo Salsa Verde. This is great stuff. And versatile too. A half pint in the stocking is destined to be enjoyed with a bowl of chips and a cold beer. A pint for the hostess of your holiday party will be used as a green enchilada sauce. And that quart you give to your friend can be combined with a couple pounds of chicken and slow cooked to a great green chile chicken for burritos, tacos, or whatever.

Not only that, but this is a one pot dish that gets blended. So no precise chopping or huge mess afterward.

Tomatillo Salsa Verde

20121115-020225.jpg
Tomatillos
Onions
JalapeƱos
Cilantro
Lemon juice
Garlic
Cumin
Salt/Pepper

We’ll talk ratios further down the line.

Tomatillos. What the hell are they? They are a fruit if the Nightshade family and fall under the category of “Who decided it was a good idea to eat this?” plants. Tomatillos are generally green, but you can also find yellow, red, and purple ones (though I haven’t). The fruit resembles a green tomato. But it’s very firm and covered in a thin husk that reminds me if a Japanese paper lantern. As the fruit grown is fills the husk and eventually breaks through. Tomatillos are sold in all stages of this process.

20121115-020923.jpgSometimes the fruit fills the husk, other times it doesn’t. And both are fine.

20121115-021009.jpgSometimes you will find a sticky coating between the fruit and the husk, similar in feel to partially dried hair spray. Don’t worry, it washes off easily.

Which brings me to the next step. The husks are not edible and must be removed. I like to kill two birds with one stone and remove the husk while washing the fruit. The running water helps separate the husk from the fruit and with a quick run the sticky residue is gone too. Invert the husk over the stem, twist, and remove.

20121115-021541.jpgThe inside looks like this.

20121115-021609.jpgFill a pot with water and drop your tomatillos in.

20121115-022020.jpgBring to a boil and cook for about 10 minutes. In the mean time prep the rest of your ingredients. Cut the stems off your jalapeƱos and split lengthwise.

20121115-022125.jpgUse a paring knife and cut the veins and seeds out. Here’s my theory on jalapeƱos and heat. If you want mild sauce remove all the veins and seeds. For hot, leave them all in. For a solid medium leave half. I cut them all out and then add about half back in.

20121115-022315.jpgChop your onion, cilantro and garlic as well. Again, we are purƩeing this later, so precision is not a factor.

20121115-022810.jpgYour tomatillos will darken in color and become soft.

20121115-022459.jpgRemove and drain them. But reserve a cup or two of the boiling liquid.

I cook, can, bake, and process so much stuff that I don’t get burns on my fingers very easily anymore. If your fingers are more….sensitive, use tongs for this next step. Cut the tomatillos into quarters. This is what the inside if a tomatillo looks like.

20121115-023020.jpgToss the tomatillos in the pot with the onion, garlic, cilantro, and jalapeƱos. Add some of the boiling liquid to the pot. How much is up to you. Just enough to prevent anything from burning and sticking to the bottom.

20121115-023314.jpgAdd salt, pepper, cumin and lemon juice. Then turn the heat on. Bring the salsa to a boil, then reduce the heat and simmer for 30 minutes. Your salsa should liquefy, the onions become translucent and generally look like this.

20121115-023502.jpgUse an immersion blender, food processor, or blender and *carefully* blend until smooth.

20121115-023559.jpgFill your clean jars to the 1″ head space. Apply a clean lid and band, and hand tighten.

Process in a water bath canned for 20 minutes. And you’re done.

20121115-024352.jpg

20121115-024404.jpgRatios:
3lbs of tomatillos is approximately 6 cups. 1 lb of chopped onion is approximately 3 cups.

Every batch is 6 cups of tomatillos, 3 cups of onion, 3 jalapeƱos, 1/2 cup cilantro, 6 garlic cloves, 1/2 cup lemon juice, 2 teaspoons cumin, 1 tablespoon salt, and 1 teaspoon pepper. I made three times this much in one batch. This recipe is a bit heavy on the cumin, but I love the heat and flavor that it adds. Other options are a mix of lemon juice and vinegar for a sour bite, adding some lime juice, and adding or removing garlic. A single batch yields about 2-3 quarts.

This recipe involves little prep work, is prepared and processed in under one hour, and only involved a cutting board and large pot.

I added a quart of this to a crock pot with a couple pounds of chicken breasts. 6 hours later I had green chile chicken. I shredded the chicken with two forks. Then I rolled the chicken in several tortilla shells and placed them in a glass casserole dish. I topped it all off with more tomatillo salsa and shredded cheese. Bake at 350 for 20 minutes then broil to crisp the cheese. Boom, easy peasy green enchiladas.

Happy canning.

Canning Pumpkin and Winter Squash

One of the great things about holidays with specific foods is that they go on sale as soon as the holiday is over. That’s prime purchasing time for canners. With Halloween over and Thanksgiving rapidly approaching, retailers are desperate to unload their inventory of pumpkins. I even saw a post on line of a grocer that was giving then away to avoid filling their dumpsters.

20121114-103309.jpg
Canning Pumpkin or Winter Squash
Pumpkins or Squash
Water

I started by placing my pumpkin on its side and then smacking the stem causing it to break off at the base. Using a large knife, and keeping your fingers out of the way, slice the pumpkin in half along the stem.

20121114-103609.jpgUse a spoon and scrape out the seeds and membrane from inside.

20121114-103701.jpgCut each half in half again.

Pumpkin in a low acid vegetable and can not be water bath processed. It’s not possible. Don’t try it. It has to be processed in a pressure canner. And, you can not purĆ©e it like you buy in the store. It has to be cubed. PurĆ©ed pumpkin is too dense for the heat of a home canner to penetrate as deep as it needs to. So the bad news is you’ll need to have or buy a pressure canner bathe good news that pressure cookers are awesome and useful in many ways. Since you need a pressure cooker I’m going to include my method of peeling which includes a pressure cooker. There are other ways to do this (peeling, roasting, steaming) but I’m sticking to one method because it was so easy.

Place your grate/rack in the bottom of your pressure cooker. Add water to just barely touch the grate. Start layering your pumpkin quarters in the pot. I was able to fit 4 pie pumpkins (16 quarters) in my Presto 23qt at a time. Put your lid on and lock it. But don’t cap the vent. Turn your heat on high. As soon as steam comes out of the vent put your weight on. Set a timer for 10 minutes. Keep an eye in the pressure, but mine never crossed 12. After ten minutes remove the pot from the heat. (*NEVER DO THIS IF YOU ARE PROCESSING JARS*) Put your canner in the sink and slowly start running water over it. As it starts to cool you can j crease the water. This rapidly cools the pot and makes the pressure drop. Please be familiar with your pressure canner and how it works. Don’t deviate from the manufacturer’s guidelines. After the pressure drop to zero carefully remove the weight. If its done venting entirely, carefully remove the lid. Steam will escape. Be cautious.

Inside you will find perfectly cooked pumpkin.

20121114-105432.jpgI shouldn’t even have to say this, but the pumpkin is hot. Really hot. Really really hot. So use spatulas, tongs, spoons, and or pot holders to remove the segments. When you do, you’ll find that the skin sloughs right off the flesh.

20121114-105719.jpgThe flesh should be softened, but firm enough to hold its shape. The first batch I made I let go slightly long because I was nervous. The flesh got a bit over done and was very soft. Again, you don’t want purĆ©e, you want cubes. A bit under done is better than a bit over since you’ll be cooking it another 75 minutes shortly.

Using a large knife cut the pumpkin in to approximate 1″ cubes. I used a large knife to avoid having to hold the hot pumpkin with my other hand.

20121114-110240.jpgUse you ladle and funnel and fill your jars to the 1″ headspace. Then top with boiling water. A tea pot is great here, or just a large pot if boiling water.

20121114-110455.jpgYou can see which jar had the softer pumpkin and which had the firmer. As long as it doesn’t purĆ©e you’re fine. The water will carry the heat between the cubes.

20121114-110613.jpgClean lids, band, finger tight. Rinse out your pressure canned and add the required amount if water. Usually only a few inches. Add your jars and process according to the guidelines below:

20121114-111210.jpgAfter the proper time turn off the heat and walk away. Do not move, cool, or attempt to open the canner. Once the pressure drops to zero, remove the weight. Once the inside is ventilated remove the lid. Allow the jars to sit for another 5 minutes or so to acclimate to the cooler temp. This entire process removes the risk of syphoning.

Remove the jars and place on a towel or wood cutting board. I love pressure canned items because they continue to boil well after removal. You can see the bubbles here.

20121114-111553.jpgyour finished product will be slightly darker and more on the brown end of the burnt orange spectrum.

20121114-111654.jpg

20121114-111708.jpgsubstitute this pumpkin for any fresh or canned pumpkin recipes. I haven’t tried using it in pumpkin bread that calls for greatest fresh pumpkin yet, but I plan to. The first time I used it I found it holds a lot of water. Next time I’ll drain it in a colander before using.

Now you can enjoy pumpkin pie or cookies, bread or purƩe in March or any other time you feel like it.

Happy canning.

Dilly Beans. Because Eventually We All Have To.

Update: This recipe won a 1st place Blue Ribbon at the 2013 Arizona State Fair in the Pickles, Relishes, and Spiced Fruits category.

I’d heard about Dilly Beans when I first got into canning. But having had canned green beans, I couldn’t imagine the joy in eating soft, soggy, pickle flavored beans. And since I was teaching myself to can simply by reading as much as I could, I didn’t have the opportunity to ask things like “How do they stay crunchy?”

But being over 2 years in and head over heels for canning, I decided to go back and give them another shot. Instagram had a lot to do with it, because the canners I follow speak so highly of them. Especially in the context of being very spicy and in a Bloody Mary.

So I made a smaller batch last month. 2 quarts and 3 pints. Just something different to try out. The nicest part was how easy they were to make. Of course the downfall of pickling is that you really need to wait at least two to three weeks to taste the product. So I waited and waited. Last night the wife and I were enjoying some beers after dinner when I decided I couldn’t wait any longer. I cracked a jar and tried one.

Oh. My. God. Why haven’t I made these before? Crisp, crunchy, spicy, and packed with all the best parts if dill pickle flavor. I’m not even ashamed to admit that we consumed the pint jar in less than 20 minutes. Fine. We’re making more.

I found myself at my favorite produce store with green beans on sale. I ended up leaving with a bushel. Which, is just over 29 pounds of green beans.

20121114-001746.jpg
Dilly Beans
Green Beans
Fresh Dill
Garlic
Dry Chilis, Chili Flake, or Cayenne pepper
Pepper Corns
Vinegar
Water
Pickling Salt

20121114-003432.jpg
Lets talk about ratios. As you know, if you keep up with me, I don’t work in small quantities. When I can stuff I make cases at a time. Now I’m guessing you guys may not be up for making a bushel if green beans. So here’s your ratios. Every part of salt gets 10 parts water and 10 parts vinegar. For instance 2 1/2 cups water, 2 1/2 cups vinegar, 1/4 cup salt. Or, in my case, two batches of 10 cups each of vinegar and water and one cup salt.

When it comes to the seasoning I added the following to each quart jar:
One sprig dill, 2 garlic cloves, two dried chilies, 10-20 peppercorns. For the pints I added half as much. For this particular batch I went heavy on the chilis, adding up to six to each quart and substituting 1/4 t of Santa Fe Chili Powder to the pints. I expect those to by spicy. Very spicy.

But this is what’s great about recipes like this. Up the dill, reduce the garlic, omit the pepper your choice. Add more or less cayenne or pepper flake for a mild, medium, hot, or atomic bean. You can also use dill seed or dry dill if you choose. Though I love fresh dill for all my pickling. Mix the flavors up and enjoy the variety.

20121114-003829.jpg
Clean and prep your green beans. I cut a 1/4 inch of both ends. Because I had 30 pounds the entire family cut 1/4 inch of each end.

20121114-004410.jpg
I read a lot of recipes where people cut each bean the exact same length to perfectly fit the required headspace in a pint jar. And that’s pretty cool…for them. I might try that for my state fair entry next year. But I have 30lbs of beans to process. If you’re making pints be sure that none of your beans are too long. If you’re making quarts you needn’t worry.

I grab a handful of beans and try to get them all facing the same direction. Then I gentry drop them straight down into the jar.

20121114-004758.jpgThen I try to fit a 2nd handful next to the 1st. After that you grab beans one by one and try to jam them in there. I’ve read of people using chop sticks to move the beans in the jar around to fit more. Again, time vs payoff. I tried to fit as many beans in one jar as I could.

20121114-005007.jpgHeat your vinegar, water, and salt to a boil and stir to dissolve the salt. Add the pickling solution to each jar of beans leaving headspace. I like to use the very bottom of the threads as a guideline. Lid, ring, finger tight.

Process in a water bath canner for 5 minutes. Yes, 5 minutes. That’s not much time. That also means this is one time your jars must be sterilized prior to processing. I use a steamer basket insert to steam my jars on a separate burner prior to use. When you put the jars on the water to process, remember that time doesn’t start until the water starts to boil again. After 5 minutes remove and set on a towel, cutting board, etc.

20121114-005517.jpg

20121114-005532.jpg

20121114-005543.jpg
And now the hard part. Let them sit in your pantry for at least 21 days before opening. Let the flavors mellow. It’s totally worth it.

Dilly Beans are amazing out of the jar. They also rock in a Bloody Mary. I’d serve them with burgers or steak. Or on an antipasto platter at a dinner party. They’ve got great crunch, a good bite, and fantastic acidic flavor. Of you haven’t tried making them yet you should give it a chance.

Happy canning!

Back to Basics; Blackberries and Pears

Sometimes I feel like it get too wrapped up in coming up with great new flavors and combinations that I forget the simple joys of canning. I’m definitely guilty of making pear, plum, and ginger jam. I’ve thrown some black pepper in with strawberries. And I’ve made jelly out of things that don’t want to be jelly, like Guinness beer and apple cider.

So occasionally I need to step back and remember some of the simple reasons that I can in the first place. Like saving money, eating ingredients that I’m aware of, and spending time in the kitchen making things for my family.

This is one of those posts that goes out to the people who say “I’m brand new to canning, what should I do the first time?” I usually point people in the direction of jam, but simply canning fruit can be rewarding and very simple.

I’m also going to touch on siphoning and thermal fractures, because both of them happened to me tonight.

While I was out today I found pints of blackberries for $.25 apiece. I picked up three flats. Bartlett pears were on sale for $.69 a pound and while I haven’t paid to close attention to the price of pears, that did seem well below average. So I grabbed a huge bag of them as well.

Canning Blackberries

20121023-012153.jpg

Go through your blackberries, rinse them off, and pick out any that even have the slightest hint of mold. For most berries I use a cold pack method. Hot pack involves heating the food to cook it through before placing it into jars. Cold pack is just like it sounds, you place the raw food directly in the jar. Blackberries stand up to the heat fairly well, but no point in overcooking them since I don’t want them to turn into mush.

Place the berries in your jar leaving enough headspace.

20121023-012843.jpg

20121023-012859.jpg

All fruit needs some kind of liquid to sit in. People use plain water (rarely), fruit juice, or syrup. I did not want to add commercial juice to my fruit so I opted to go with syrup as I usually do. You can make several different types of syrup from very light to heavy, all depending on what ratio of water to sugar you use. I make a light syrup which is approximately 2 cups of sugar in 7 cups of water.

20121023-013104.jpg
When you first add the sugar to the water it will be very visible in the bottom of the pan. Heat it over medium-high heat and begin to stir. As the water heats up the sugar will disappear. Continue to heat until bubble start to form. However do not bring it to a full roaring boil.

20121023-013206.jpg
Ladle the syrup over your fruit leaving 1 inch of headspace. You can see that the hot liquid is already beginning to leech some of the color out of the berries below the surface.

20121023-013303.jpg

20121023-013317.jpg

Place a new lid and clean ring on top of your clean jars. I read recently on the county extension website that the USDA is no longer requiring sterilization before every batch. As long as the jars are cleaned and processed for the correct amount of time sterilization prior to filling them is not necessary. I have stopped boiling my jars for anything that I waterbath process. For the pressure cooker items were botulism is still a concern I think I’m paranoid enough that placing the jars in an inch of water and letting them steam for 20 minutes before I fill them gives me a bit of reassurance.

Place the filled jars in your waterbath canner and process for 20 minutes for pints and 25 minutes for quarts.

20121023-013804.jpg

20121023-013817.jpg

20121023-013829.jpg

Blackberries hold up fairly well to the canning process. My wife makes herself a fruit smoothie nearly daily. Instead of trying to keep fresh berries on hand all the time she’ll simply open a pint, spoon out what she wants for that day, and then place the rest in the refrigerator. They are also good as ice cream toppings. Additionally, you can take the contents of a quart jar add some flour and sugar and pour it directly into a pie tin to make yourself a fresh blackberry pie.

Canning Pears

When I made pear butter a couple of months ago I used Bartlet pears. I was so impressed with the flavor of those pears I wanted to preserve some. However I let the box sit around for too long and they became too soft to can on their own. When I found them on sale again I picked up a large bag so that I could save some for later.

20121023-014640.jpg
Start by peeling your pears and adding them to a large pot or bowl that contains water and either citric acid or lemon juice.

20121023-014734.jpg
Take each pear, cut the top off to remove the stem, and then slice in half lengthwise. Use either a teaspoon or a melon baller to remove the core.

20121023-014841.jpg
The next step is up to you. You could can half pears if you had widemouth quart jars handy. I preferred slices to fit more in each jar. I sliced each half into four quarters.

20121023-015006.jpg
As you slice the fruit return it to the same pot or a different one that has acidified water to preserve the color.

20121023-015325.jpg
Again you’ll want to decide what kind of syrup or juice to place your fruit into. I use the same light syrup. The USDA currently has no recipes that call for cold packing pears. This time we bring the simple syrup up to a boil and then place the fruit in the syrup and boil it for five minutes.

20121023-015507.jpg
Using your funnel and ladle fill the jars with pears and then fill with the syrup liquid that you boiled them in, up to a 1 inch headspace. Put on new lids and clean rings and process in a water bath canner for 20 minutes for pints and 25 minutes for quarts.

20121023-015746.jpg

20121023-015759.jpg

20121023-015812.jpg

The pears came out fantastic. I think they held their color really well. The important part here is that I will be enjoying blackberries and pears when everyone else is paying four dollars a pint and $2.99 a pound for them.

People can for so many different reasons. Nutrition, tradition, preparedness, necessity, taste, and cost savings. As much as I enjoy making extravagant jams and jellies to give away as gifts I enjoy the simple pleasure obtained from preserving low-cost produce to be enjoyed a later date.

A Word On Syphoning and Thermal Fractures.

There are several things that can happen to canners to interrupt their enjoyable evening. One of them is siphoning and abother is breakage.

What is siphoning? Simply put it’s the contents of the jar leaving the inside and going to the outside very quickly. It is due to a rapid change in temperature or pressure. I’m not sure why but I noticed that almost all of my jars of blackberries suffered from siphoning. As the timer went off I would remove them from the water bath and set them on the counter. Almost immediately dark purple and red liquid seeped from under the lid and spilled all over the counter. Siphoning is bad for many reasons.

First off I’ve had it occur previously during a pressure canner session when I returned to find 4 quarts filled with vegetables but no liquid. That’s bad folks. That time it was a result of me removing the pressure canner from the stove and trying to cool it rapidly with the use of water. I was very very new back then. But unfortunately the food was wasted anyway.

The other problem is that the escaping liquid can prevent a good seal on the lid. You guys all know that you have to listen for the pop and check the seal of the lid on the jar when it’s finished, right? If you do suffer from siphoning, but it is only a small amount of liquid, and your lid sets and seals you do not have to worry. Your biggest concern at that point will be washing off the exterior of the jar to prevent any mold growth on the outside.

So, how do you prevent siphoning? If you are using a pressure canner when the time is up simply turn off the burner and walk away. Don’t attempt to move the canner off of the stove to a cool burner or countertop. And definitely do not place it in the sink and run cold water over it the way you can to remove cooked foods quicker. Just let the temperature drop on its own.

If you are using a water bath canner when the time is up turn off the burner and wait two to four minutes. Allow the water to slowly stop boiling and the jars to acclimate to the lower temperature before removing them. Place the jars on a folded up kitchen towel rather than directly on the cold countertop. Allowing slower transitions between temperatures should prevent siphoning.

Speaking of rapid temperature changes have you ever seen thermal fractures? Jars break for one of two reasons. Thermal fractures or impact fractures. The first is caused by rapid temperature changes. Usually something too cold getting too hot too quickly. The second is caused by jars knocking into each other, implements knocking into jars, jars falling over, et cetera. Luckily they are easily distinguished and identified.

Impact fractures will run vertically up the side of the jar either in a straight line or lightning bolt pattern. Thermal fractures will run horizontally around the jar, and in my experience only at the very base. The fracture is extremely straight and clean almost leaving no sharp edges.

20121023-021021.jpg

20121023-021033.jpg

20121023-021043.jpg

20121023-021054.jpg

Thermal fractures are caused by your jar heating up to rapidly. You started with cold jars and placed hot food inside of them, or your jars had hot food inside of them and you place them in a pot that was too hot, or you placed the jars directly onto the surface of the bottom of the pot without having any kind of insert to gain elevation. If you are sterilizing your jars before each batch this is generally not an issue. However if you are not, be sure to heat your jars up in the dishwasher or by using hot water before filling them. Always keep your jars off the bottom of the pot.

Luckily for me I found this one almost immediately after it happened because I took the lid off of the pot to check on the contents. I was able to salvage the ingredients, find a new jar, and continue on. Do notice that this is a Golden Harvest jar and not a Ball or Kerr brand. I believe Golden Harvest was Walmarts house brand there for a while. I’m not sure where this one came from as it was my only one. But I do trade my goods with other people and pick up jars at thrift stores and garage sales as I see them. I recommend sticking to the two major name brands to know that you’re getting quality jars.

Happy canning.
Personal Satisfaction

I’m not going to post a recipe or procedure today, since I already talked about how to can tomatoes. This post is more about me being happy with my own productivity. A little pat on the back, if you will.

Last year we processed 50 lbs of tomatoes. And the conclusion we came to was….that’s a great start. But we blew through them in a couple of months. So this time around my wife suggested we do way more. I’ve been calling Superstition Ranch, Sprouts, and Food City checking on tomato prices for 2 months. I tried to negotiate lower price for ordering large quantities, but the lowest I got was an offer for $.88/lb. Not worth it to me.

Finally last week Superstition Ranch said their Romas were $.59. I told the wife this might be the cheapest we find. She agreed, and we decided to bite the bullet and grab 100 pounds.

When we got to the store I received the greatest surprise.

20120927-122049.jpg
Salad Sized Tomatoes at $.25/lb. In case you’re wondering, this is what they look like.

20120927-122147.jpg
We came prepared to spend $60 anyway, so I asked the wife. “You wanna stick with a hundred pounds, or do you want to step up our game and do two hundred.” In her infinite wisdom she decided we should go for 200 pounds.

20120927-122511.jpg
That many tomatoes required more jars than I had on hand. After a quick stop for jars and citric acid we were home.

20120927-122804.jpg
Now that’s a beautiful sight!

We spent that first evening processing 100 lbs. Lets just say that it took a little longer than I remember. What slowed me down the most was the limitations of my canner. 7 quarts at a time, at 45 minutes per batch. By the time we went to bed on Sunday we were half way done.

20120927-123055.jpg
On Monday I had errands to run, dinner to make, and children the wrangle. I got through another 50 lbs. Tuesday I had to work, teaching a class all day. Wifey prepped 25 lbs and I processed them when I got home. But knowing I was working 17 hours on Wednesday I couldn’t stay up any later. That’s when the unthinkable happened….the wife suggested she prep and process the remaining 25 lbs on her own.

Canning has always been my thing. Generally she isn’t interested on any part except for enjoying the results. So I was really happy that she was interested and willing to try. I walked her through the important parts, citric acid, clean rims, finger tight rings, and full boil. On Wednesday she finished off the last 25 on her own, with zero failures or breaks.

I came home last night to see what 200 pounds of tomatoes look like in jars.

20120927-124009.jpg
Just over 70 quarts. About 3 lbs per jar. Seems that we can have just over a quart per week for the next year.

We use canned tomatoes in lots of stuff. All you need is an immersion blender and some herbs to make a quick spaghetti sauce. Rough chopping them creates a nice ragout. They go in Spanish rice, stew, soup, etc, etc.

3 days of work seems like a lot to some people. But knowing that we have plenty of tomatoes, at a price that can’t be beat, and knowing that each jar contains exactly 2 ingredients is worth the effort to me.

20120927-124947.jpg

Happy Canning!

And there were beans, lots of beans, lots of beans, lots of beans.

Reddit has a great canning community as does Intagram if you search #canning. I’ve been trying to network and talk with more canners to get recipe ideas, help, and enjoy some canning small talk. Instagram user Michca3 even got me interested in antique Ball jars and I picked up 3 this weekend.

20120925-212919.jpg
So if you’re in to canning be sure to check out those two resources if you haven’t already.

One of the things I was able to find was a recipe for Ranch Style Beans posted by Reddit user VicinSea (who is currently writing a canning/preserving book that I can’t wait to be published). I love the Apetite Pleasin’ Ranch Style Beans in the black can and wanted to duplicate them at home. The taste is not 100% the same, but this recipe seems to do a good job of replicating it.

Ranch Style Beans
(Ingredient Measurements Per Quart Jar)

1 1/2 cups Dry Pinto Beans
1/8 cup onion
1/4 cup tomato
1 clove garlic
1 t jalapeƱos
1 t green chiles
1/8 cup green pepper
1/4 t cinnamon
1 t honey
1 t salt
1/4 t pepper

20120925-214912.jpg
If you have never worked with beans before, you should know something. Measurements, by volume, of dried beans are different than beans that have been boiled. I counted the number of empty jars that I had available and measured that amount of dried beans into a pan. I wound up with almost twice as much as I needed. Just keep this in mind if you don’t have a large amount of empty jars on hand. I would estimate a half cup of dried beans per pint or one cup of dried beans per quart.

20120925-215259.jpg
Put your beans in a colander and sift through them with your fingers. You are looking for rocks, pebbles, twigs, or any beans that just don’t look right to you. Then rinse the beans off and run your fingers through them to get them all cleaned up.

20120925-215232.jpg
Put the beans in a large enough pot and cover with plenty of water. You’ll notice right away that some beans start floating. I tossed these out. Honestly, I don’t actually know if they are bad or not, but if 99% of the beans are sinking I don’t trust the 1% floating up there. I ran my fingers through them one more time to allow any floaters that were at the bottom to hit the surface, and then I skimmed them out. Place the pot on high heat and bring them to a boil. I let the water come to a full boil for about a minute and then I took the pot off the heat. Drain the beans and set aside.

Chop your pepper, onion, garlic, and tomato if you aren’t using canned.

20120925-220323.jpg
I cheated and bought canned chopped jalapenos and chopped green chilies. Also, the green chilies are my addition to the recipe. I really enjoy the mild bite that they add to dishes.

Place the measurement of beans in the bottom of each jar. Then start layering the other ingredients on top. I started with green pepper, then onion, then jalapenos, chilies, garlic, honey, Cinnamon, salt, pepper.

20120925-220607.jpg

20120925-220624.jpg
I was making pints which made some of the measurements very interesting. Instead of estimating what a half a clove of garlic was, I just added a quarter teaspoon of garlic to each jar. By the time all the layers were in there it reminded me of a little Christmas tree like parfait.

20120925-220901.jpg
My wife has a little teapot that she uses to boil water for her tea before bedtime. It really comes in handy when I’m canning things. Add boiling water to each jar leaving 1 inch of headspace. Be aware that I had to add water to each jar, allow it to settle, and then top off each jar with a little bit more to get the proper headspace.

20120925-221031.jpg
I found out that my Presto 23 quart pressure cooker can hold 16 pints and 1 quart jar. It’s a beautiful sight.

20120925-221240.jpg
Process the beans at 10 pounds for 90 minutes.

I haven’t opened them yet because I want the flavored to mingle for a bit. Maybe I’ll try them this weekend. But, just from looks, they seem pretty dead on.

20120925-221533.jpg

20120925-221553.jpg
As with anything that is pressure canned, reheat and boil for 10 minutes before serving.

Happy Canning!

Beets The Heck Out Of Store Bought

My wife loves beets. It’s a fact. She loves them steamed, roasted, grilled, raw, and pickled. On salads, with vegetables, as a side. It doesn’t matter. The woman loves beets. And that’s how a lot of my canning adventures start. Trying to impress the woman that loves me unconditionally.

I found myself at an Asian grocer tonight trying to find the ingredients for pickled ginger. And while I was wandering through aisles of various dehydrated fish products, candy made from vegetables, and exotic sauces I found a big display of Beets; 69 Cents/Lb. Now I don’t know if that is a great price, but it definitely seemed like a fair price. I picked up about 8 pounds of beets, a bag of pearl onions, a gallon of pickling vinegar, and a white onion.

The only thing I’ve done previously is dice and roast beets with other root vegetables. So I was not sure just how easy this task was going to be. Everything turned out better than expected.

20120921-025136.jpg
Pickled Beets
8lbs Beets
1 Bag Pearl Onions
1/2 White Onion
2 Cinnamon Sticks
12 Cloves
12 Allspice Berries
4 Cups Vinegar
2 Cups Water
2 Cups Sugar
1 1/2 t Salt

If your beets come with the greens attached just trim them above the bulb. The idea is to trim them, but not to cut in to the beet.

Cover the beets in water and bring to a boil.

20120921-024337.jpg
Boil the beets for approximately 45 minutes. Mine were the size of baseballs, and 45 minutes was perfect.

While the beets are boiling heat a medium pan of water to boil. Then drop in your pearl onions and boil for 3 minutes. Place the onions in an ice bath to cool.

20120921-025301.jpg
Remove the onions one at a time and cut off the root end. Then squeeze the flower end and the onion pops right out. If part of the center of the onion pops out just push it back in.

20120921-025426.jpg
Repeat until all your onions are liberated.

20120921-025457.jpg
When your beets are cooked drain them and place them in an ice bath. Be careful when removing them. The skin of the beets sloughs off very easily now and it’s a bit like trying to grab a wet bar of soap. The next step involves a slippery beet and a sharp knife so be careful. Cut off the root end and the leaf end.

20120921-025706.jpg
Then remove the skin. This is seriously so easy. Way easier than peaches. And even easier than tomatoes. I just passed the beet back and forth in my hands working it in circles. Almost like a pitcher does with a baseball.

20120921-025844.jpg
To make it even easier I did it under running water. This washed the peels away and also prevented my hands from looking like I spent the day with Ed Gein. Now tomato skins come off easily. But I’m always afraid of damaging the tomato. The beets however are hard and solid which made this part so easy.

20120921-030116.jpg
Cut your beet however you like. I’ve seen slices, cubes, chunks, crinkle cut caterpillar looking pieces. Whatever. Just try to keep the pieces uniform in size. I decided to cut the beet in half and then slice the halves in to 1/4 inch slices.

20120921-030311.jpg
I rinsed my hands repeatedly through this process and avoided looking like a MASH surgeon. The extremely rich and dark color of the beet is amazing to me. I was trying to imagine what purpose it serves in nature. An attractant to pollinators? A pesticide? I have no idea. If you know, please share. I just know I love the color.

20120921-030519.jpg
Mix your vinegar, water, sugar, and salt in a large pot over medium heat, stirring until the sugar dissolves. Place your clove, allspice, and cinnamon in cheesecloth and add it to the pot. Then increase heat to a boil. Slice your half onion in to strips. Add the white onion and pearl onions to the beets and add them to the pickling liquid.

20120921-030633.jpg
Allow it all to return to a boil and them simmer for 5 minutes. You know the part about clean hot jars, funnels, labels , rings, and lids by now, right? Fill your jars with the beets, packing it down, and adding pickling liquid, if needed, to the 1/2″ headspace. Use your little canning tool to remove air bubbles.

20120921-031130.jpg
Wipe the rims, place the lids, and finger tighten the bands. Process in a water bath canner for 30 minutes (pints or quarts). If I hadn’t mentioned it before, adding a splash if vinegar to your water bath eliminates the white hard water stains on your jars. 30 minutes later, you’ve got the beets, you’ve got the beets. Yeah! You’ve got the beets!

20120921-031448.jpg

20120921-031458.jpg
I haven’t tried these yet. I’m a firm believer that pickled need to sit for a while to become better. I’ll give the 1st jar at least a month before opening. But I’ll report back.

Happy Canning.


Enter your email address to follow this blog and receive notifications of new posts by email.

Join 368 other subscribers