Posts Tagged 'Tomatoes'

Buhsketty Sauce; Or How To Get Your Kids To Eat A Weeks Worth Of Vegetables

Canning stuff is all fine and good. But what are you supposed to do with it? I’m trying to post more recipes that use home canned items to give you a better idea of options that are out there.

When we canned 200lbs of tomatoes last year we considered making pasta sauce. But, not knowing what we’d use or in what quantity, we decided to stick with stewed tomatoes that could be made in to Italian sauce or a variety of other things.

Over the last 9 months I’ve tried a variety if techniques and recipes. This is my favorite recipe for pasta sauce.

Pasta Sauce
2 quarts canned tomatoes
Olive Oil
Onion
Garlic
Vegetables Of Your Choice
Red Wine
Balsamic Vinegar
Oregano
Basil
Thyme

20130910-010415.jpg

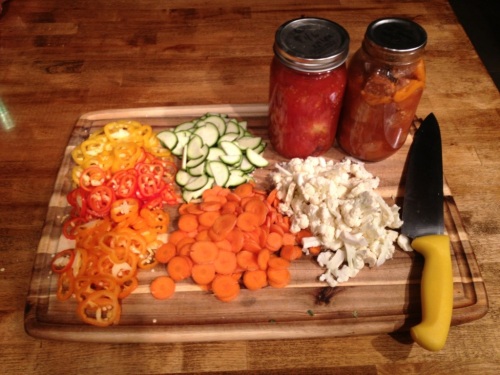
I always start this recipe by raiding the fridge and pulling out all the vegetables that have been forgotten over the last two weeks. Bell peppers, sweet peppers, that little 1/4 of a head of cauliflower that’s starting to get rubbery, the one crook neck squash, and that pack of mushrooms you found on clearance. Pretty much anything you find is good. I always have, and always use, carrots. They add the perfect sweetness to the sauce.

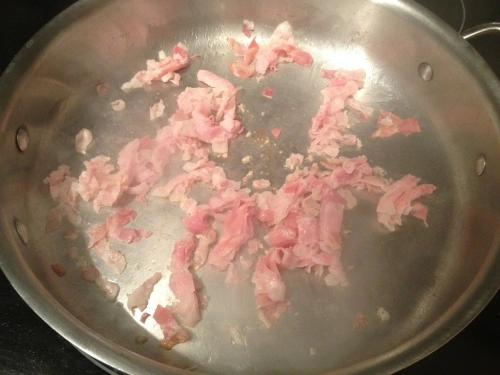
This time I happened to find some panchetta that needed using up. You could also add bacon, Italian sausage, or fat back if you have that. If you don’t just add more olive oil to the pan instead.

Start by rendering out the fat of whatever meat you’re using.

20130910-010525.jpg

Chop the onion and garlic, and slice the carrot into thin rounds. Add them to the hot pan and cook until the onions are translucent and the carrots are slightly browned and softened.
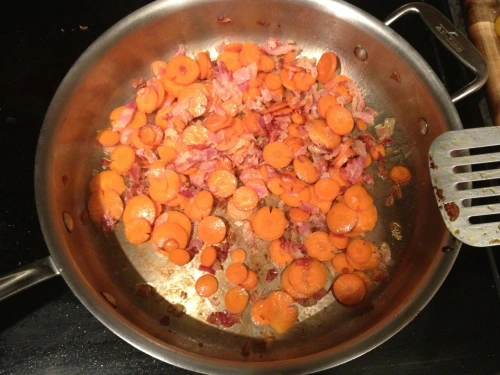
20130910-010724.jpg
For this recipe I used pickled garlic that I made previously. Pickled garlic is great. It makes garlic last 6 times as long, preserves all the garlic flavor, but takes that acrid bite out of the cloves.
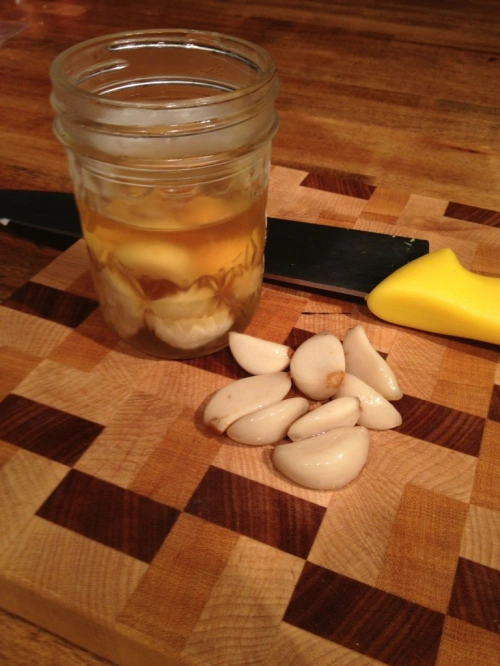
20130910-010935.jpg
Add the the vegetables in order of hardness. For instance, cauliflower, then zucchini, then peppers so everything cooks to the same consistency.
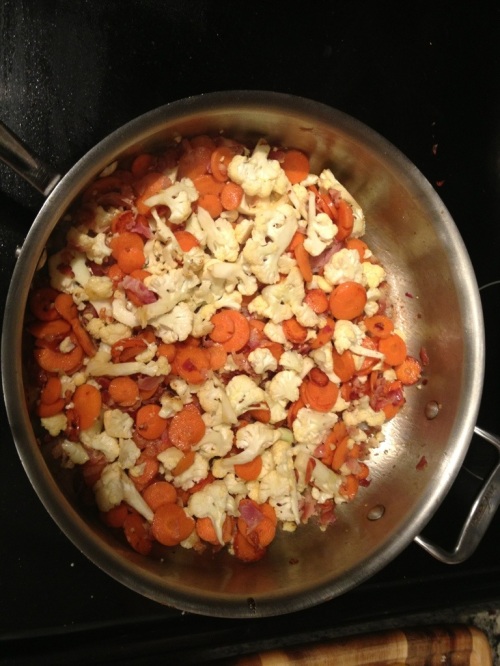
20130910-011122.jpg
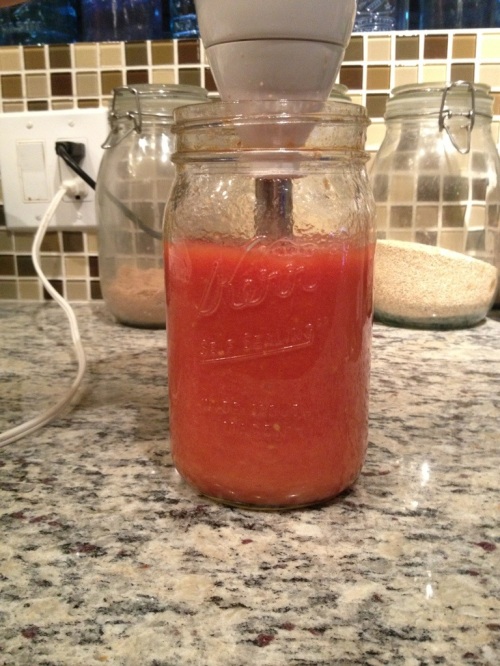
Take your tomatoes and drain the clear liquid off of them. I’ve found that tomatoes really hold the liquid trapped in the jar so I move them around with a fork to release it all. If you canned them in a regular mouth jar screw a blender base on the top. If you use widemouth jars an immersion blender will fit right in the top.
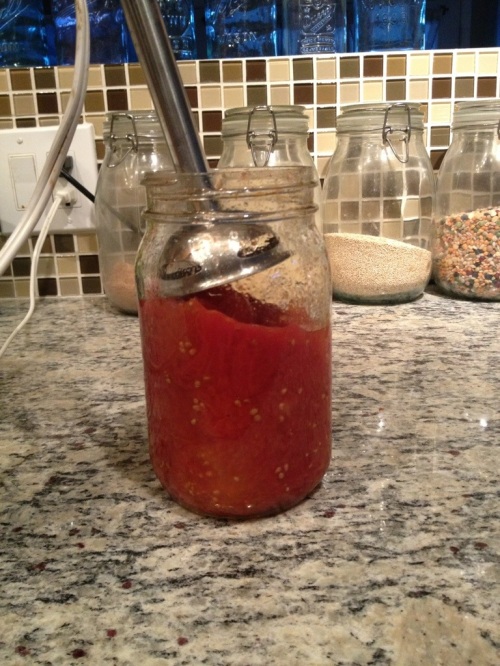
20130910-012743.jpg
Blend until the tomatoes are pureed.

20130910-012944.jpg
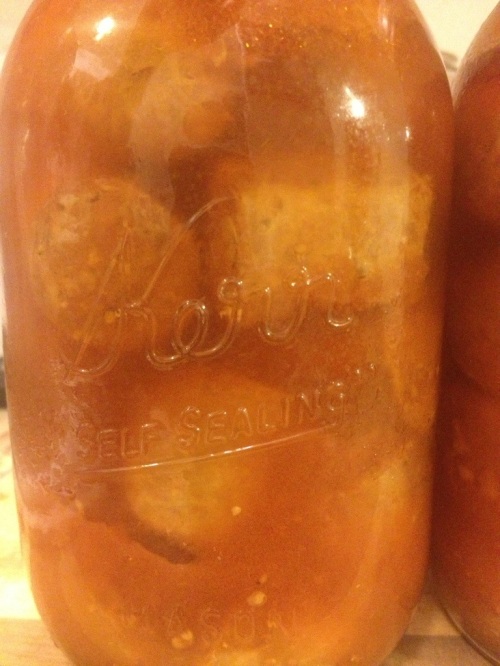
Add the tomato sauce to the pan and bring to a boil. This time around I decided to add a jar of hot Italian sausages that I canned a couple of posts ago.
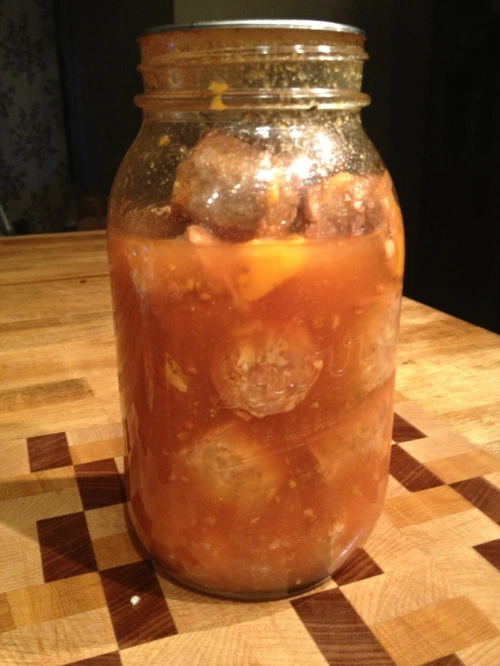
20130910-013223.jpg
Since they are already in tomato sauce I just added them right in.

20130910-013428.jpg
Add a healthy pinch of oregano, basil and thyme; 2 tablespoons to 1/2 cup of any red wine; and 2 tablespoons to 1/4 cup of balsamic vinegar. I like my sauce on the more acidic side, and feel that balsamic adds some good depth to it overall, so I’m more heavy handed with it. Let the sauce simmer and reduce for a while.

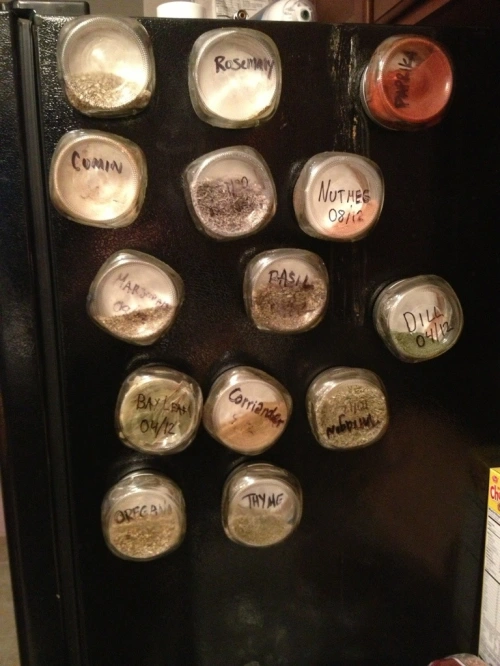
While we are waiting let’s talk about spices. Have you seen Ball’s little shorty half pints? I glued some hobby magnets to their lids and use em as spice jars on my fridge.
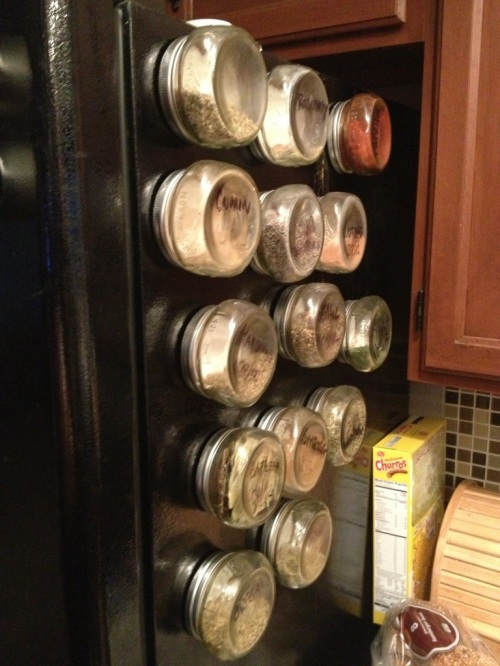
20130910-014519.jpg

20130910-014613.jpg
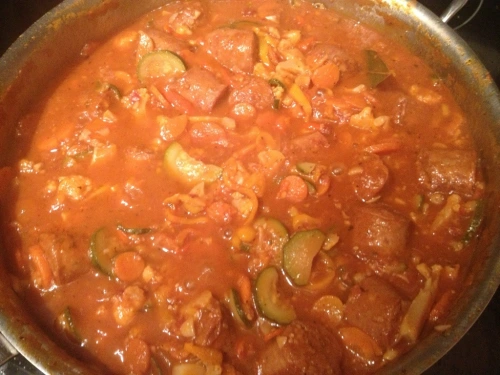
Ok, back to the sauce. The basic idea is to sauté the vegetables, puree the tomatoes, added herbs and acidity, and then simmer until it teaches the consistency you like. I prefer mine a little on the thicker side, so I let it reduce for a while.
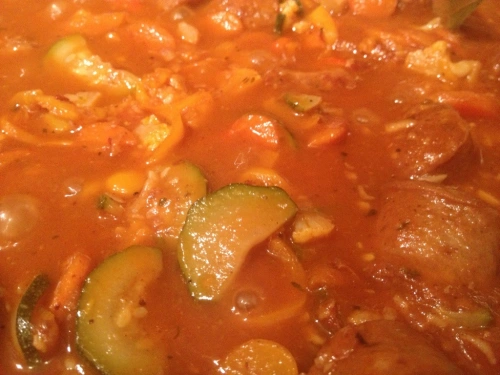
20130910-014948.jpg

20130910-014959.jpg
I like this recipe because it cleans out my veggie drawer. Ill add portabellos one week and sweet mini peppers the next. Ive also added kale or spinach to the mix. But my favorite part is that my kids gobble it all up. All of it. They love spaghetti. They love the sauce. And they don’t even care what’s in it.

If you have a pasta sauce that uses home canned ingredients, please share it.

Happy canning!
Hot Italian Sausage In Tomato Sauce

Update: This recipe won a 1st place Blue Ribbon at the 2013 Arizona State Fair in the Canning Meat category.

Italian Sausage in Tomato Juice

20130716-184452.jpg

I’m trying to delve deeper in to the world of canning. To try more meats. And specifically, to can more things that are closer to ready to eat.

We were at the grocery store looking for pork to smoke (a whole different post) when I saw packages of hot Italian sausages on clearance for half price. In the past I would have frozen them. But I figure, why not put em in a jar?

The National Center For Home Preservation says to brown sausage and then process it in water, stock or tomato juice. My thought process was this: water would be a waste. Why remove all that flavor into water that would likely be drained out anyway. Stock sounded ok. But all I had was previously home canned smoked chicken stock. And that didn’t sound that great. So that left me with tomato juice, which I didn’t have. But what I did have was previously home canned tomatoes.

I figure hot italian sausage is destined to be in pasta sauce at some point in the future. So why not process it in tomatoes now? I grabbed a wide mouth quart of canned tomatoes off the shelf. The immersion blender fits right in the top, and in no time it was a quart of tomato puree. I put that in a pot with a pint of water to make my tomato juice.

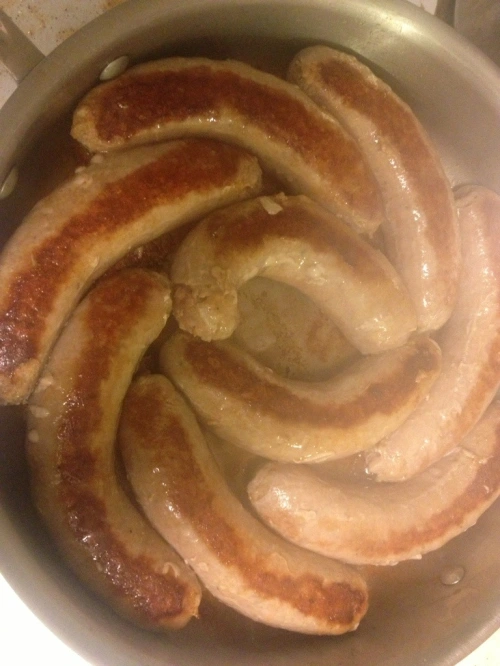
I placed the sausages in a pan and browned them on both sides.

20130716-174651.jpg
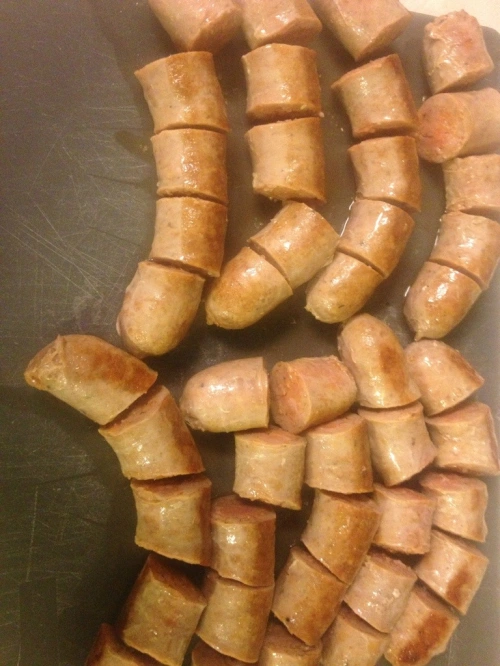
Once they were brown I cut each sausage in to 5 pieces.

20130716-174805.jpg
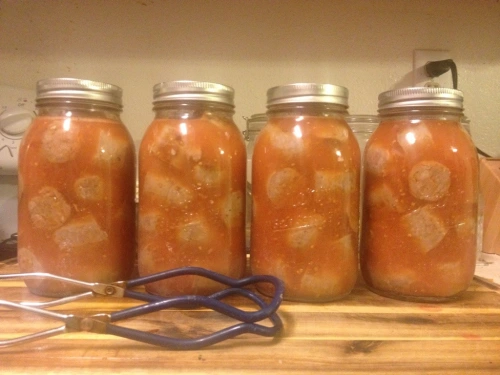
Place the pieces in a quart jar. This took a little bit if engineering. But luckily years of playing Tetris paid off. Just make sure you’re filling voids in the jars where you see them. In total I cooked 6 pounds of sausages that ended up filling 4 quarts.

Heat the tomato juice to a boil and cover the sausage pieces with the juice. Leave a 1″ headspace.

20130716-175403.jpg
Use a plastic utensil to remove any air pockets or bubbles. Why plastic, you ask? Because metal can cause micro scratches and fissures in the glass. This can be the catalyst for thermal fractures in the future.

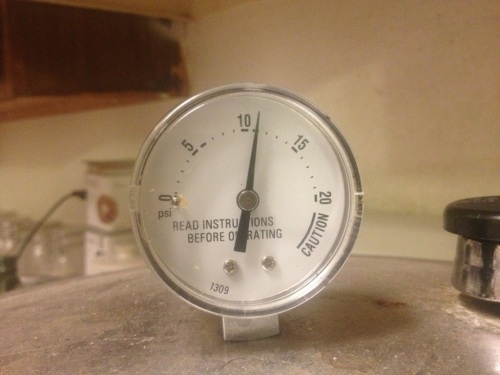
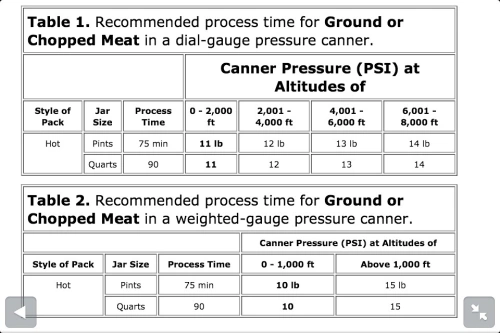
Top with lids and bands and place in a pressure canner at 11lbs for 75 min for pints or 90 min for quarts.

20130716-183309.jpg
Use this chart to adjust for altitude.

20130716-184022.jpg
Always turn off the heat and allow the pressure canner to cool by itself when the time is up.

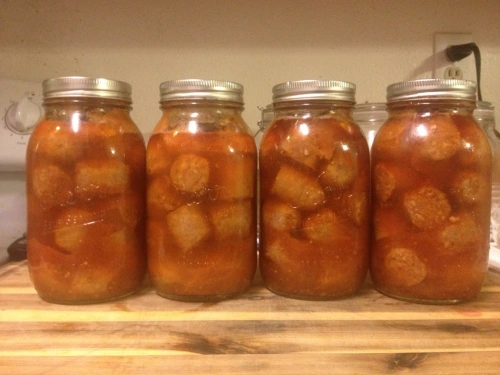
The finished product looks like this. Not too bad. Sometimes canned meat looks like a lab specimen. This looks more like Spaghettios.

20130716-184327.jpg
I’m huge on making my own pasta sauce right now. Generally it’s 2 quarts of tomatoes, onion, garlic, carrots, zucchini, squash, peppers, wine, balsamic, and spices. In theory a jar of sausages can be added, without taking the time to defrost and brown the sausages, cook them through, and letting them simmer in the sauce. The flavor’s already in there.

Happy canning.

Personal Satisfaction

I’m not going to post a recipe or procedure today, since I already talked about how to can tomatoes. This post is more about me being happy with my own productivity. A little pat on the back, if you will.

Last year we processed 50 lbs of tomatoes. And the conclusion we came to was….that’s a great start. But we blew through them in a couple of months. So this time around my wife suggested we do way more. I’ve been calling Superstition Ranch, Sprouts, and Food City checking on tomato prices for 2 months. I tried to negotiate lower price for ordering large quantities, but the lowest I got was an offer for $.88/lb. Not worth it to me.

Finally last week Superstition Ranch said their Romas were $.59. I told the wife this might be the cheapest we find. She agreed, and we decided to bite the bullet and grab 100 pounds.

When we got to the store I received the greatest surprise.

20120927-122049.jpg
Salad Sized Tomatoes at $.25/lb. In case you’re wondering, this is what they look like.

20120927-122147.jpg
We came prepared to spend $60 anyway, so I asked the wife. “You wanna stick with a hundred pounds, or do you want to step up our game and do two hundred.” In her infinite wisdom she decided we should go for 200 pounds.

20120927-122511.jpg
That many tomatoes required more jars than I had on hand. After a quick stop for jars and citric acid we were home.

20120927-122804.jpg
Now that’s a beautiful sight!

We spent that first evening processing 100 lbs. Lets just say that it took a little longer than I remember. What slowed me down the most was the limitations of my canner. 7 quarts at a time, at 45 minutes per batch. By the time we went to bed on Sunday we were half way done.

20120927-123055.jpg
On Monday I had errands to run, dinner to make, and children the wrangle. I got through another 50 lbs. Tuesday I had to work, teaching a class all day. Wifey prepped 25 lbs and I processed them when I got home. But knowing I was working 17 hours on Wednesday I couldn’t stay up any later. That’s when the unthinkable happened….the wife suggested she prep and process the remaining 25 lbs on her own.

Canning has always been my thing. Generally she isn’t interested on any part except for enjoying the results. So I was really happy that she was interested and willing to try. I walked her through the important parts, citric acid, clean rims, finger tight rings, and full boil. On Wednesday she finished off the last 25 on her own, with zero failures or breaks.

I came home last night to see what 200 pounds of tomatoes look like in jars.

20120927-124009.jpg
Just over 70 quarts. About 3 lbs per jar. Seems that we can have just over a quart per week for the next year.

We use canned tomatoes in lots of stuff. All you need is an immersion blender and some herbs to make a quick spaghetti sauce. Rough chopping them creates a nice ragout. They go in Spanish rice, stew, soup, etc, etc.

3 days of work seems like a lot to some people. But knowing that we have plenty of tomatoes, at a price that can’t be beat, and knowing that each jar contains exactly 2 ingredients is worth the effort to me.

20120927-124947.jpg

Happy Canning!

Let’s can some tomatoes.

Update: This recipe won a 1st place Blue Ribbon at the 2013 Arizona State Fair in the Canned Vegetable; Tomatoes category.

As you know, I have great love for Superstition Ranch Market. When we went there last week they had Roma Tomatoes on sale for $0.25 a pound. In my experience, that’s pretty much unheard of. We talked about it, and decided to buy two cases, 50lbs, for $12.50. An amazing deal. Rather than make spaghetti sauce like last time, we chose just to can the tomatoes. Especially since the transition from stewed tomatoes is easy. Plus stewed tomatoes are more versatile, and easier to prepare.

Canned Stewed Tomatoes

Start off by filling a large pot with water and bringing it to boil, filling your sink with ice and water, and laying out a cutting board and knife for prep work. Henry Ford was on to something….it’s much easier if you have an assembly line.

Look through your tomatoes. I found a couple that started going rotten in the 2 days it took me to get the this project together. Just toss them. If you have any with a dark spot or whatnot, we can work around that.

Drop the tomatoes int he boiling water, using tongs, and let them boil for 2-3 minutes. You’ll notice that the skins start to split. As that happens, remove the tomatoes and drop them in the ice water. this process makes the skins really easy to remove.

Let them chill for a while in the ice bath. If you try to soon, you’ll burn your fingers as the insides can remain hot for a couple of minutes.

As you remove the tomatoes from the ice water, start where the skin split, and remove the skin. On most of them it was super easy. The tomatoes fell out of their skin. On a couple I had to do a bit of peeling.

Remove the stem area and any black spots from the tomatoes. Then cut them in to quarters. As usual, only work with clean, sterile, prepared canning jars. Drop 1 tablespoon of lemon juice in to each pint jar, or 2 tablespoons into each quart. I like to use quarts for what will eventually become spaghetti sauce, and pints for what will be used in recipes. However, we had so many tomatoes that i was scrambling just to find enough jars. If you run out of lemon juice (like I did) you can also use powdered citric acid, red wine, or vinegar for the acid. We did about 1/2 dozen with balsamic vinegar.

Start stuffing your jars. Drop the quarters in and when they reach the neck tap the jar on the counter to get them to settle. I also used my fingers to force them down. Once they look full take a ladle full of boiling water and dribble enough in the jar cover the tomatoes, but leave head space. Honestly, with the juices that came out, this was only a couple of tablespoons of water in each jar. Remember that air doesn’t heat the same way water does, and that’s why the liquid is important. Use your non-metal tool to run around the edge of the jar to release any air bubbles. All the real estate int he jar needs to be tomato or liquid (except for the head space).

Hopefully you put your lids in a small pan of water and heated them (not to a boil). So wipe the rims of the jars, put a lid on each one, and close with a band. Remember, hand tighten. That’s it. Finger tighten even. People have ruined batches of foods by overtightening the bands. Air needs to escape from under the lid.

You can water bath process tomatoes with the added acidity. But it takes 45 minutes for quarts. I chose to pressure can because I can fit more cans in at a time. Fill your canner with jars (remembering to off set the 2nd layer or use a metal grate to build your 2nd layer). For my location I did 12PSI for 15 minutes. (Follow your canner’s manufacture’s manual). After 12 minutes I just shut off the heat and walked away. When all the hissing stops, and all the steam has escaped, I took of the lid and lest the jars rest for another 10-15 minutes. This prevents shock, which can result in breaking jars, which can result in tomatoes and juice the temperature and consistency of napalm exploding on your body. After they’ve had time to rest use your jar lifter to remove them from the pot and place them on the counter where they should be able to sit, undisturbed for the next 12-24 hours.

If you bought as many tomatoes as I did you’ll need to repeat the process 3 times.

Remember, home canning eliminates unwanted added sugars or salts, exposure to chemicals (BPA is leached from the tin can lining in commercially canned tomatoes), and exposure to preservatives. This recipe requires only 3 ingredients; tomatoes, something acidic, and water. If you are on a low salt diet, don’t add any. If you don’t care for lemon juice, add powdered citric acid. For a more Italian flavor add balsamic vinegar or red wine. I also tried to make “Italian Seasoned Tomatoes” this time around. To 6 jars I added a 1/2 pinch of Oregano, Thyme, and Basil. Dried herbs offer a great deal of flavor, especially when canned, so go easy. You could also peel the tomatoes and leave them whole, cut them in half, or dice them; depending on how you wanted to use them.

Here’s the wife photo-bombing my victory shot:

50 pounds of tomatoes with about 10 spoiled tomatoes ended up being 23 pints and 11 quarts of quartered tomatoes. For $12.50 (plus the new jars I had to buy). I wont find commercially canned tomatoes that cheap. And I probably won’t find tomatoes that cheap again this year.

The fruit tends to float while the liquid sinks immediately after canning. So on the 2nd day I rotate all the jars back and forth, like I’m mixing paint, and that gets it’s all homogenized again.


Enter your email address to follow this blog and receive notifications of new posts by email.

Join 368 other subscribers