Archive for the 'cooking' Category

Finally, my time to Shine

Everyone loves mason jars. Everyone. And they’re popping up all over the place. Now, seeing as how I’m one of the biggest mason jar fans in the country, people send me stuff about jars when they see it. Something I’ve been sent a lot is “Moonshine” in mason jars. Apple pie, blackberry, cherry, etc. Now we all know that they aren’t actually moonshine, as they are lawfully produced and sold in the US, under the watchful eye of the ATF. But…I bet they are tasty.

So that brings us to this idea. I started looking and asking around for recipe ideas. Most of what I saw said 1 gallon of apple juice, one gallon of cider, various aromatics, and a bottle of Everclear. Now, if you take 256 ounces of non alcohol, and add 25 ounces of alcohol, you end up with a product that is 9.7% alcohol by volume (19 proof). I’m pretty sure they make Porters stronger than that. That wouldn’t do.

See, I’m leaving shortly on a 12 day Mule Deer hunt in a forest that is dropping well below freezing every night. I need something that will keep me warm. Either by consumption or ignition. It’s moonshine for god’s sake. Not a White Zinfandel. It should burn the hair off the chest of those who have hair, and grow hair on the chest of those who have none. So I decided I’d create my own.

20131026-021628.jpgGraham’s Apple Pie Moonshine

1 – 750ml bottle of Everclear 190 proof Grain Alcohol
1 pint Apple Juice
1 pint Apple Cider
1/4 C Brown Sugar
2 Cinnamon Sticks
2 Nutmeg…uh, Nuts?
1/2 Apple (variety your choice)

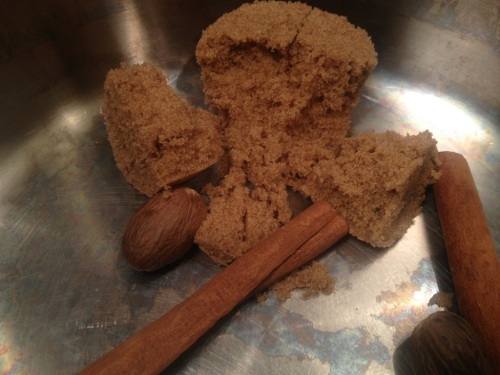
Toss the brown sugar, cinnamon sticks, and nutmegs (still super confused at to what to call these) in a pot.
20131026-022044.jpg
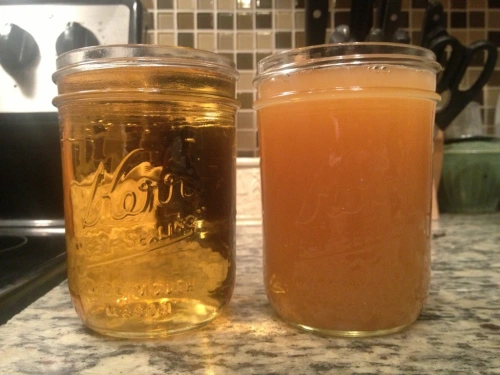
Measure out two cups (1 pint) of the juice and cider. Who needs measuring cups, right?
20131026-022126.jpg
Add the liquids to the pot and stir to dissolve the sugar. Heat. Bring the mixture to a boil. Reduce the heat, cover, and simmer for 20 minutes.
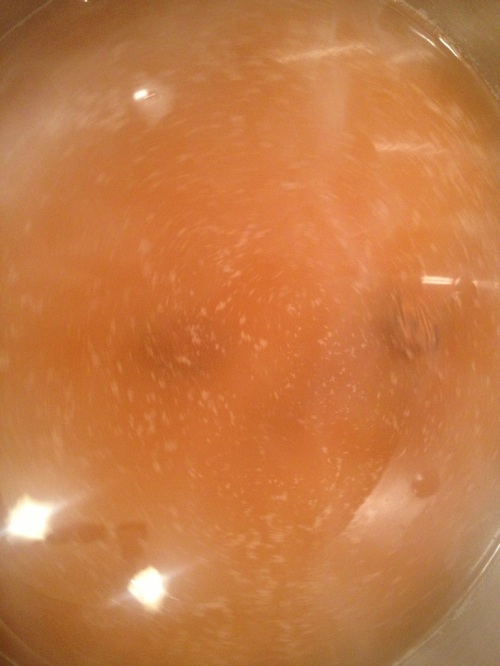
20131026-022236.jpg
Now, why didn’t we add the Everclear? Two reasons. 1st off it evaporates at like 188 degrees. If you boiled the cider and Everclear for 20 minutes you’d be left with a hard cider, not moonshine. The 2nd is that Everclear is no joke. This stuff is basically pure alcohol at 190 proof.

20131026-022542.jpgIf you have a gas stove and you off vapor enough Everclear you could start a fire. So keep the booze on the counter and the cider in the stove.

After 20 minutes turn off the heat. Using a canning funnel and ladle. (Seriously, you could put the stuff in anything. From a decorative bottle to a Tupperware container. But I love mason jars, so it’s going in a mason jar.) Catch one cinnamon stick and one nutmeg and drop them in one quart sized jar. Grab the others and drop them in the 2nd jar. Then try to get one pint of cider mixture in each jar. Eye balling is ok. Remember to set your mason jars on a towel or wooden cutting board. Cold countertops, especially Granite ones, can cause the jars to shatter once hot liquid is added to the cold jars.
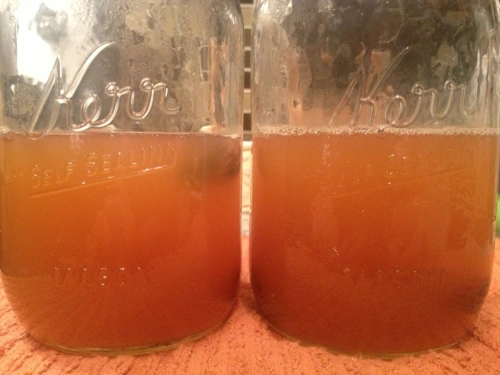
20131026-023122.jpgLet the mixture cool at least 20 more minutes. The longer the better. Then add the bottle of Everclear, divided between the two quarts. Slice your apple in to….slices. (Don’t like the sound of that sentence.) Drop 2-4 slices in each jar. I used Honeycrisp, because they are the undisputed champions of apples. But you could use Gala, Golden Delicious, Granny Smith, whatever.
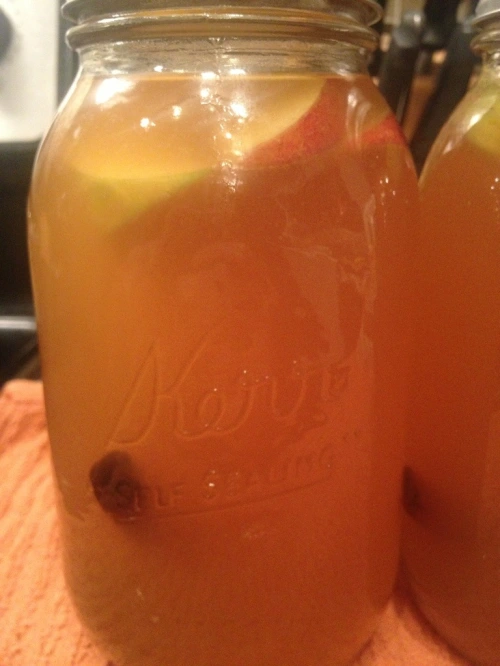
20131026-023658.jpgSo before you put that lid on, lets talk some science real quick. Let’s just say you decided not to let the cider cool. You just added the Everclear into the hot jar of cider. Then you toss your lid on, secured down with a ring, and walk away. What’s going to happen? As we discussed earlier Everclear evaporates at a relatively low temperature. Which means that alcohol is turning into vapor and that vapor is beginning to take up space. What happens when there is more vapor than space? Big Badda Boom. Now I’m not saying that your jar is going to explode. But I’m also not not saying that. However it’s very likely that the weak aluminum lid comes flying off the top with great force.

So if you don’t have the time to wait for whatever reason do the following. Fill your sink with the hottest water that your faucet will muster. Lower your jars into the sink. Start turning the faucet from hot to warm as you let some water drain out of the sink. Then turn your faucet from warm to cool, and then cool to cold as you continue to let the water slowly drain from the sink. Do this until your jars are cool. The transition has to be slow or your jars will shatter. Ok, back to the fun.

I like to mark my jars so the kids don’t think it’s a treat they can snack on.
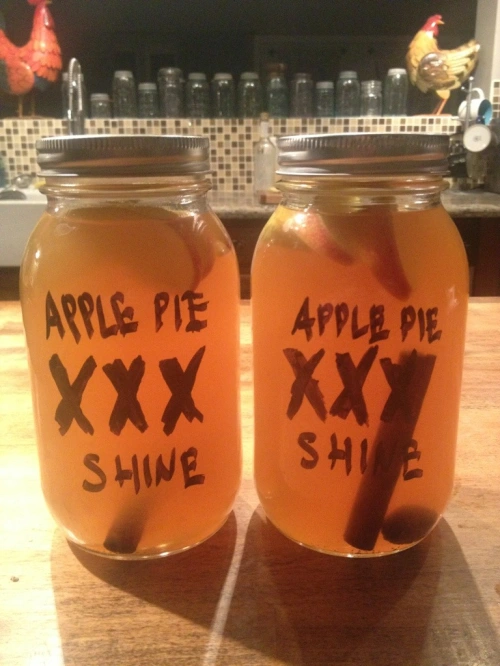
20131026-024350.jpg Let’s do the math on this shine real quick. 2 pints of juice and cider is 32 ounces. 750 mL of Everclear are 25 ounces. Added together that’s 57 ounces. If 25 of those ounces are alcohol what proof is this? 43.86% or 88 Proof. Now THAT’s a lot closer to real shine.

This stuff only gets better with time. And no need to worry about processing. No bacteria can grow in this high of an alcohol content. In future batches I’m thinking about withholding 1/2 cup of apple juice and adding 1/2 cup of Fireball Whisky instead for an additional cinnamon kick.

I plan on using this to Irish up my hot apple cider around the campfire, as well as keeping a flask on me for those dusk and dawn hunting hikes up north.

If you have a shine recipe feel free to share or link it in the comments.

Happy canning!

Meals In A Jar; Sloppy Joes

I have a 12 day Mule Deer hunt coming up next week. In preparation, I was trying to come up with self contained meals in mason jars, to save on my finite cooler space.

One of the first things I thought of was Sloppy Joes. But instead of just the sauce, like a can of Manwich, I wanted the meat in the recipe too.

I did some searching around and found a base recipe to work off of. I was originally given the recipe by a member of a canning group I belong to. But I also found the same recipe a couple of places online. So I’m not sure who get’s credit. Either way, I modified it slightly.

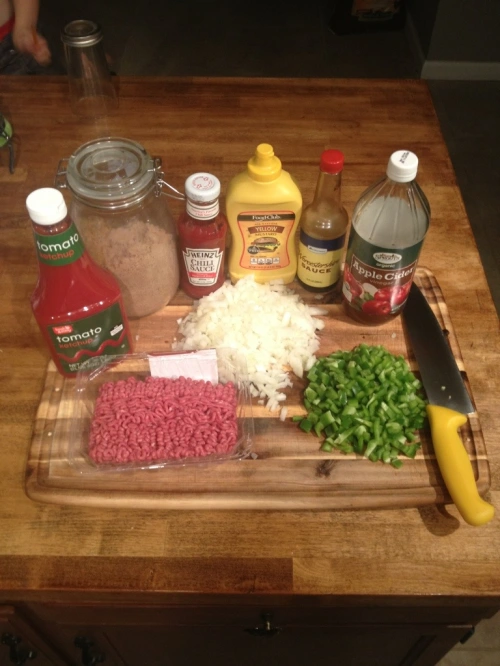
Ready To Go Sloppy Joes

2lbs Ground Beef
1 C Chopped Onion
3/4 C Chopped Green Bell Pepper
1 1/2 C Catsup/Ketchup (Use Heinz or Hunt, or make sure your brand has no thickeners added)
2 T Brown Sugar
2 T Apple Cider Vinegar
3 T Heinz Chili Sauce
3 t Worcestershire Sauce
2 t Yellow Mustard
1/4 C Water

Yield 3 Pints

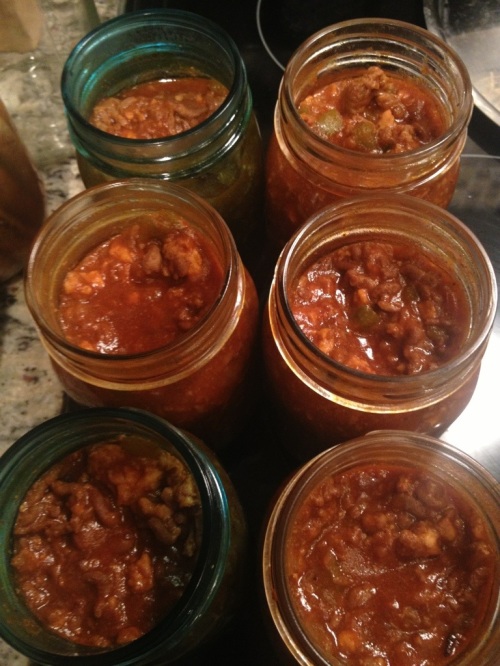
20131025-023258.jpg
For complete transparency, know that I doubled my recipe, and also used 3lbs of beef and 1lb of chicken.

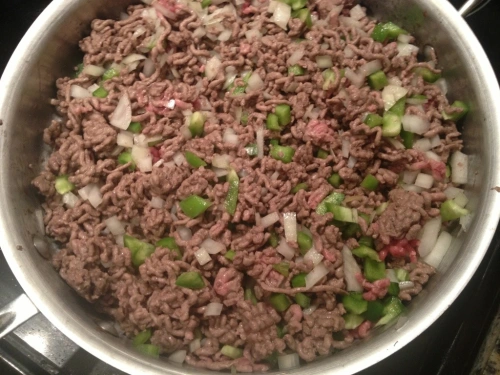
Start by adding your beef, onion, and green pepper to a hot skillet. If you chose to use chicken, add some olive oil to the pan first. If you double your recipe, this is easier to do in two batches

20131025-023620.jpg
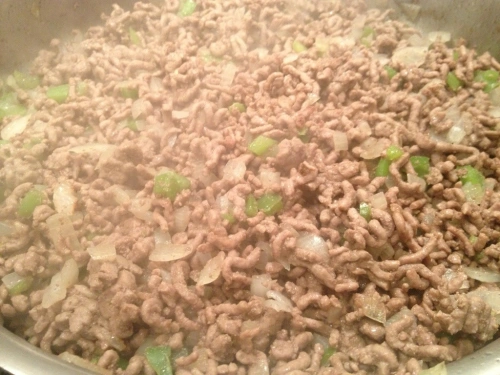
Brown the ground beef and cook the onions to translucence. Depending on the fat content of your beef you may need to drain the fat off. Mine was lean enough that it didn’t need it.

20131025-023643.jpg
I prepped by putting my ketchup/catsup (that’s a whole different debate), Worcestershire Sauce, Chili Sauce, and Mustard in one bowl, and my brown sugar, cider and water in another. Stirring to dissolve the sugar.
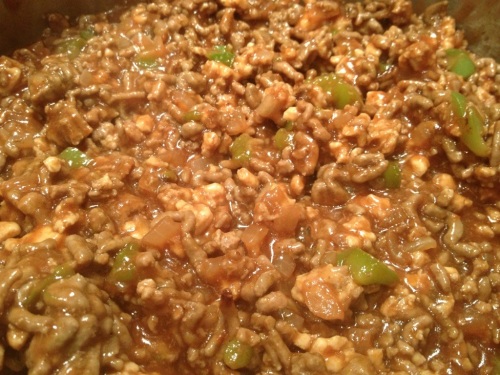
When the beef and veggies are done, add the remaining ingredients and stir to combine.

20131025-023951.jpg
Bring everything to a boil, reduce to a simmer, cover, and cook for 20 minutes. After 20 minutes I took the lid off and found that it was a bit runnier than I’d like. I kept the lid off and stirred it until it reduced to a consistency I wanted. Fill your clean mason jars to a 1″ headspace.

20131025-024158.jpg
Top with your heated lids and finger tightened rings. Process at 11lbs for 75 minutes for pint, and 90 minutes for quarts. Remember, you can’t fit much more than a half a cup of meat onto one hamburger bun. That’s four servings per pint and eight servings per quart.

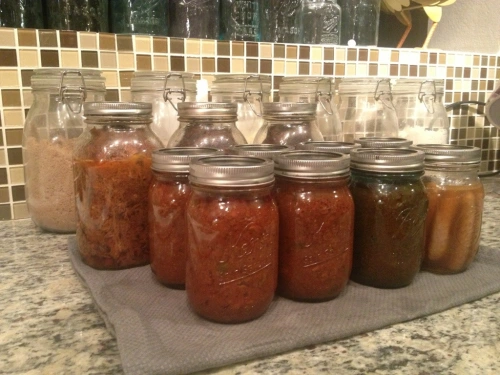
20131025-024342.jpg
I haven’t cracked these open yet, as my hunting trip is next week. I’ll definitely come back and update the bottom of this post with a review. But my eight-year-old son and I ate the little bit of leftovers that wouldn’t fill a seventh jar and so far we are both very happy with it. He has requested that I make them from scratch for dinner. Which really isn’t a bad idea since it too less than 30 min to make.

20131025-024459.jpg
The flavor was very comparable to a can of Manwitch sauce. Maybe a touch sweeter. Next time I will add less sugar and try to spice it up just a little bit more, maybe with some hot sauce. But we’ll see what it tastes like out of the jar.

20131025-024603.jpg
If you have ideas for self-contained meals that can be opened from a jar, heated, and served please share or link them in the comments.

Happy canning!
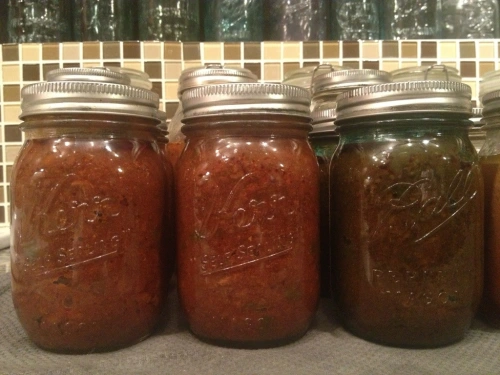
Buhsketty Sauce; Or How To Get Your Kids To Eat A Weeks Worth Of Vegetables

Canning stuff is all fine and good. But what are you supposed to do with it? I’m trying to post more recipes that use home canned items to give you a better idea of options that are out there.

When we canned 200lbs of tomatoes last year we considered making pasta sauce. But, not knowing what we’d use or in what quantity, we decided to stick with stewed tomatoes that could be made in to Italian sauce or a variety of other things.

Over the last 9 months I’ve tried a variety if techniques and recipes. This is my favorite recipe for pasta sauce.

Pasta Sauce
2 quarts canned tomatoes
Olive Oil
Onion
Garlic
Vegetables Of Your Choice
Red Wine
Balsamic Vinegar
Oregano
Basil
Thyme

20130910-010415.jpg

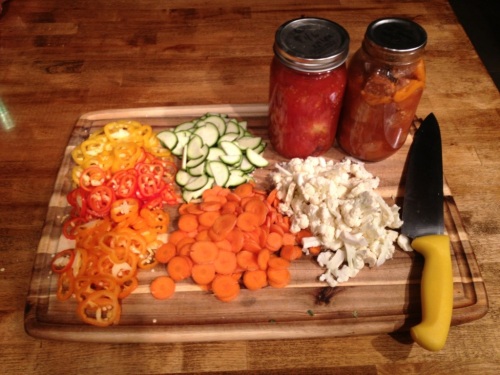
I always start this recipe by raiding the fridge and pulling out all the vegetables that have been forgotten over the last two weeks. Bell peppers, sweet peppers, that little 1/4 of a head of cauliflower that’s starting to get rubbery, the one crook neck squash, and that pack of mushrooms you found on clearance. Pretty much anything you find is good. I always have, and always use, carrots. They add the perfect sweetness to the sauce.

This time I happened to find some panchetta that needed using up. You could also add bacon, Italian sausage, or fat back if you have that. If you don’t just add more olive oil to the pan instead.

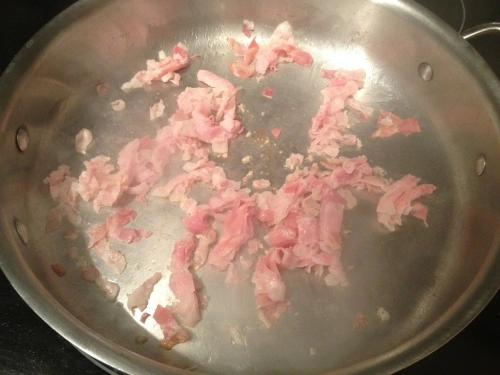
Start by rendering out the fat of whatever meat you’re using.

20130910-010525.jpg

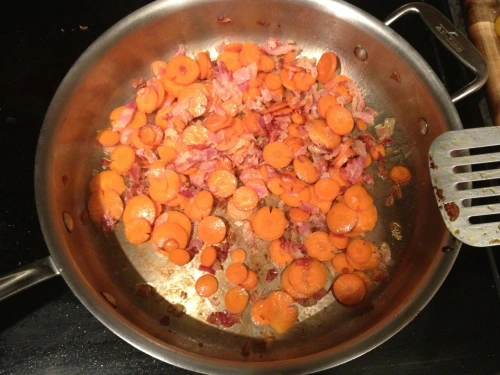
Chop the onion and garlic, and slice the carrot into thin rounds. Add them to the hot pan and cook until the onions are translucent and the carrots are slightly browned and softened.

20130910-010724.jpg
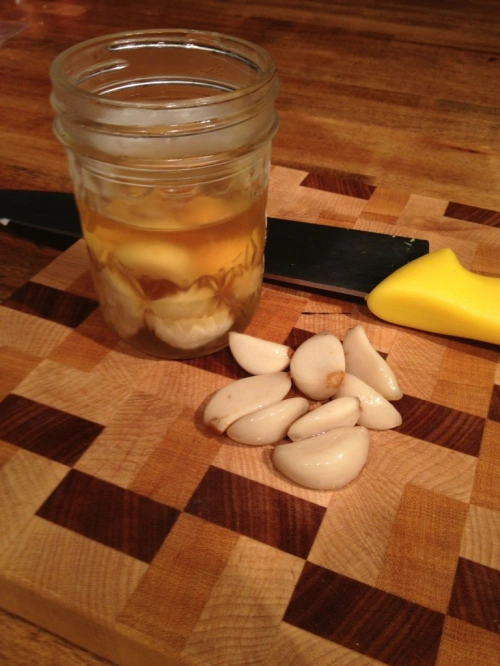
For this recipe I used pickled garlic that I made previously. Pickled garlic is great. It makes garlic last 6 times as long, preserves all the garlic flavor, but takes that acrid bite out of the cloves.

20130910-010935.jpg
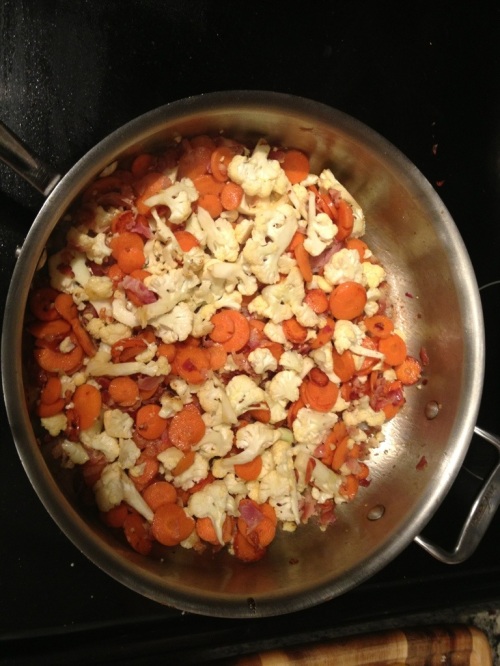
Add the the vegetables in order of hardness. For instance, cauliflower, then zucchini, then peppers so everything cooks to the same consistency.

20130910-011122.jpg
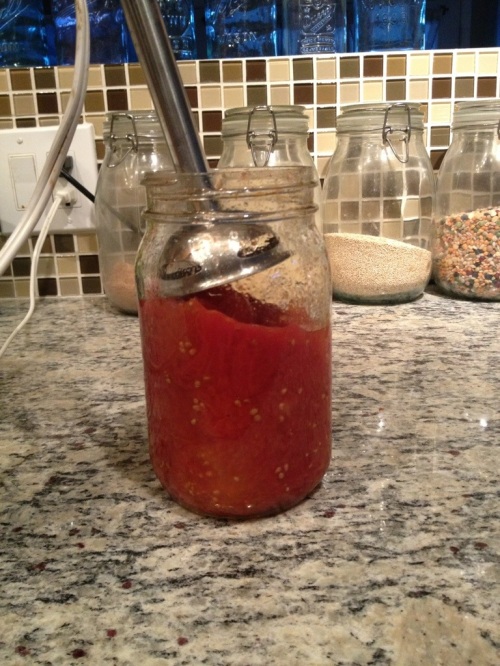
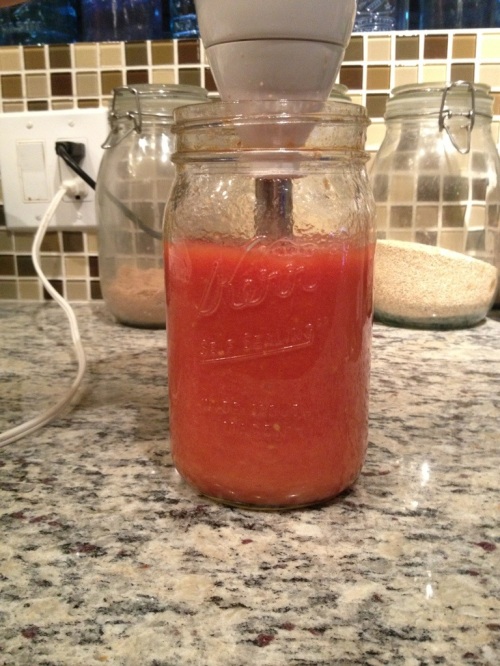
Take your tomatoes and drain the clear liquid off of them. I’ve found that tomatoes really hold the liquid trapped in the jar so I move them around with a fork to release it all. If you canned them in a regular mouth jar screw a blender base on the top. If you use widemouth jars an immersion blender will fit right in the top.

20130910-012743.jpg
Blend until the tomatoes are pureed.

20130910-012944.jpg
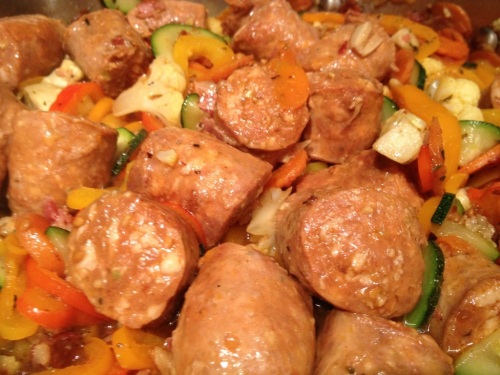
Add the tomato sauce to the pan and bring to a boil. This time around I decided to add a jar of hot Italian sausages that I canned a couple of posts ago.

20130910-013223.jpg
Since they are already in tomato sauce I just added them right in.

20130910-013428.jpg
Add a healthy pinch of oregano, basil and thyme; 2 tablespoons to 1/2 cup of any red wine; and 2 tablespoons to 1/4 cup of balsamic vinegar. I like my sauce on the more acidic side, and feel that balsamic adds some good depth to it overall, so I’m more heavy handed with it. Let the sauce simmer and reduce for a while.

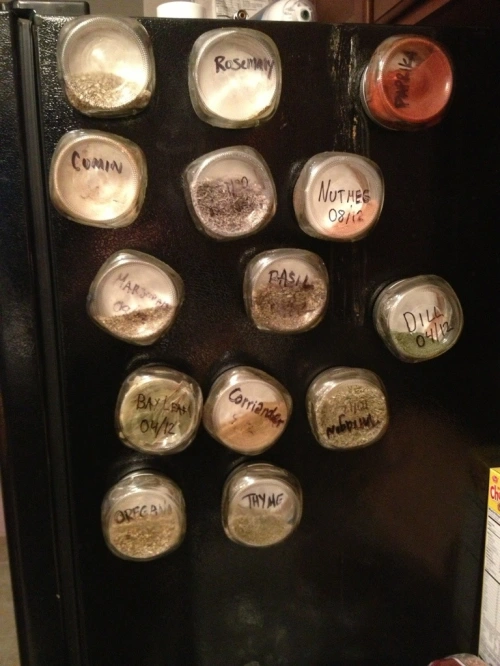
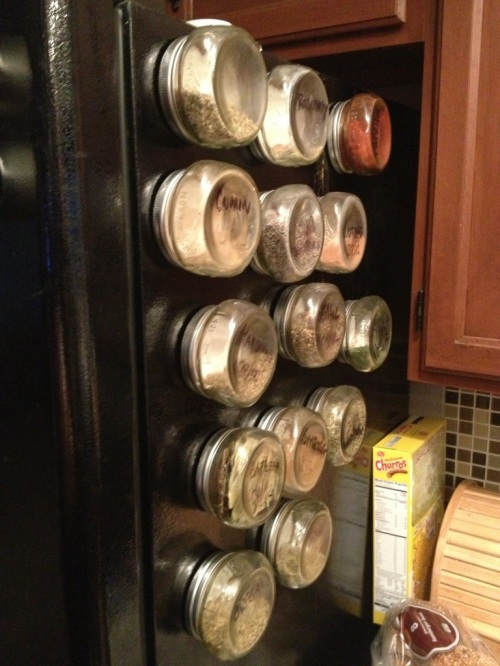
While we are waiting let’s talk about spices. Have you seen Ball’s little shorty half pints? I glued some hobby magnets to their lids and use em as spice jars on my fridge.

20130910-014519.jpg

20130910-014613.jpg
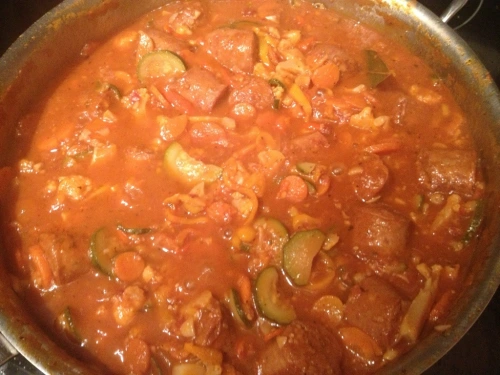
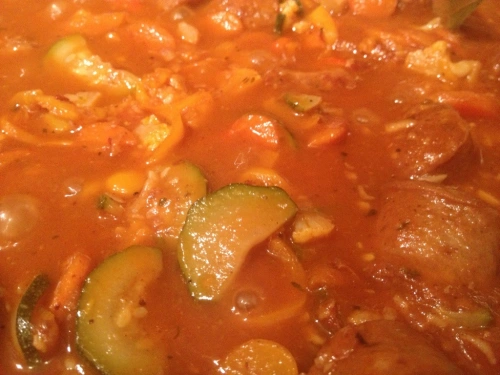
Ok, back to the sauce. The basic idea is to sauté the vegetables, puree the tomatoes, added herbs and acidity, and then simmer until it teaches the consistency you like. I prefer mine a little on the thicker side, so I let it reduce for a while.

20130910-014948.jpg

20130910-014959.jpg
I like this recipe because it cleans out my veggie drawer. Ill add portabellos one week and sweet mini peppers the next. Ive also added kale or spinach to the mix. But my favorite part is that my kids gobble it all up. All of it. They love spaghetti. They love the sauce. And they don’t even care what’s in it.

If you have a pasta sauce that uses home canned ingredients, please share it.

Happy canning!
Hot Italian Sausage In Tomato Sauce

Update: This recipe won a 1st place Blue Ribbon at the 2013 Arizona State Fair in the Canning Meat category.

Italian Sausage in Tomato Juice

20130716-184452.jpg

I’m trying to delve deeper in to the world of canning. To try more meats. And specifically, to can more things that are closer to ready to eat.

We were at the grocery store looking for pork to smoke (a whole different post) when I saw packages of hot Italian sausages on clearance for half price. In the past I would have frozen them. But I figure, why not put em in a jar?

The National Center For Home Preservation says to brown sausage and then process it in water, stock or tomato juice. My thought process was this: water would be a waste. Why remove all that flavor into water that would likely be drained out anyway. Stock sounded ok. But all I had was previously home canned smoked chicken stock. And that didn’t sound that great. So that left me with tomato juice, which I didn’t have. But what I did have was previously home canned tomatoes.

I figure hot italian sausage is destined to be in pasta sauce at some point in the future. So why not process it in tomatoes now? I grabbed a wide mouth quart of canned tomatoes off the shelf. The immersion blender fits right in the top, and in no time it was a quart of tomato puree. I put that in a pot with a pint of water to make my tomato juice.

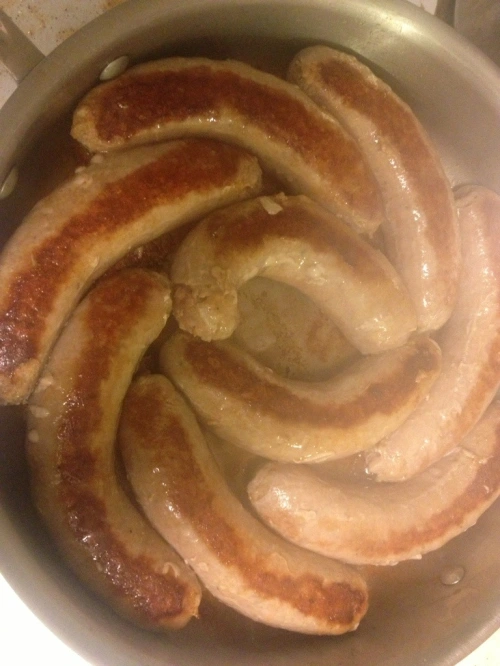
I placed the sausages in a pan and browned them on both sides.

20130716-174651.jpg
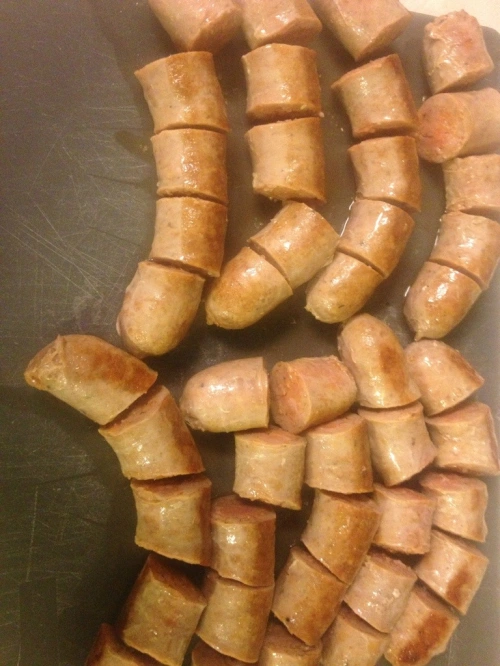
Once they were brown I cut each sausage in to 5 pieces.

20130716-174805.jpg
Place the pieces in a quart jar. This took a little bit if engineering. But luckily years of playing Tetris paid off. Just make sure you’re filling voids in the jars where you see them. In total I cooked 6 pounds of sausages that ended up filling 4 quarts.

Heat the tomato juice to a boil and cover the sausage pieces with the juice. Leave a 1″ headspace.

20130716-175403.jpg
Use a plastic utensil to remove any air pockets or bubbles. Why plastic, you ask? Because metal can cause micro scratches and fissures in the glass. This can be the catalyst for thermal fractures in the future.

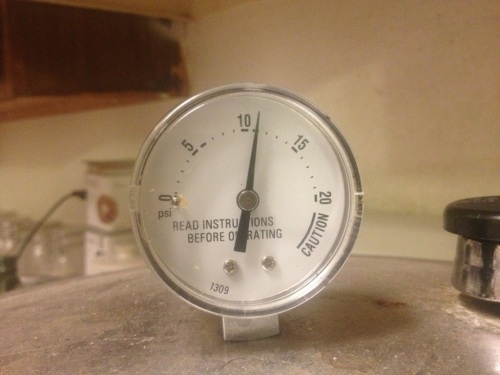
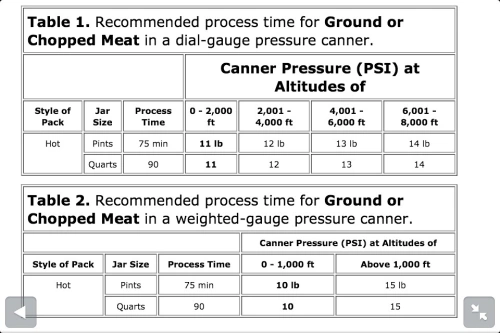
Top with lids and bands and place in a pressure canner at 11lbs for 75 min for pints or 90 min for quarts.

20130716-183309.jpg
Use this chart to adjust for altitude.

20130716-184022.jpg
Always turn off the heat and allow the pressure canner to cool by itself when the time is up.

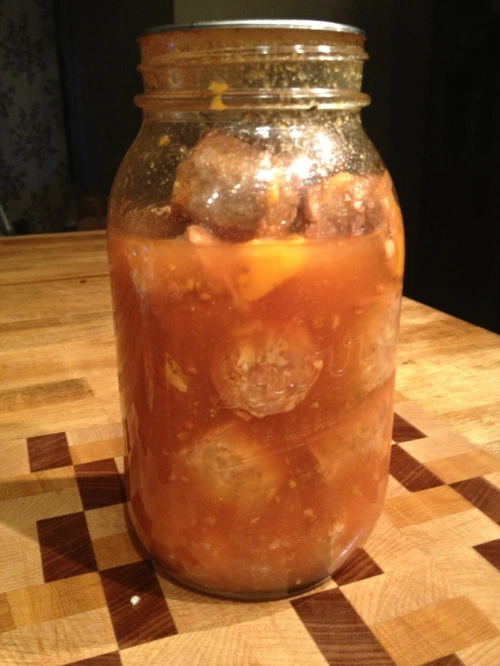
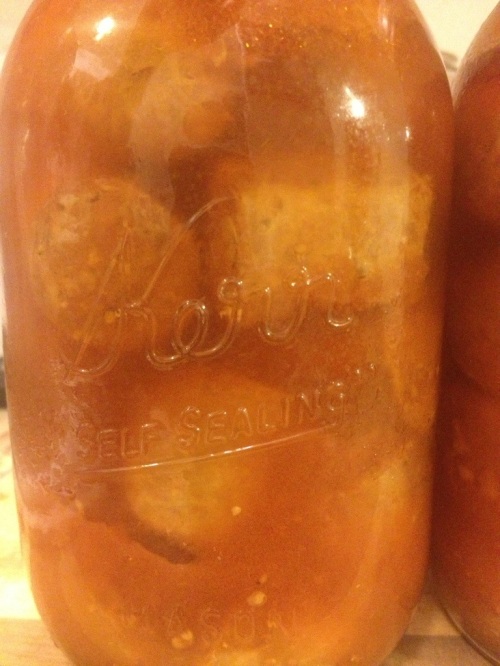
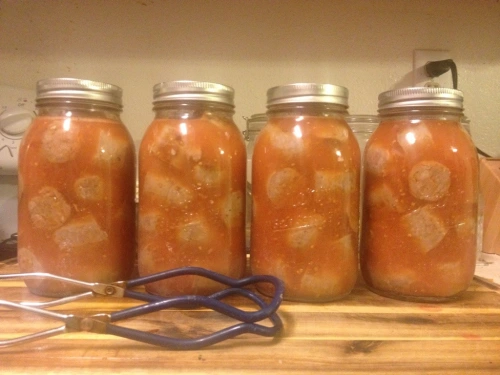
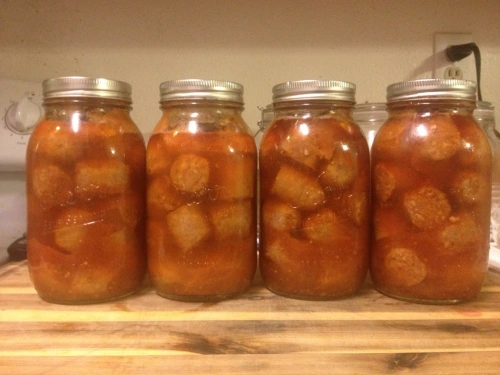
The finished product looks like this. Not too bad. Sometimes canned meat looks like a lab specimen. This looks more like Spaghettios.

20130716-184327.jpg
I’m huge on making my own pasta sauce right now. Generally it’s 2 quarts of tomatoes, onion, garlic, carrots, zucchini, squash, peppers, wine, balsamic, and spices. In theory a jar of sausages can be added, without taking the time to defrost and brown the sausages, cook them through, and letting them simmer in the sauce. The flavor’s already in there.

Happy canning.

I pickled a peck of picked peppers.

Ok, so that title is a bit misleading. I actually pickled 3 pounds of store bought peppers. But this was a total win of a recipe. I’ll be keeping these on hand forever.

I wanted to make pickled peppers for a while. Only problem was, for what? My younger kids don’t like too much spice, and I’m not real keen on strong heat. I didn’t want to make jars and jars of stuff just to sit around.

What I wanted was something closer to “Hots.” A blend of sweet and spicy peppers packed in oil that is popular on sandwiches on the east coast.

I found yellow chile peppers at the grocery store. Didn’t know much about them, but they looked good. And I thought they’d look good in a jar. So I grabbed a couple pounds and brought them home.

On the way home I stopped by Cost Plus and found their Weck Jars on sale. So of course I grabbed 3 of them as well. I know the price is high. But I love them. Weck jars have a presence to them. They just look so amazing with food in them. The added benefit of food only touching glass is a bonus.

Pickled Pepper Brine
5 C White Vinegar
1 C Water
4 t Pickling Salt
2 T Sugar

Start by rinsing and hand washing all your peppers. Pretty easy step.

20130610-233106.jpg
Cut the top off each pepper and then slice lengthwise.

20130610-233213.jpg
Pack the pepper halves in to jars. I pushed them down to compress them, but not enough to break them. My childhood Tetris experience definitely helped me out.

Combine the brine ingredients and bring to a boil. Pour the hot brine over the peppers leaving 1/2″ headspace.

20130610-233729.jpg
Add your lids and rings, or in case of Weck jars, rubber bands and lids.

Process for 10 minutes in a water bath.

20130610-234205.jpg
Skip ahead 3 weeks. I always let my pickled foods sit for 21 days before opening. It can be murder seeing them every day. But it’s totally worth it.

The end result were peppers that have a mild heat like green chiles, the tang of vinegar, and the subtle sweetness that you get with sweet peppers. It’s like a blend of sweet and hot peppers, but only one pepper. I couldn’t be happier.

Tonight I chopped a couple up and used added them to a bowl of mild chili. But I can totally see these sliced on a sandwich, mixed in with ground beef as a burger or meatloaf, or on a pizza. As soon as stock runs low I’ll be making more.

20130610-235139.jpg

20130610-235241.jpg

20130610-235840.jpg

Shank You Very Much

Braising. It’s one of my favorite ways of preparing meats. Braising uses moist heat and time and takes tougher, less expensive cuts that have huge flavor, and break them down into tender delicious dishes.

Im going to over two recipes today. Moroccan Lamb Shanks With White Bean Ragu which contains a variety of spices and seasonings and Beef Shanks In Red Wine that has less ingredients, but a full rich flavor.

The 1st recipe is not real picture intensive because I was too busy cooking. 🙂

Moroccan Lamb Shanks with White Bean Ragu, Chick Pea Mash, and Roasted Cauliflower

4 Lamb shanks
1 T Cumin
1 t Turmeric
2 t Coriander
1/2 t Cayenne Pepper
1/2 t Paprika
1 t Fennel Seed
2 t Kosher Salt
1/2 t Black Pepper
2 t Mint
1 T Chopped Ginger
1 Onion
4 T Olive Oil
1 qt Canned Tomatoes
1 qt Stock
2 C White Wine
1/4 Preserved Lemon
1 Pint White Beans
Handful Of Spinach

2 can garbanzo beans/chick peas
1/4 C chopped Cilantro
1 C stock (chicken or veg)

1 head cauliflower
2 T olive oil
1 t Salt
2 t Pepper

Oven at 425.

Heat half the oil on a skillet. Sear the lamb shanks on all sides until brown. In a dutch oven heat the other half of the oil and brown the onion. As the onion is cooking add the cumin, turmeric, coriander, cayenne pepper, paprika, and fennel seed. Add the white wine and deglaze the pan.

Once the shanks are seared add them to the dutch oven. Add salt and pepper. Stir in the canned tomatoes, stock, beans, ginger, and mint.

Take the preserved lemons and cut the flesh out. Filet the pith off of the zest. Rinse the zest well under cold water. Slice the zest crosswise into the thinest strips you can muster. Add the strips to the pot. Bring the contents to a boil.

Cover the dutch oven and place in the oven for approximately 2-3 hours. Add the handful of spinach 20 minutes before serving and stir it in the pot. The meat on the shank should be very tender and fall easily off the bone.

Core the cauliflower. Break off the florets from the base. Cut larger florets in to smaller pieces by cutting up the stems and separating by hand. Place the cauliflower in a pan or cookie sheet. Drizzle with oil and sprinkle with salt and pepper. Then toss to coat. Roast the cauliflower for 25-30 minutes.

Combine the chick peas and stock in a pot. Heat. Roughly mash the peas with a fork or potato masher. Heat through. Add the cilantro and stir to combine.

Serve the cauliflower and chick pea mash next to the shank. Top the shank with the bean and spinach ragu.

These shanks are so flavorful as you taste the lamb with bursts of coriander and lemon, heat from the cumin and paprika, and the depth of the turmeric and ginger. It seems like a lot. But the white beans and chick peas help mellow it out.

20130530-013346.jpg

Hope you enjoy.

For a dish with less spice, but just as much depth, try my 2nd dish.

Beef Shanks In Red Wine On Polenta

4 Beef shanks
1 Onion
2 Stalks celery
1 Large carrot
1 Bottle of red wine (merlot or cabernet)
4 Garlic cloves
1 Bunch fresh thyme
4 T Olive oil
2 t Salt
1 qt Beef stock

1 C Corn meal
4 C+ Vegetable Stock
3 T butter

Oven at 400.

20130530-013539.jpg
Heat the oil in a dutch oven. One at a time, sear the shanks on all sides. Remove the shanks as they are seared and store on a plate.

20130530-014149.jpg
Chop the onion and cut the carrot and celery into 1/2″ pieces. Add them to the pot and cook until the onions start to turn translucent.

20130530-014038.jpg
Add the red wine, beef stock, and thyme.

20130530-014423.jpg
Bring the contents to a boil and cook to reduce some of the liquid. This concentrates the flavor.

20130530-014637.jpg
Cover and place the pot in the oven for 3-3 1/2 hours. The meat with retract from the bone and the connective tissue and meat will be very tender.

20130530-014954.jpg
Heat the vegetable stock to a boil. Slowly pour in the corn meal while stirring vigorously. Reduce to a simmer. This is where polenta gets tricky. You want it to be thick, but not lumpy. If it get’s too thin, cook it longer. If it gets lumpy, slowly add mor stock. Continue to cook for 30 minutes, stirring frequently.

These were so tender that as I tried to remove them from the pan the bones slipped from the meat. I pocked the marrow back into the bone and tossed the bones aside.

Spoon the polenta on a plate. Place a shank on top and the add the cooked vegetables.

20130530-015944.jpg

Pork Loin Stuffed With Apples And Blackberries

This is one of those recipes that was born because I was hungry and I didn’t want to run to the grocery store before dinner. You know those days, where you take turns opening the refrigerator, the pantry, and the cupboards, in turn hoping that you’ll find something that you didn’t see the previous five times.

I had a beautiful pork loin in the refrigerator. But the question was what to do with it. Rotisserie, slice it in to chops, cool it down into pulled pork, or roast it. I ended up grabbing a handful of other ingredients and coming up with this.

Pork Loin Stuffed With Apples and Blackberries
20121115-165849.jpg1 pork loin
2 apples
1 onion
1/4 cup blackberries (or raisins)
1/4 cup whiskey
1/2 cup breadcrumbs
3 tablespoons blue cheese (optional)
1/2 teaspoon dried thyme or 2 sprigs fresh
Butter
Salt and pepper to taste

400 degree oven

Dice the apples and onion. I used 1 Granny Smith and 1 Honeycrisp. Salt and cook the onion in butter over medium low heat to give them a head start on caramelizing. Then add the apples and continue to cook until translucent and soft.

20121115-170640.jpgAdd the blackberries (or raisins, which was my original thought but I was out), the thyme, and the whiskey and cook to reduce.

20121115-170824.jpgSprinkle the breadcrumbs over the top just to absorb the excess moisture. I’m estimating that I used 1/2 cup. Then sprinkle the blue cheese. Next time I’ll skip the blue cheese. It wasn’t bad…but it didn’t really add anything either. No need to over complicate things, right?

20121115-171046.jpgFold the stuffing to combine and heat through.

Grab the pork loin and the longest thinnest knife you own. Insert the knife in one end and carefully drive it through to the other end with out penetrating the other side. Then CAREFULLY sweep the sharp side of the blade toward that side of the loin as you draw it out. Reinsert with the blade facing the other direction and repeat. The goal is to cut a nice hollow pocket in the center of your pork loin without having the blade penetrate through any of the sites. This pocket will hold all of your stuffing without allowing it to seep out while it cooks. I wanted to take pictures of this process for you guys but it is so difficult to handle meat and use the camera at the same time without constant handwashing and/or cross-contamination. But I hope you get the idea.

Stand the roast on the end that does not have the hole in it. This next step works best with an assistant. I held the hole in the roast open while my wife used to spoon to put the stuffing inside. I would then pack it in with my fingers. It was hot but not unbearable. Be sure to work the stuffing all the way down so that it’s distributed evenly throughout. Then use butchers twine to seal up the only end with a hole in it.

20121115-171611.jpg Put the roast in a pan and into your oven.

20121115-171830.jpg It took about 40 to 45 minutes to reach an internal temperature of 145. Remove it from the oven, tent with foil and let it rest for 10 minutes.

20121115-173153.jpgIf you use a very sharp knife and support both ends of the pork loin while you slice it the stuffing should stay in until you serve it.

20121115-173259.jpg Carefully remove one slice at a time and place it on a plate to serve. I chose previously home canned German style sweet and sour pickled red cabbage and home canned ranch style barbecue beans to serve on the side. (see picture above)

20121115-173639.jpg

Tomatillo Salsa Verde

I’m going start focusing on holiday gift ideas. Hopefully one post a week until the New Year. I already covered two ideas, Guinness Stout Beer Jelly and Curry Pickled Cauliflower, last year. That beer jelly is a huge hit with everyone that tries it. So if you need a quick and easy gift idea, start there.

But in the mean time I plan on trying some other easy gift ideas for you to use. This week will be Tomatillo Salsa Verde. This is great stuff. And versatile too. A half pint in the stocking is destined to be enjoyed with a bowl of chips and a cold beer. A pint for the hostess of your holiday party will be used as a green enchilada sauce. And that quart you give to your friend can be combined with a couple pounds of chicken and slow cooked to a great green chile chicken for burritos, tacos, or whatever.

Not only that, but this is a one pot dish that gets blended. So no precise chopping or huge mess afterward.

Tomatillo Salsa Verde

20121115-020225.jpg
Tomatillos
Onions
Jalapeños
Cilantro
Lemon juice
Garlic
Cumin
Salt/Pepper

We’ll talk ratios further down the line.

Tomatillos. What the hell are they? They are a fruit if the Nightshade family and fall under the category of “Who decided it was a good idea to eat this?” plants. Tomatillos are generally green, but you can also find yellow, red, and purple ones (though I haven’t). The fruit resembles a green tomato. But it’s very firm and covered in a thin husk that reminds me if a Japanese paper lantern. As the fruit grown is fills the husk and eventually breaks through. Tomatillos are sold in all stages of this process.

20121115-020923.jpgSometimes the fruit fills the husk, other times it doesn’t. And both are fine.

20121115-021009.jpgSometimes you will find a sticky coating between the fruit and the husk, similar in feel to partially dried hair spray. Don’t worry, it washes off easily.

Which brings me to the next step. The husks are not edible and must be removed. I like to kill two birds with one stone and remove the husk while washing the fruit. The running water helps separate the husk from the fruit and with a quick run the sticky residue is gone too. Invert the husk over the stem, twist, and remove.

20121115-021541.jpgThe inside looks like this.

20121115-021609.jpgFill a pot with water and drop your tomatillos in.

20121115-022020.jpgBring to a boil and cook for about 10 minutes. In the mean time prep the rest of your ingredients. Cut the stems off your jalapeños and split lengthwise.

20121115-022125.jpgUse a paring knife and cut the veins and seeds out. Here’s my theory on jalapeños and heat. If you want mild sauce remove all the veins and seeds. For hot, leave them all in. For a solid medium leave half. I cut them all out and then add about half back in.

20121115-022315.jpgChop your onion, cilantro and garlic as well. Again, we are puréeing this later, so precision is not a factor.

20121115-022810.jpgYour tomatillos will darken in color and become soft.

20121115-022459.jpgRemove and drain them. But reserve a cup or two of the boiling liquid.

I cook, can, bake, and process so much stuff that I don’t get burns on my fingers very easily anymore. If your fingers are more….sensitive, use tongs for this next step. Cut the tomatillos into quarters. This is what the inside if a tomatillo looks like.

20121115-023020.jpgToss the tomatillos in the pot with the onion, garlic, cilantro, and jalapeños. Add some of the boiling liquid to the pot. How much is up to you. Just enough to prevent anything from burning and sticking to the bottom.

20121115-023314.jpgAdd salt, pepper, cumin and lemon juice. Then turn the heat on. Bring the salsa to a boil, then reduce the heat and simmer for 30 minutes. Your salsa should liquefy, the onions become translucent and generally look like this.

20121115-023502.jpgUse an immersion blender, food processor, or blender and *carefully* blend until smooth.

20121115-023559.jpgFill your clean jars to the 1″ head space. Apply a clean lid and band, and hand tighten.

Process in a water bath canned for 20 minutes. And you’re done.

20121115-024352.jpg

20121115-024404.jpgRatios:
3lbs of tomatillos is approximately 6 cups. 1 lb of chopped onion is approximately 3 cups.

Every batch is 6 cups of tomatillos, 3 cups of onion, 3 jalapeños, 1/2 cup cilantro, 6 garlic cloves, 1/2 cup lemon juice, 2 teaspoons cumin, 1 tablespoon salt, and 1 teaspoon pepper. I made three times this much in one batch. This recipe is a bit heavy on the cumin, but I love the heat and flavor that it adds. Other options are a mix of lemon juice and vinegar for a sour bite, adding some lime juice, and adding or removing garlic. A single batch yields about 2-3 quarts.

This recipe involves little prep work, is prepared and processed in under one hour, and only involved a cutting board and large pot.

I added a quart of this to a crock pot with a couple pounds of chicken breasts. 6 hours later I had green chile chicken. I shredded the chicken with two forks. Then I rolled the chicken in several tortilla shells and placed them in a glass casserole dish. I topped it all off with more tomatillo salsa and shredded cheese. Bake at 350 for 20 minutes then broil to crisp the cheese. Boom, easy peasy green enchiladas.

Happy canning.

Pumpkin Everything!

Is there any doubt that this is the best time if the year for flavors? Every part of the last 3 months is fantastic. Cinnamon, nutmeg, allspice, clove, pumpkin, pecans, peppermint, yams, caramel, cranberries, pears, apples, and raisins.

I even decided to spend a couple bucks on supplies and throw together an autumn wreath for our door, a first for me.

20121023-143502.jpg

Back to the matter at hand. As a result of cooking up two and canning six pumpkin I had a huge bowl of pumpkin guts and seeds. I knew I wanted to keep the seeds. But the idea of spending an hour picking those slimy buggers out was not appealing. As I started taking the seeds out I tossed then in a bowl if water to rinse them off. That’s when I noticed that the seeds all floated.

So I filled a stock pot half way with water. I grabbed a large handful of pumpkin guts, held them under water loosely, and vigorously moved my hand. Similar to the agitation of a washing machine. And sure enough, all the seeds popped to the top.

20121023-145828.jpg
You can see that some of the pumpkin is floating as well. But those chunks were easy to grab and pull out. Most of the really stringy stuff sent to the bottom. Then I just used a slotted spoon to skim the very surface to grab the seeds out.

I’m sure I’m not the first person in history to figure this out. But it was a first time for me. And it definitely made things much easier. I was able to remove the seeds from eight pumpkins in less than 10 minutes.

I decided to make four varieties if roasted pumpkin seeds.

The procedure for each is the same.

Rinse the seeds off to remove all of the pumpkin.

20121023-150514.jpg
Place the seeds in a bowl and drizzle with approximately 1 to 2 teaspoons of olive oil. Use a spoon to gently toss the seeds to coat them with oil. Then sprinkle on whatever topping you’re using as you continue to stir.

20121023-150543.jpg
Spread out in a single layer on a cookie sheet and roast at 350° for 30 minutes. Use a spatula to move the seeds around once or twice during roasting to ensure that they are all evenly cooked. Cool and enjoy.

Pumpkin Pie Seeds
1 1/2 c pumpkin seeds
2t olive oil
2T sugar
1t cinnamon
1/2t nutmeg
1/2t allspice
1/4t ginger

20121023-150933.jpg

Old Bay Pumpkin Seeds
1 1/2 c pumpkin seeds
2t olive oil
1T Old Bay Seasoning

20121023-151136.jpg

Cocoa Cayenne Pumpkin Seeds
1 1/2 c pumpkin seeds
2t olive oil
2T sugar
2t cocoa powder
1/2t cayenne pepper

20121023-151303.jpg

Spicy Curry Pumpkin Seeds
1 1/2 c pumpkin seeds
2t olive oil
1t curry powder
1t kosher salt

20121023-151443.jpg

Pumpkins stuffed with sausage

My wife has got to be the biggest fan of squash in the world. We’ve always got at least 3 varieties on the counter and she eats it twice a week. When the little pie/baking pumpkins came out she started looking for a savory way to serve them.

Stuffed Pumpkins with Sausage

20121023-133412.jpg
2 pie pumpkins
6 Italian sausages
1 leek
2 medium apples
1 jar canned mushrooms (or 2 lbs fresh)
2 cups roughly chopped kale
1/4 C sherry
Salt, pepper, garlic powder, marjoram

Drop your sausages in a pan of water and boil to cook through.

Clean your pumpkins. Then cut a hole around them, the same way you would if you were going to carve it. The use a spoon to scrape out the seeds and punkin’ guts. But be sure to save them for roasting later.

20121023-133702.jpg
Drop 1/4t marjoram and salt and 1/8t pepper and garlic powder in to the cavity.

20121023-133826.jpg
Put the lid back on and shake to distribute. Photos now include real shaking action!

20121023-133919.jpg
Set the pumpkins aside. Chop your apple and leek in to 1/2″ pieces.

20121023-134145.jpg
Sautéed the apple and leek in some olive oil until they begin to become translucent. If you are using fresh mushrooms add them at the beginning to cook down. If you are using home or commercially canned add then after to prevent over cooking.

20121023-134433.jpg
Add sherry to the pan and cook until the liquid reduces. Chop your sausages in to pieces and toss it in the mix. Cook everything until its heated throughout and the flavors have mingled. Salt and pepper to taste (most sausages are already pretty salty).

20121023-134900.jpg
Open your pumpkins and stuff with the filling. Or, fill with the stuffing. Your choice.

20121023-134950.jpg

20121023-135009.jpg
Put those bad boys in a roasting pan and spray with olive oil. Or, if you need to, just drizzle and rub them all over. Pop em in the oven for one hour.

20121023-135230.jpg
After an hour the skin is nice and dark.

20121023-135328.jpg
Carefully (they’re hot) remove the top and add 1 cup of kale to the pumpkin. Replace the lid and let it sit for 5 minutes. This is a great time to set the table. By the time you’re ready to eat the kale should be perfectly steamed.

20121023-143731.jpg

20121023-135921.jpg
To serve we removed the lid, and then cut the pumpkin into 6 pieces. We tossed the stuffing together to mix in the kale. Then served one slice of pumpkin with stuffing on it.

20121023-143916.jpg

20121023-140102.jpg
I found the pumpkin to be slightly under seasoned so I upped the salt in this recipe. My only complaint was that it didn’t feel like a whole meal (despite containing meat, veggies, and starch). Next time I’d serve it as a side to roast chicken with Brussels sprouts or something in the side. The flavors, however, were fantastic. Definitely a fall side dish to make again.


Enter your email address to follow this blog and receive notifications of new posts by email.

Join 368 other subscribers