Posts Tagged 'dinner'

Meals In A Jar; Sloppy Joes

I have a 12 day Mule Deer hunt coming up next week. In preparation, I was trying to come up with self contained meals in mason jars, to save on my finite cooler space.

One of the first things I thought of was Sloppy Joes. But instead of just the sauce, like a can of Manwich, I wanted the meat in the recipe too.

I did some searching around and found a base recipe to work off of. I was originally given the recipe by a member of a canning group I belong to. But I also found the same recipe a couple of places online. So I’m not sure who get’s credit. Either way, I modified it slightly.

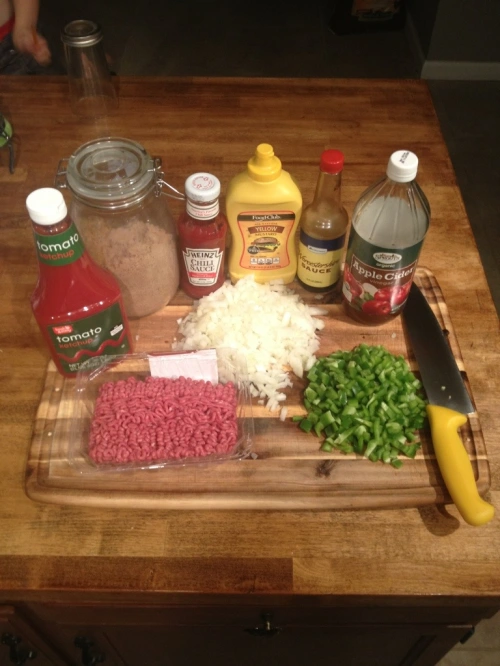
Ready To Go Sloppy Joes

2lbs Ground Beef
1 C Chopped Onion
3/4 C Chopped Green Bell Pepper
1 1/2 C Catsup/Ketchup (Use Heinz or Hunt, or make sure your brand has no thickeners added)
2 T Brown Sugar
2 T Apple Cider Vinegar
3 T Heinz Chili Sauce
3 t Worcestershire Sauce
2 t Yellow Mustard
1/4 C Water

Yield 3 Pints
20131025-023258.jpg
For complete transparency, know that I doubled my recipe, and also used 3lbs of beef and 1lb of chicken.

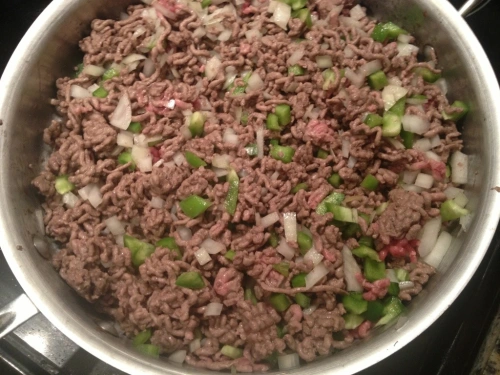
Start by adding your beef, onion, and green pepper to a hot skillet. If you chose to use chicken, add some olive oil to the pan first. If you double your recipe, this is easier to do in two batches
20131025-023620.jpg
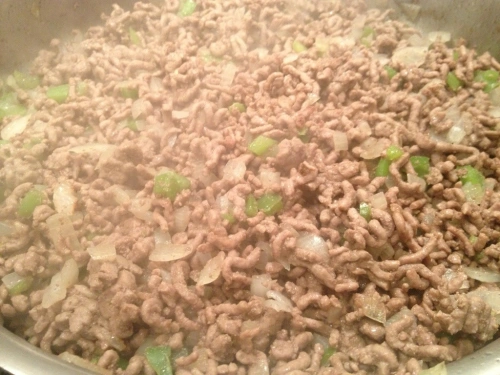
Brown the ground beef and cook the onions to translucence. Depending on the fat content of your beef you may need to drain the fat off. Mine was lean enough that it didn’t need it.
20131025-023643.jpg
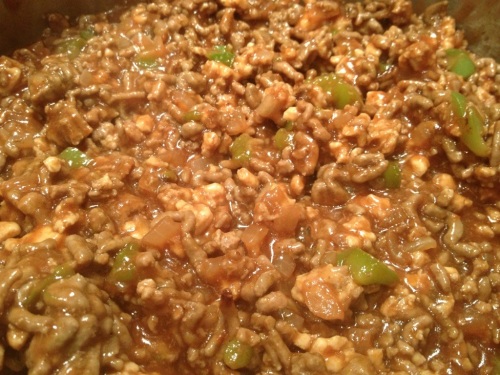
I prepped by putting my ketchup/catsup (that’s a whole different debate), Worcestershire Sauce, Chili Sauce, and Mustard in one bowl, and my brown sugar, cider and water in another. Stirring to dissolve the sugar.
When the beef and veggies are done, add the remaining ingredients and stir to combine.
20131025-023951.jpg
Bring everything to a boil, reduce to a simmer, cover, and cook for 20 minutes. After 20 minutes I took the lid off and found that it was a bit runnier than I’d like. I kept the lid off and stirred it until it reduced to a consistency I wanted. Fill your clean mason jars to a 1″ headspace.
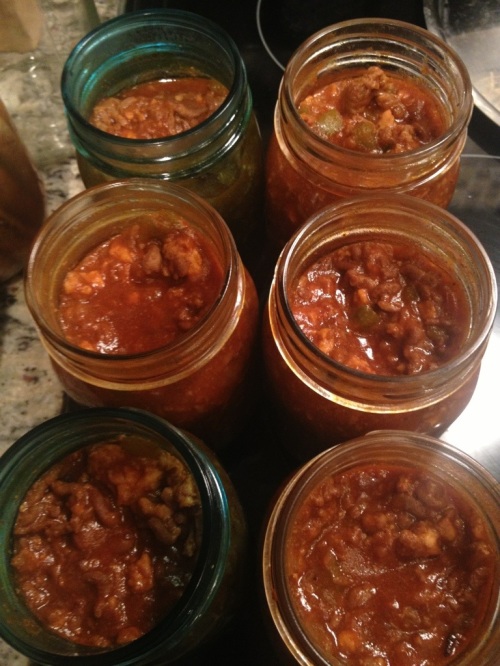
20131025-024158.jpg
Top with your heated lids and finger tightened rings. Process at 11lbs for 75 minutes for pint, and 90 minutes for quarts. Remember, you can’t fit much more than a half a cup of meat onto one hamburger bun. That’s four servings per pint and eight servings per quart.
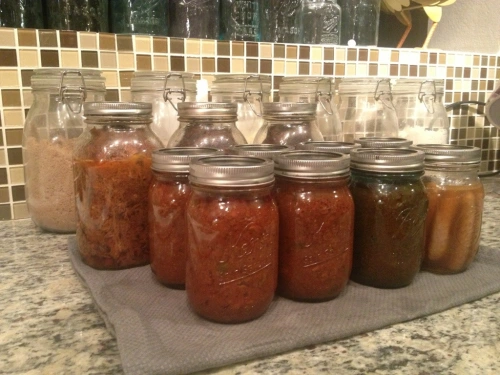
20131025-024342.jpg
I haven’t cracked these open yet, as my hunting trip is next week. I’ll definitely come back and update the bottom of this post with a review. But my eight-year-old son and I ate the little bit of leftovers that wouldn’t fill a seventh jar and so far we are both very happy with it. He has requested that I make them from scratch for dinner. Which really isn’t a bad idea since it too less than 30 min to make.
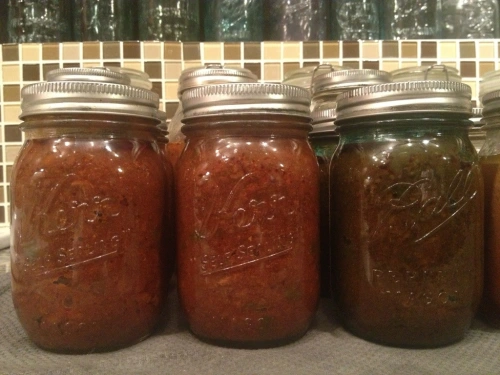
20131025-024459.jpg
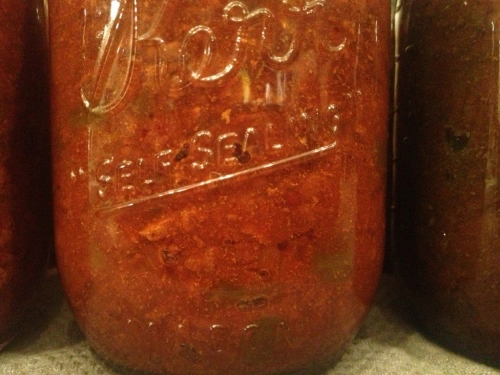
The flavor was very comparable to a can of Manwitch sauce. Maybe a touch sweeter. Next time I will add less sugar and try to spice it up just a little bit more, maybe with some hot sauce. But we’ll see what it tastes like out of the jar.
20131025-024603.jpg
If you have ideas for self-contained meals that can be opened from a jar, heated, and served please share or link them in the comments.

Happy canning!

Shank You Very Much

Braising. It’s one of my favorite ways of preparing meats. Braising uses moist heat and time and takes tougher, less expensive cuts that have huge flavor, and break them down into tender delicious dishes.

Im going to over two recipes today. Moroccan Lamb Shanks With White Bean Ragu which contains a variety of spices and seasonings and Beef Shanks In Red Wine that has less ingredients, but a full rich flavor.

The 1st recipe is not real picture intensive because I was too busy cooking. 🙂

Moroccan Lamb Shanks with White Bean Ragu, Chick Pea Mash, and Roasted Cauliflower

4 Lamb shanks
1 T Cumin
1 t Turmeric
2 t Coriander
1/2 t Cayenne Pepper
1/2 t Paprika
1 t Fennel Seed
2 t Kosher Salt
1/2 t Black Pepper
2 t Mint
1 T Chopped Ginger
1 Onion
4 T Olive Oil
1 qt Canned Tomatoes
1 qt Stock
2 C White Wine
1/4 Preserved Lemon
1 Pint White Beans
Handful Of Spinach

2 can garbanzo beans/chick peas
1/4 C chopped Cilantro
1 C stock (chicken or veg)

1 head cauliflower
2 T olive oil
1 t Salt
2 t Pepper

Oven at 425.

Heat half the oil on a skillet. Sear the lamb shanks on all sides until brown. In a dutch oven heat the other half of the oil and brown the onion. As the onion is cooking add the cumin, turmeric, coriander, cayenne pepper, paprika, and fennel seed. Add the white wine and deglaze the pan.

Once the shanks are seared add them to the dutch oven. Add salt and pepper. Stir in the canned tomatoes, stock, beans, ginger, and mint.

Take the preserved lemons and cut the flesh out. Filet the pith off of the zest. Rinse the zest well under cold water. Slice the zest crosswise into the thinest strips you can muster. Add the strips to the pot. Bring the contents to a boil.

Cover the dutch oven and place in the oven for approximately 2-3 hours. Add the handful of spinach 20 minutes before serving and stir it in the pot. The meat on the shank should be very tender and fall easily off the bone.

Core the cauliflower. Break off the florets from the base. Cut larger florets in to smaller pieces by cutting up the stems and separating by hand. Place the cauliflower in a pan or cookie sheet. Drizzle with oil and sprinkle with salt and pepper. Then toss to coat. Roast the cauliflower for 25-30 minutes.

Combine the chick peas and stock in a pot. Heat. Roughly mash the peas with a fork or potato masher. Heat through. Add the cilantro and stir to combine.

Serve the cauliflower and chick pea mash next to the shank. Top the shank with the bean and spinach ragu.

These shanks are so flavorful as you taste the lamb with bursts of coriander and lemon, heat from the cumin and paprika, and the depth of the turmeric and ginger. It seems like a lot. But the white beans and chick peas help mellow it out.

20130530-013346.jpg

Hope you enjoy.

For a dish with less spice, but just as much depth, try my 2nd dish.

Beef Shanks In Red Wine On Polenta

4 Beef shanks
1 Onion
2 Stalks celery
1 Large carrot
1 Bottle of red wine (merlot or cabernet)
4 Garlic cloves
1 Bunch fresh thyme
4 T Olive oil
2 t Salt
1 qt Beef stock

1 C Corn meal
4 C+ Vegetable Stock
3 T butter

Oven at 400.

20130530-013539.jpg
Heat the oil in a dutch oven. One at a time, sear the shanks on all sides. Remove the shanks as they are seared and store on a plate.

20130530-014149.jpg
Chop the onion and cut the carrot and celery into 1/2″ pieces. Add them to the pot and cook until the onions start to turn translucent.

20130530-014038.jpg
Add the red wine, beef stock, and thyme.

20130530-014423.jpg
Bring the contents to a boil and cook to reduce some of the liquid. This concentrates the flavor.

20130530-014637.jpg
Cover and place the pot in the oven for 3-3 1/2 hours. The meat with retract from the bone and the connective tissue and meat will be very tender.

20130530-014954.jpg
Heat the vegetable stock to a boil. Slowly pour in the corn meal while stirring vigorously. Reduce to a simmer. This is where polenta gets tricky. You want it to be thick, but not lumpy. If it get’s too thin, cook it longer. If it gets lumpy, slowly add mor stock. Continue to cook for 30 minutes, stirring frequently.

These were so tender that as I tried to remove them from the pan the bones slipped from the meat. I pocked the marrow back into the bone and tossed the bones aside.

Spoon the polenta on a plate. Place a shank on top and the add the cooked vegetables.

20130530-015944.jpg

Pork Loin Stuffed With Apples And Blackberries

This is one of those recipes that was born because I was hungry and I didn’t want to run to the grocery store before dinner. You know those days, where you take turns opening the refrigerator, the pantry, and the cupboards, in turn hoping that you’ll find something that you didn’t see the previous five times.

I had a beautiful pork loin in the refrigerator. But the question was what to do with it. Rotisserie, slice it in to chops, cool it down into pulled pork, or roast it. I ended up grabbing a handful of other ingredients and coming up with this.

Pork Loin Stuffed With Apples and Blackberries
20121115-165849.jpg1 pork loin
2 apples
1 onion
1/4 cup blackberries (or raisins)
1/4 cup whiskey
1/2 cup breadcrumbs
3 tablespoons blue cheese (optional)
1/2 teaspoon dried thyme or 2 sprigs fresh
Butter
Salt and pepper to taste

400 degree oven

Dice the apples and onion. I used 1 Granny Smith and 1 Honeycrisp. Salt and cook the onion in butter over medium low heat to give them a head start on caramelizing. Then add the apples and continue to cook until translucent and soft.

20121115-170640.jpgAdd the blackberries (or raisins, which was my original thought but I was out), the thyme, and the whiskey and cook to reduce.

20121115-170824.jpgSprinkle the breadcrumbs over the top just to absorb the excess moisture. I’m estimating that I used 1/2 cup. Then sprinkle the blue cheese. Next time I’ll skip the blue cheese. It wasn’t bad…but it didn’t really add anything either. No need to over complicate things, right?

20121115-171046.jpgFold the stuffing to combine and heat through.

Grab the pork loin and the longest thinnest knife you own. Insert the knife in one end and carefully drive it through to the other end with out penetrating the other side. Then CAREFULLY sweep the sharp side of the blade toward that side of the loin as you draw it out. Reinsert with the blade facing the other direction and repeat. The goal is to cut a nice hollow pocket in the center of your pork loin without having the blade penetrate through any of the sites. This pocket will hold all of your stuffing without allowing it to seep out while it cooks. I wanted to take pictures of this process for you guys but it is so difficult to handle meat and use the camera at the same time without constant handwashing and/or cross-contamination. But I hope you get the idea.

Stand the roast on the end that does not have the hole in it. This next step works best with an assistant. I held the hole in the roast open while my wife used to spoon to put the stuffing inside. I would then pack it in with my fingers. It was hot but not unbearable. Be sure to work the stuffing all the way down so that it’s distributed evenly throughout. Then use butchers twine to seal up the only end with a hole in it.

20121115-171611.jpg Put the roast in a pan and into your oven.

20121115-171830.jpg It took about 40 to 45 minutes to reach an internal temperature of 145. Remove it from the oven, tent with foil and let it rest for 10 minutes.

20121115-173153.jpgIf you use a very sharp knife and support both ends of the pork loin while you slice it the stuffing should stay in until you serve it.

20121115-173259.jpg Carefully remove one slice at a time and place it on a plate to serve. I chose previously home canned German style sweet and sour pickled red cabbage and home canned ranch style barbecue beans to serve on the side. (see picture above)

20121115-173639.jpg

Thyme Rubbed Pork Chops

I’ve decided to start using WordPress as my primary search engine for food and recipe ideas. Last week I was in charge if dinner and in the mood for a simple pork recipe. I found what I was looking for over at Because I Am Uniquely And Wonderfully Made. I tweaked the recipe just slightly, but its so simple. I love it.

Thyme Rubbed Pork Chops
Pork Chops
Olive Oil
Dried Thyme
Garlic Powder
Salt Pepper
Paprika
Balsamic Vinegar

I’m leaving measurements out here because I eyeballed it.

I started at the butcher counter at my grocery store. Their chops looked like carpaccio, they were so thin. I had the butcher cut me six 1″-1 1/4″ chops.

20120929-224707.jpg
I arranged the chops in a baking dish. Then drizzled with a liberal about of olive oil. I gave them all little pork chop massages to cover both sides with oil. Then I mixed together what was probably about 2T thyme, 1T garlic, 1t paprika, 2t salt, and 1t pepper. I mixed the spices together and then shook the mixture over the chops, turning them to cover both sides.

20120929-225009.jpg
The chops got baked at 350 for just over a half hour. I kept an eye on their color and then took the internal temp.

20120929-225129.jpg
Right when you serve them drizzle them with a teaspoon of balsamic vinegar.

They came out perfect. Tender, moist, and flavorful.

I ended up serving them with home made black eyed peas (with pork fat), a jar of pickled red cabbage and a jar of pear sauce (both of which I canned myself earlier in the year), and some cornbread (from mix. Forgive me).

20120929-225456.jpg
This is definitely a recipe I’ll make again.

Roast Chicken with Root Vegetables

As the wife left for the gym she told me to make dinner, using the whole chicken that was in the fridge. As I pulled the chicken from the refrigerator I opened up the vegetable drawer to figure out what else we might have with it. I found a parsnip, three beets, a bag of carrots, some fennel and a bag of potatoes. Seemed like it was going to be chicken and root vegetables for dinner. I decided to throw together a recipe based loosely on portions of the recipe that I use for my Thanksgiving turkey, recipes that I had previously used for roast chicken, as well as some recipes that my wife uses for side dishes. It was very successful so I thought I would share it.

Roast Chicken With Root Vegetables
1 Whole Chicken
1 Parsnip
3 Beets
5 Carrots
1 Head Fennel
5-10 small potatoes
Rosemary
Garlic
Thyme
Olive Oil
Salt And Pepper

I go from the chicken to seasonings to vegetables and back throughout this recipe. I also washed my hands about 12 times. Remember not to cross contaminate.

Oven to 475.

Rinse the chicken, remove the neck and gibblets, and pat dry with a paper towel.

Salt and pepper the cavity. Crush 4 cloves of garlic with the edge of your knife. Throw the garlic in the cavity along with 2-3 sprigs of thyme and rosemary. I found myself short of fresh thyme, so I used dried but in the future I’d use fresh.

Drizzle olive oil on the bird and rub to coat. Like a little chicken back rub. Season the exterior liberally with kosher salt and black pepper. And I do mean liberally. My bird looked as sparkly as a Liberace costume when I was done.

20120828-211804.jpg

Now we’re going to get all trussed up with no where to go. Have you ever trussed a chicken? It’s not difficult if you can tie shoes.

Put the chicken breast side up, legs pointed toward you. Grab a length of butcher’s twine. I usually go for about 2-3 feet so I don’t end up short. Hold the ends up to find the halfway point. Put the center of the twine under what I would call the shoulders of the bird and run it up on top of the wings.

20120828-212448.jpg
Bring the twine over the legs against the rib cage. Under the end of the rib cage cross the twine and cinch it up. (taking this picture was not easy)

20120828-212642.jpg
Move the legs in tight, cross the twine again, and wrap it around the legs just behind the knuckles. I pull the twine tight, cross it, and wrap the legs again. Tie a bow, tuck the wing tips under the body, and you’re done.

20120828-213041.jpg

Set the chicken aside and get ready to prep vegetables. I do it in this order because it gives the chicken more time to get to room temperature, which provides for more even cooking.

20120828-213310.jpg
I peeled the parsnip and beets, but everything else was just washed. Chopping vegetables is easy. My end goal was just to have approximately 1″ pieces. Put all the vegetables in a baking dish. Drizzle with oil, salt, and pepper and then toss by hand.
The beet stains on the parsnips reminded me a bit of bananas in strawberry syrup.

20120828-213756.jpg
Place the chicken right on top of the vegetables.

20120828-214257.jpg

20120828-214729.jpg
Throw it in the oven and set a timer for 25 minutes. This makes the skin fabulously crispy. Then drop the heat to 400 and set the time for another 45 minutes. The deepest part of the thigh should be 160 degrees.

20120828-214918.jpg

20120828-214926.jpg

Cut and remove the twine before serving.

Just a note. The beets either steamed or leeched into the bird, causing the fluid in the cavity to look exactly like blood. It freaked me out. The chicken appeared done, the temp was right, and the fluids coming from the joints were clear. It took me a minute to figure out what had happened.

The end result was chicken skin so deliciously salty and crispy that I would have eaten it like a bag of chips given the opportunity, meat that was moist and flavorful, and a variety of vegetables that were cooked perfectly and paired great with the chicken. I served it with Odessa’s Cranberry Sauce that you can find in its own post from last year. And the whole meal was fantastic.

20120828-215556.jpg


Enter your email address to follow this blog and receive notifications of new posts by email.

Join 368 other subscribers